Azure Background Jobs in GUI application with Helper Functions
- Details
- Written by Max Trinidad
- Last Updated: 08 October 2019
- Created: 07 August 2018
- Hits: 9623

PowerShell Studio provides application templates and helper functions to help you speed up your development process.
Another article on creating an Azure application shows the evolution of an Azure solution from a console script to a Windows application. And in this article, I used an empty form with two controls (Button & RichTextBox), and then started building from an existing console script. Then I added code with logic to handle the background job process.
Now I'm going to take it a little further with the help of PowerShell Studio's ready-to-use templates.
Using "Grid Job” Template
I am going to use the GUI Form "Grid Job” template (File > New > New Form > Forms > Grid Job).
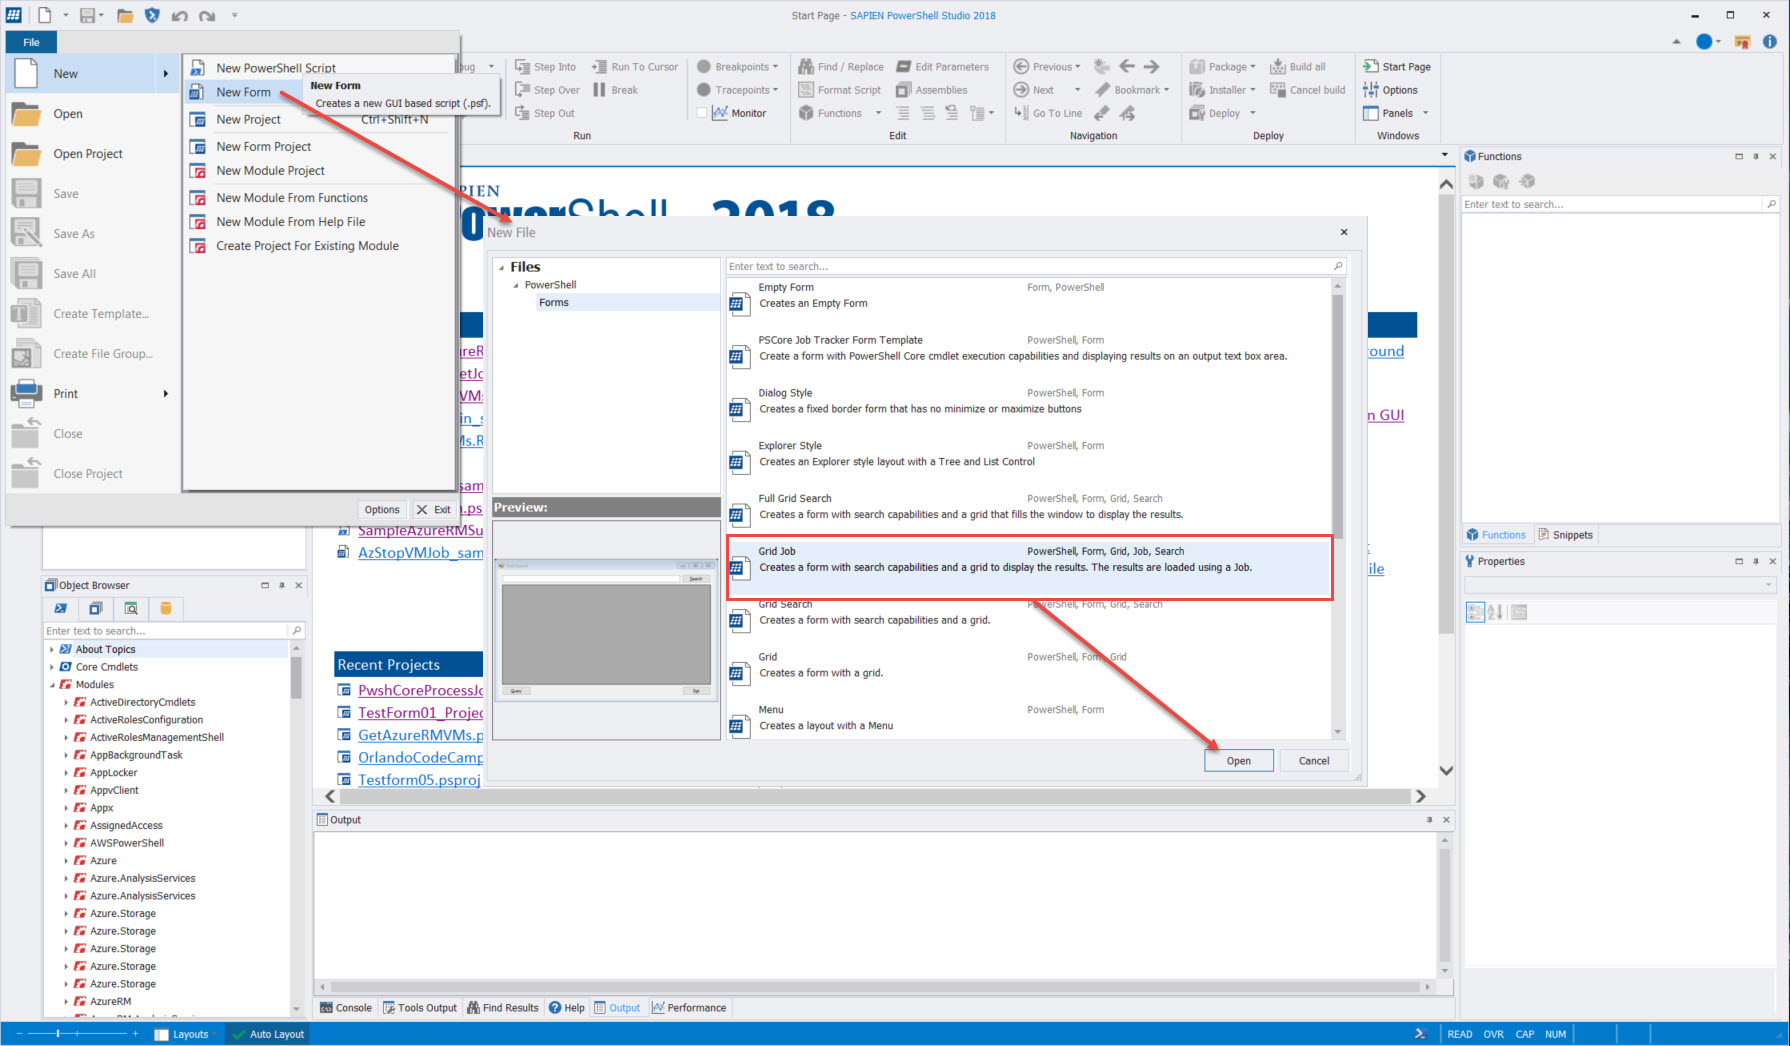
This is a PowerShell Studio single form file which includes some of SAPIEN's Helper Functions to assist with your GUI application development.
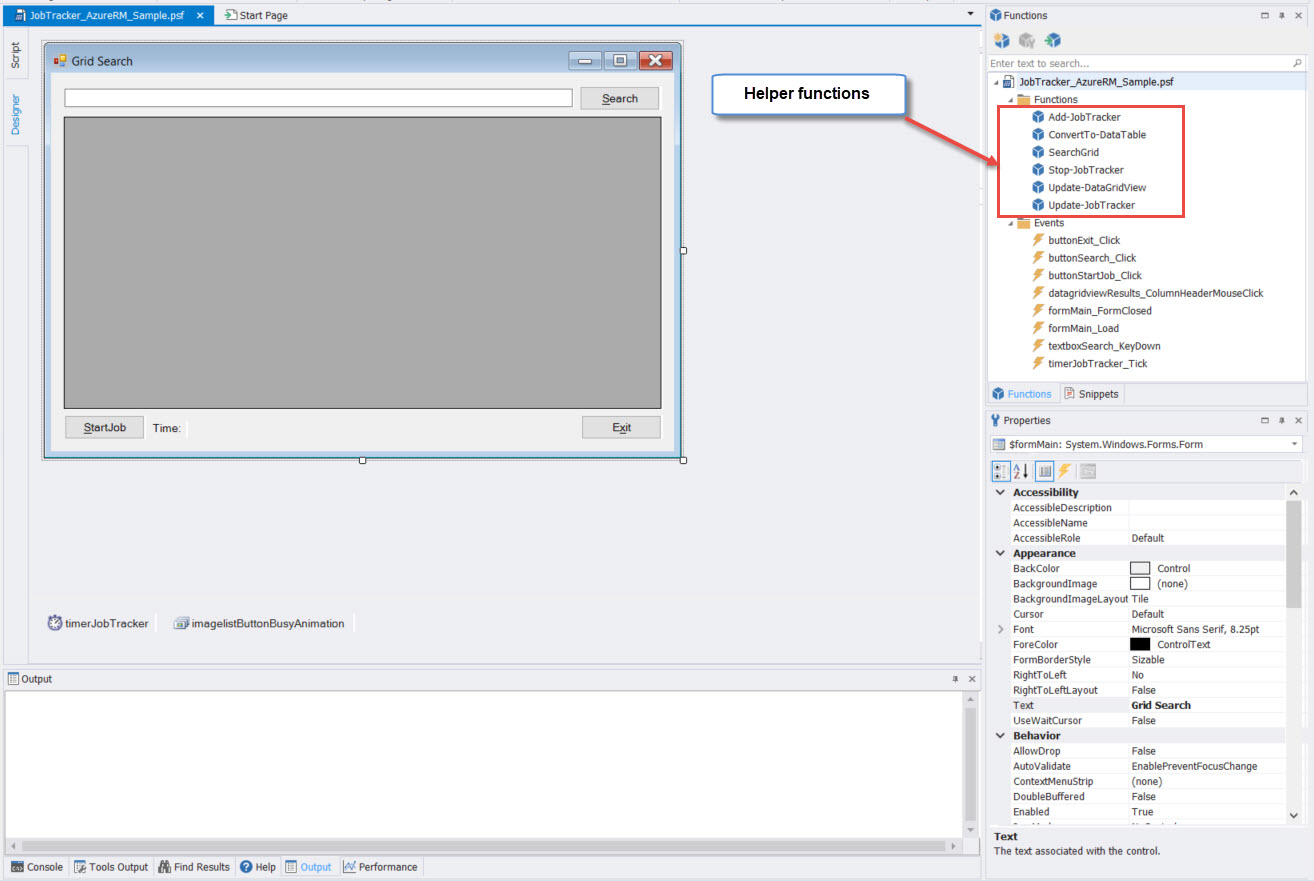
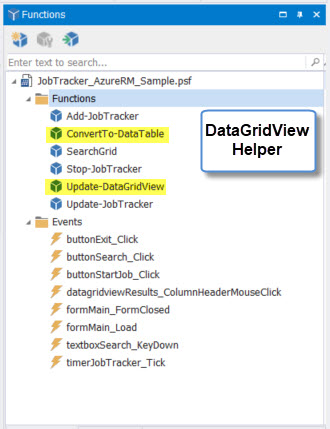
Below is a list of the Helper Functions available when using the "Grid Job” template:
- Add-JobTracker
- Update-JobTracker
- Stop-JobTracker
- ConvertTo-DataTable
- Update-DataGridView
- SearchGrid
In this article I will cover the JobTracker Add-JobTracker helper function and the DataGridView ConvertTo-DataTable and Update-DataGridView helper functions.
First I will change the Button control text property from "Query” to "StartJob". Then I will add a Label control and change the label text property to "Time:". Finally, I will save the file as "JobTracker_AzureRM_Sample.psf".
Understanding JobTracker Function
Before I start to implement my code, let's take a look at the main function used for background job processing: Add-JobTracker.
Basic usage syntax:
Add-JobTracker [-Name] <String> [-JobScript] <ScriptBlock> [[-ArgumentList] <Object>] [[-CompletedScript] <ScriptBlock>] [[-UpdateScript] <ScriptBlock>] [<CommonParameters>]
The following parameters can be used:
- Name – This is the name of the background job.
- JobScript – This is the code to executed in the background job.
- CompletedScript – This is the code to execute at the completion of the background job.
- UpdateScript – This code executes while the background job is running.
- ArgumentList – (Optional) Only used if there is a need to pass a value to the ScriptBlock.
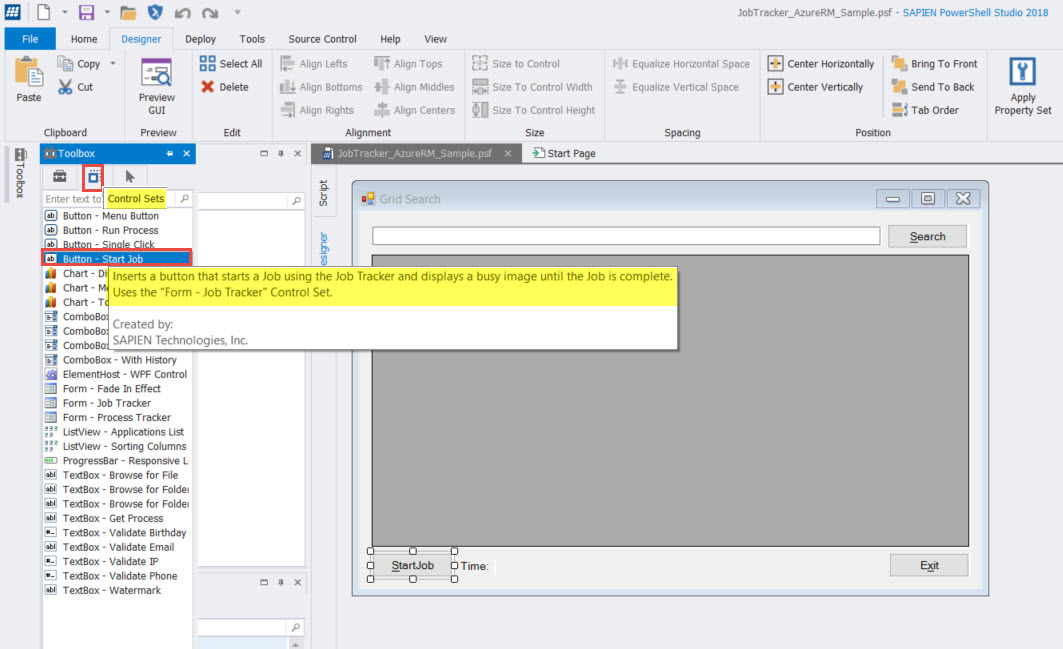
The JobTracker functions can be found in a custom Control Set labeled "Button – Start Job” which is part of the "Grid Job” template.
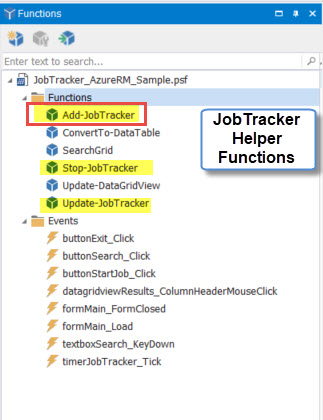
The JobTracker helper functions are highlighted below:
The "Grid Job” template also has a DataGridView component, with helper functions that convert and display the receive-job result in a simple format.
Understanding DataGridView Functions
Here's where I can use the following helper functions:
ConvertTo-DataTable – This function converts the result object into a data table object.
Update-DataGridView – This function reads the data type object to be displayed in the DataGridView component.
Basic usage syntax:
ConvertTo-DataTable [[-InputObject] <Object>] [[-Table] <DataTable>] [-RetainColumns] [-FilterWMIProperties] [<CommonParameters>]

Update-DataGridView [-DataGridView] <DataGridView> [-Item] <Object> [[-DataMember] <String>] `
[[-AutoSizeColumns] {None | ColumnHeader | AllCellsExceptHeader | AllCells | DisplayedCellsExceptHeader | DisplayedCells | Fill} ] [<CommonParameters>]
Array objects created in PowerShell can be displayed in a DataGridView component. The benefit of using a DataTable is that it allows you to use sorting. This can be accomplished with the following two lines of code:
## - Sample Code to display converted data table object results into a Databgridview component:
$dgvResults = ConvertTo-DataTable -InputObject $results -FilterWMIProperties;
Update-DataGridView -DataGridView $datagridviewResults -Item $dgvResults -AutoSizeColumns DisplayedCells;
Note that "$datagridviewResults” is the name on the DataGridView component in the form:

The DataGridView helper functions are highlighted below:
Some Additional Changes
I also made the following additional changes:
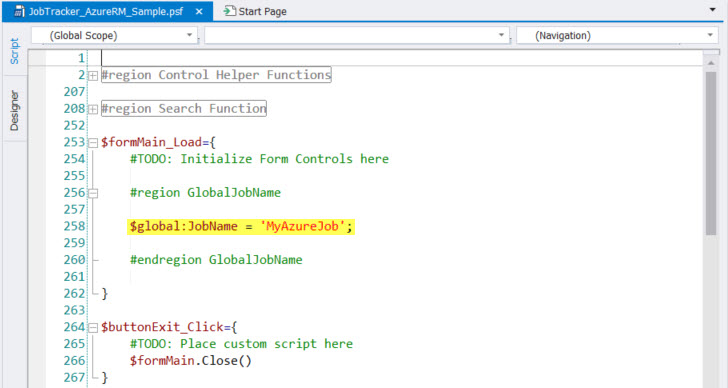
In the $formMain_Load form event, I added a global variable for the job name: $global:JobName. For now, this is a hard-coded constant string.
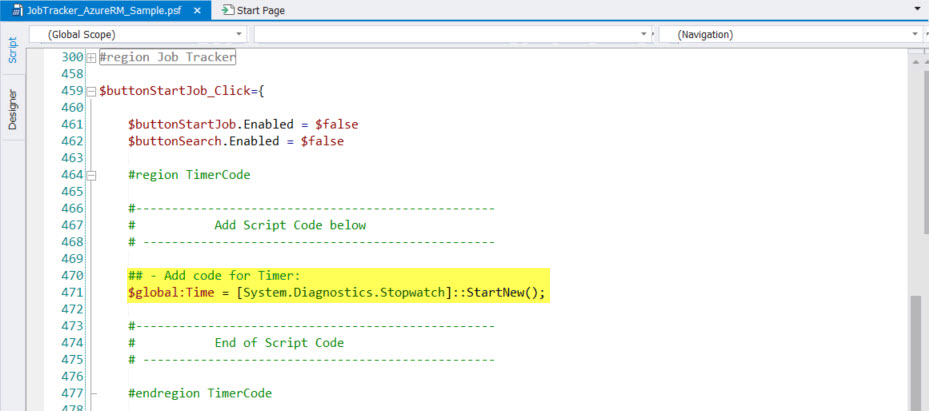
In the $buttonStartJob_Click button event, I added the Timer code which updates the label "Timer:” text property with the recurring execution time.
In the Add-JobTracker function I added the "-ArgumentList” parameter to pass the hard-coded system name value. In the "-JobScript” parameter, values can be passed through the Param($Argument1).
Note that you can rename this variable to suit your needs—with a descriptive name that describes the purpose of the argument.
Remember, any hard-coded variable is a prospect for automation. It is up to the developer to improve the application.
Working with Add-JobTracker function
Next I start adding the code in the Add-JobTracker function. All of this is happening in the $buttonStartJob_Click button event.
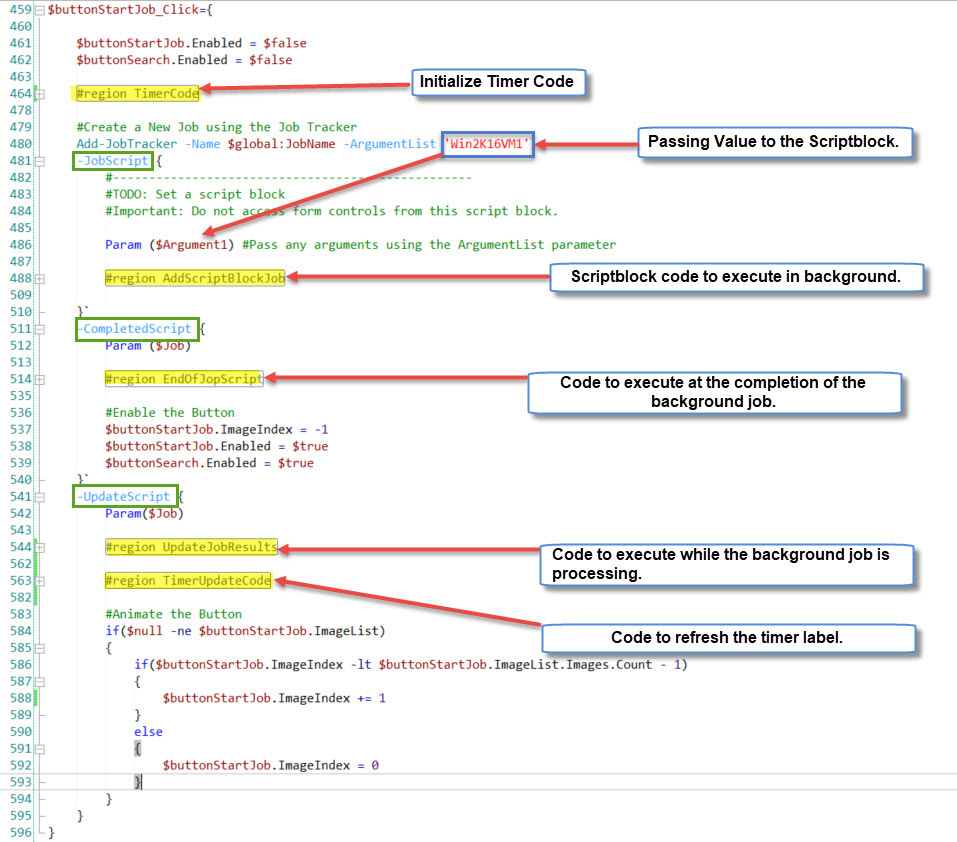
The following image shows the areas where the code can be added and follows the process after the ScriptBlock has been submitted to the background for processing:
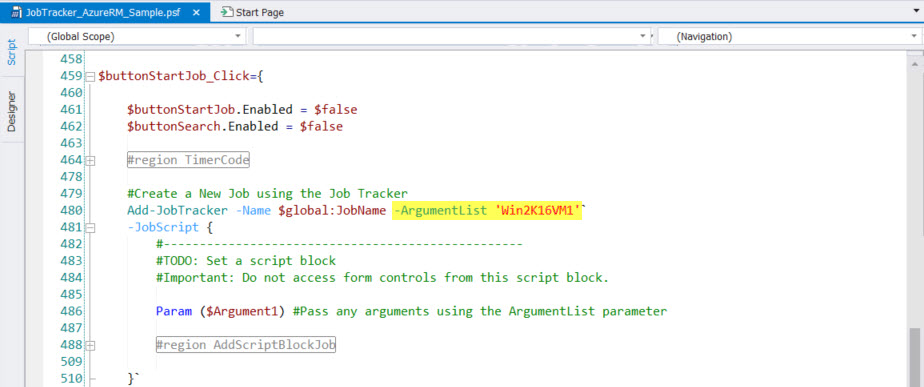
In this Azure GUI form sample I am using the following Add-JobTracker function parameters in the $buttonStartJob_Click button event:
1. '-Name' and the '-ArgumentList':
Add-JobTracker -Name $global:JobName -ArgumentList 'Win2K16VM1' `...
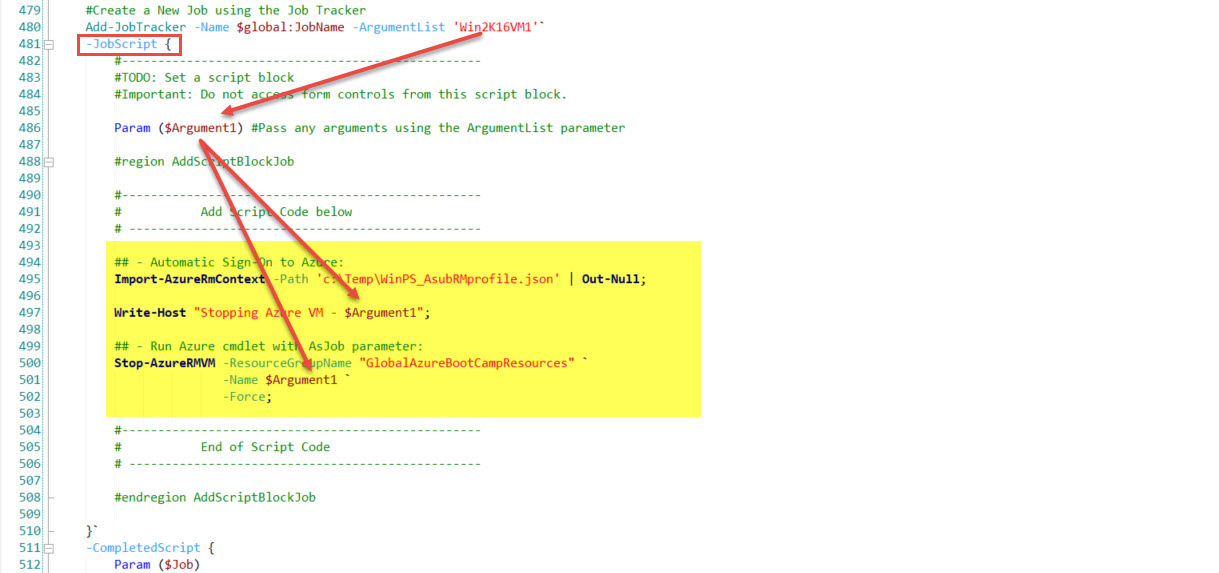
2. '-JobScript':
#region AddScriptBlockJob

#--------------------------------------------------
# Add Script Code below
# -------------------------------------------------

## - Automatic Sign-On to Azure:
Import-AzureRmContext -Path 'c:\Temp\WinPS_AsubRMprofile.json' | Out-Null;

Write-Host "Stopping Azure VM - $Argument1";

## - Run Azure cmdlet with AsJob parameter:
Stop-AzureRMVM -ResourceGroupName "GlobalAzureBootCampResources" `
-Name $Argument1 `
-Force;

#--------------------------------------------------
# End of Script Code
# -------------------------------------------------

#endregion AddScriptBlockJob
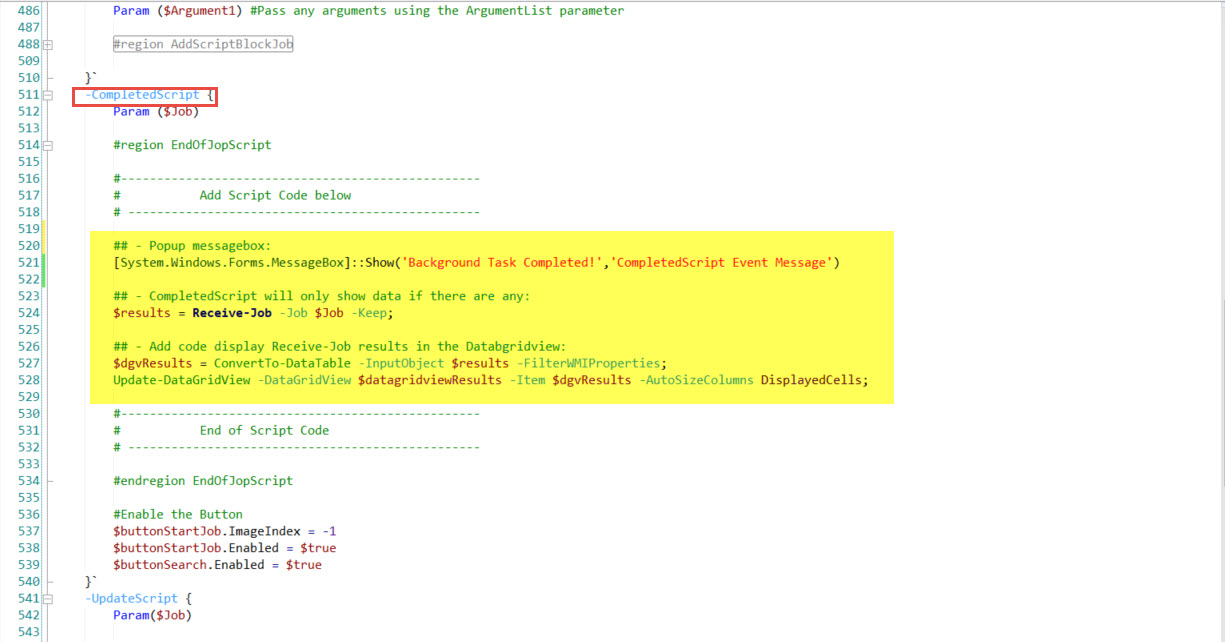
3. '-CompletedScript':
#region EndOfJopScript

#--------------------------------------------------
# Add Script Code below
# -------------------------------------------------

## - Popup messagebox:
[System.Windows.Forms.MessageBox]::Show('Background Task Completed!','CompletedScript Event Message')
## - CompletedScript will only show data if there are any:
$results = Receive-Job -Job $Job -Keep;

## - Add code display Receive-Job results in the Databgridview:
$dgvResults = ConvertTo-DataTable -InputObject $results -FilterWMIProperties;
Update-DataGridView -DataGridView $datagridviewResults -Item $dgvResults -AutoSizeColumns DisplayedCells;

#--------------------------------------------------
# End of Script Code
# -------------------------------------------------

#endregion EndOfJopScript
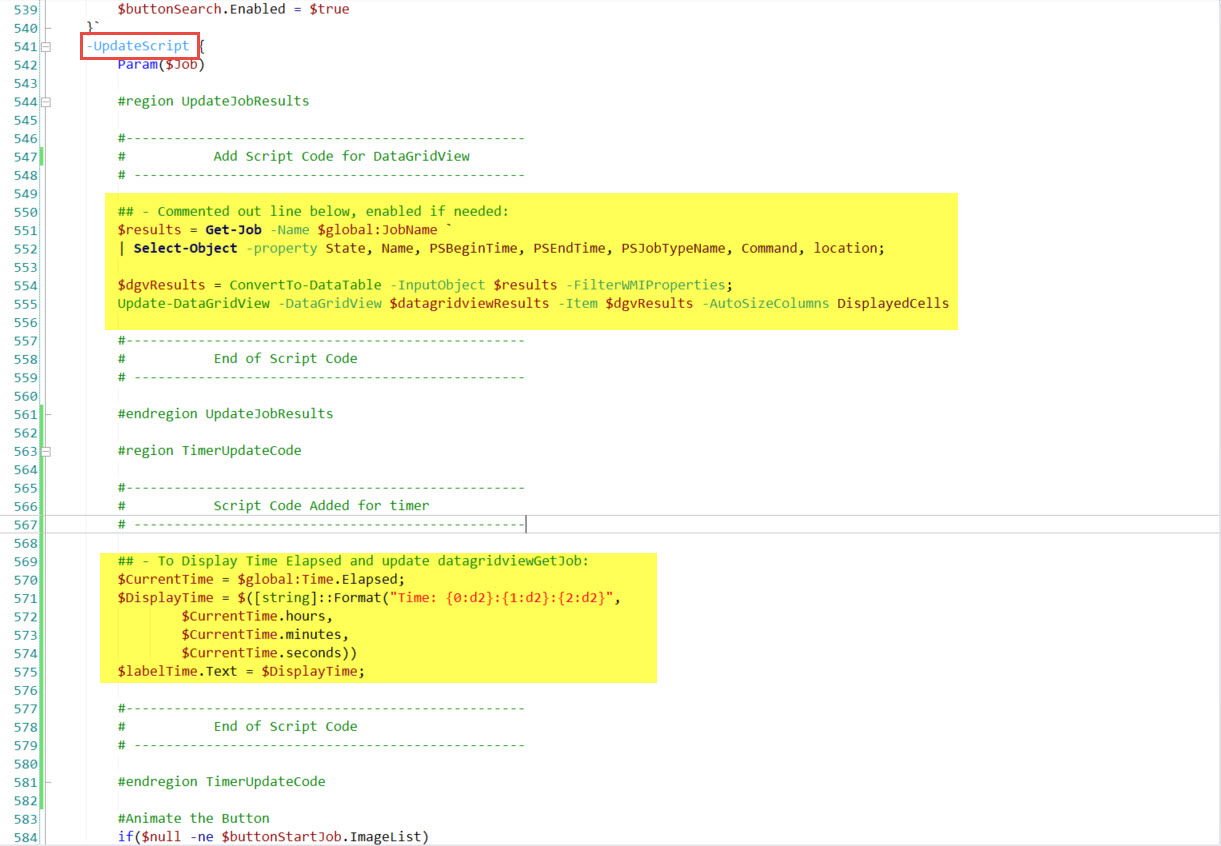
4. '-UpdateScript' – There are two added code blocks: "UpdateJobResults” and the "TimerUpdateCode".
#region UpdateJobResults

#--------------------------------------------------
# Add Script Code below
# -------------------------------------------------

## - Commented out line below, enabled if needed:
$results = Get-Job -Name $global:JobName `
| Select-Object -property State, Name, PSBeginTime, PSEndTime, PSJobTypeName, Command, location;

$dgvResults = ConvertTo-DataTable -InputObject $results -FilterWMIProperties;
Update-DataGridView -DataGridView $datagridviewResults -Item $dgvResults -AutoSizeColumns DisplayedCells

#--------------------------------------------------
# End of Script Code
# -------------------------------------------------

#endregion UpdateJobResults
#region TimerUpdateCode
#--------------------------------------------------
# Script Code Added for timer
# -------------------------------------------------
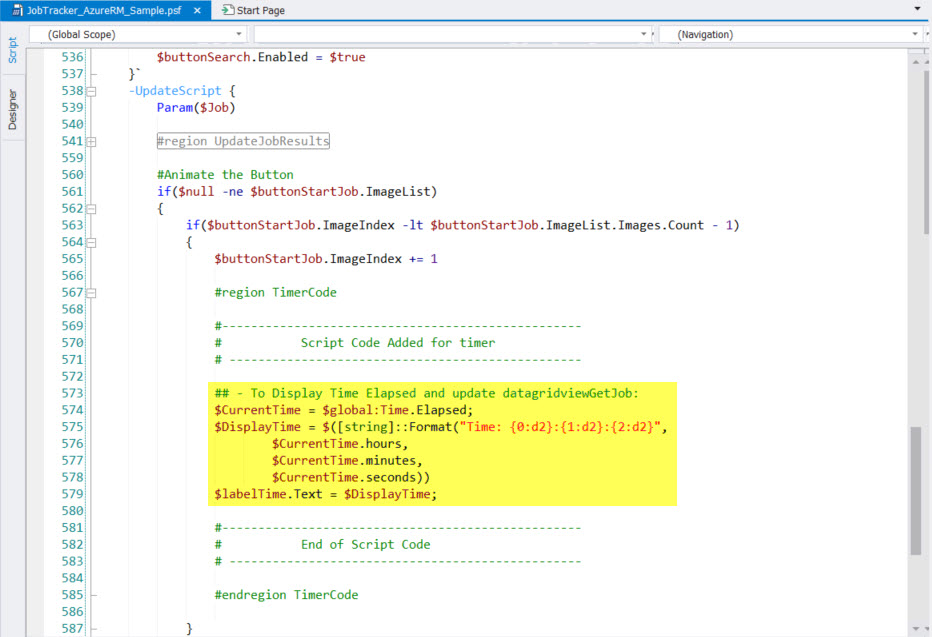
## - To Display Time Elapsed and update datagridviewGetJob:
$CurrentTime = $global:Time.Elapsed;
$DisplayTime = $([string]::Format("Time: {0:d2}:{1:d2}:{2:d2}",
$CurrentTime.hours,
$CurrentTime.minutes,
$CurrentTime.seconds))
$labelTime.Text = $DisplayTime;
#--------------------------------------------------
# End of Script Code
# -------------------------------------------------
#endregion TimerUpdateCode
You can use both the '-UpdateScript' and '-CompletedScript' parameter section to update the information on the DataGridView component.
In this Azure GUI form application I am using the Get-Job cmdlet results to display the progress of the background job in the DataGridView component during the "-UpdateScript” process. When the job completes, the "-CompletedScript” section gets the result from the Receive-Job cmdlet that is sent to the DataGridView component.

Summary
This "Grid job” sample shows how to integrate Azure scripts into a GUI application to take advantage of background processing.
Remember to submit Azure scripts as background jobs to prevent the GUI form from freezing.
This article covered two main topics:
1. Use the JobTracker Add-JobTracker helper function to submit the Azure code as a background job.
2. Use the DataGridView helper functions (ConvertTo-DataTable and Update-DataGridView) to display the results during and after the background process.
I also covered the parameters used in the Add-JobTracker function which is enough to get you started.
PowerShell Studio template can cut down time in development. Specially when taking time to understand these helper functions.
You can download the updated sample Windows GUI here: JobTracker_AzureRM_Sample.zip
Checkout this short two minute video showing the GUI form in action: Sample_AzureGUI_HelperFunctions
Related Articles
- PowerShell GUI Apps: Why think in events?
- PowerShell Studio: Creating Responsive Forms
- PowerShell Studio: How to prevent Powershell cmdlets from hanging in GUI apps
- New Video – PowerShell Studio: Working with Azure cmdlets in Background Jobs
- New Video – PowerShell Studio: Working with Azure cmdlets in Background Jobs in a GUI app
For licensed customers, use the forum associated with your product in our Product Support Forums for Registered Customers.
For users of trial versions, please post in our Former and Future Customers - Questions forum.