How To Work with PowerShell Core in PrimalScript
- Details
- Written by Max Trinidad
- Last Updated: 23 August 2019
- Created: 17 January 2019
- Hits: 10990
Now that PowerShell Core 6.0.0 has reached the GA (Generally Available) status, you can start developing scripts using PrimalScript.
Yes, in this product look under File | Options, in the Environment section you’ll find the Window Command area. Here, PowerShell Core shell can be added manually. Also, if you’re using Windows 10 Build 16299 (or higher) with WSL (Windows Subsystem for Linux), your system can also be setup to run both Bash and Bash with PowerShell Core.
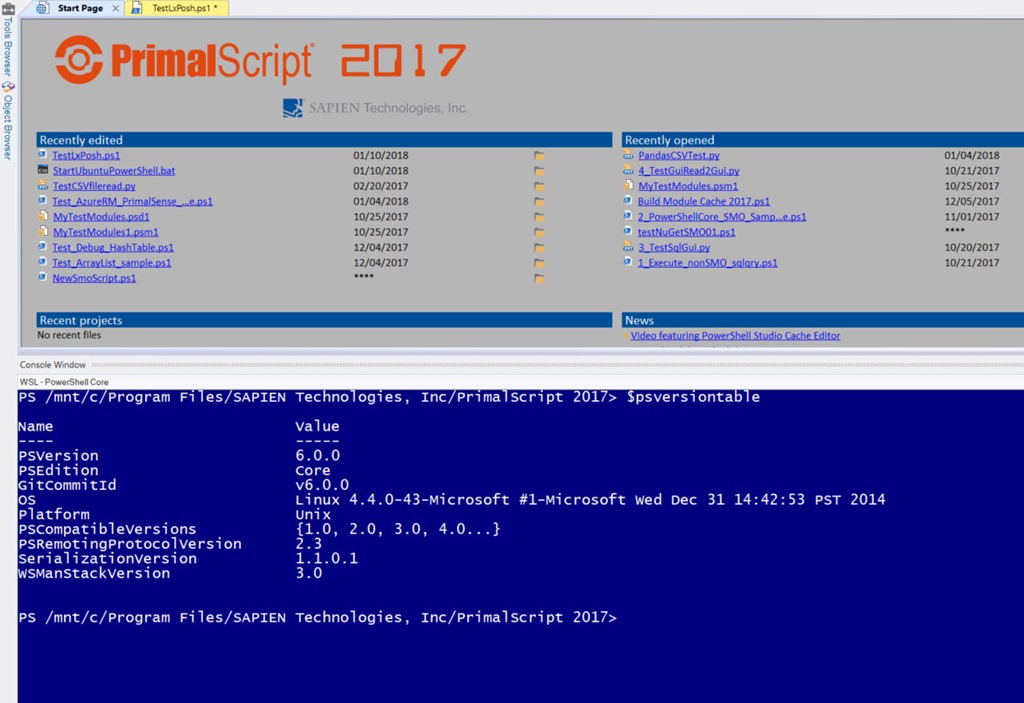
Let’s think about this for a minute. Although our SAPIEN Products are meant to be used in Windows Systems, having WSL installed will give you the ability to build and test PowerShell Core scripts cross-platform without leaving Windows.
Take a moment to look at the existing article, Using PowerShell Core in PrimalScript.
For more information about WSL (Windows Subsystem for Linux) read Microsoft's article, Windows Command Line Tools For Developers.
Setting up PowerShell Core in PrimalScript
Note: The instructions below are demonstrated in our short video PrimalScript – Command Window Option
The following steps will properly setup PowerShell Core in PrimalScript:
1. Under the File menu, go to Options.
2. In the Environment section, click on Command Window.
3. Add a new shell by clicking on the New button. This will add a new line to be changed.
*Note: Keep in mind, this could be any type of console shell, such as: Python, Ruby, Bash.
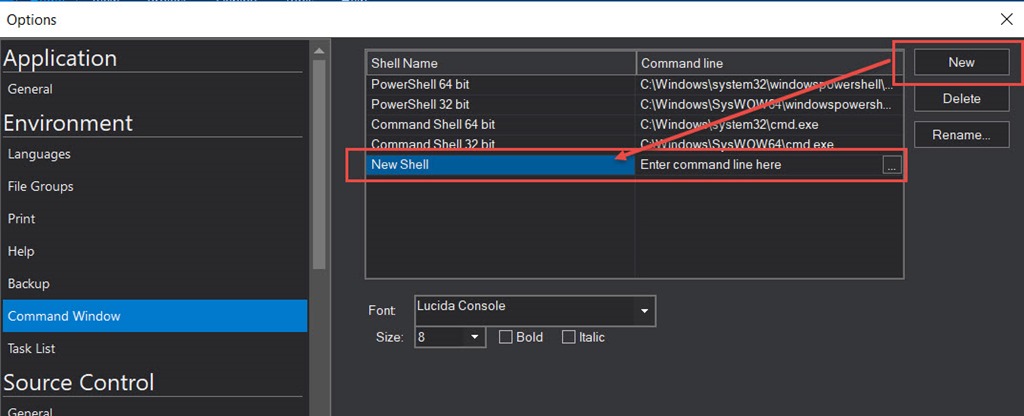
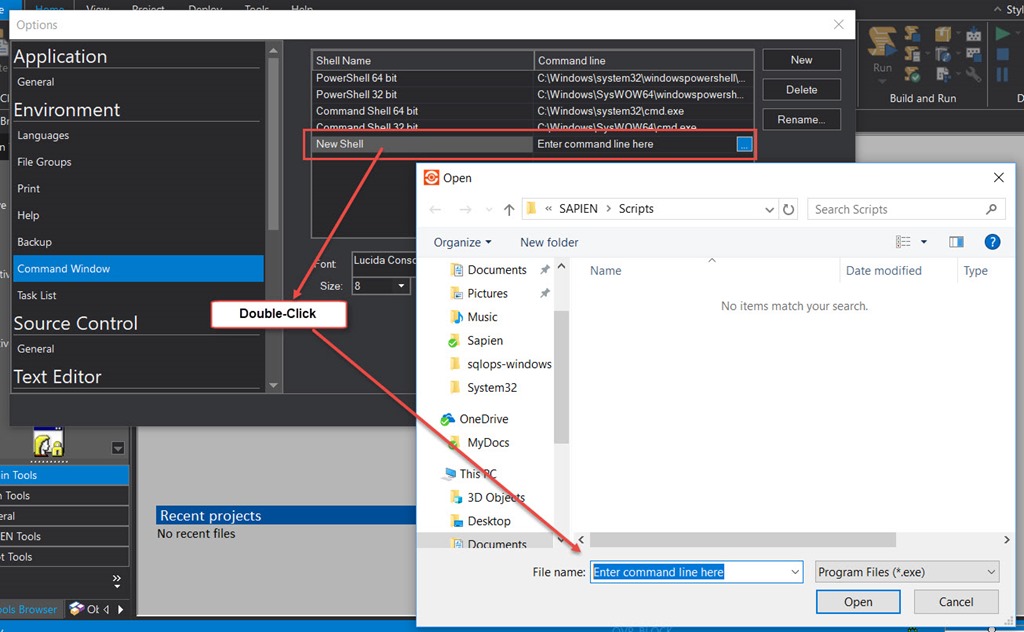
Now, we add PowerShell Core to the Command Window list. In the New Shell line, do the following:
A. Double-Click on the New Shell line, and it will allow you to search for the shell executable,
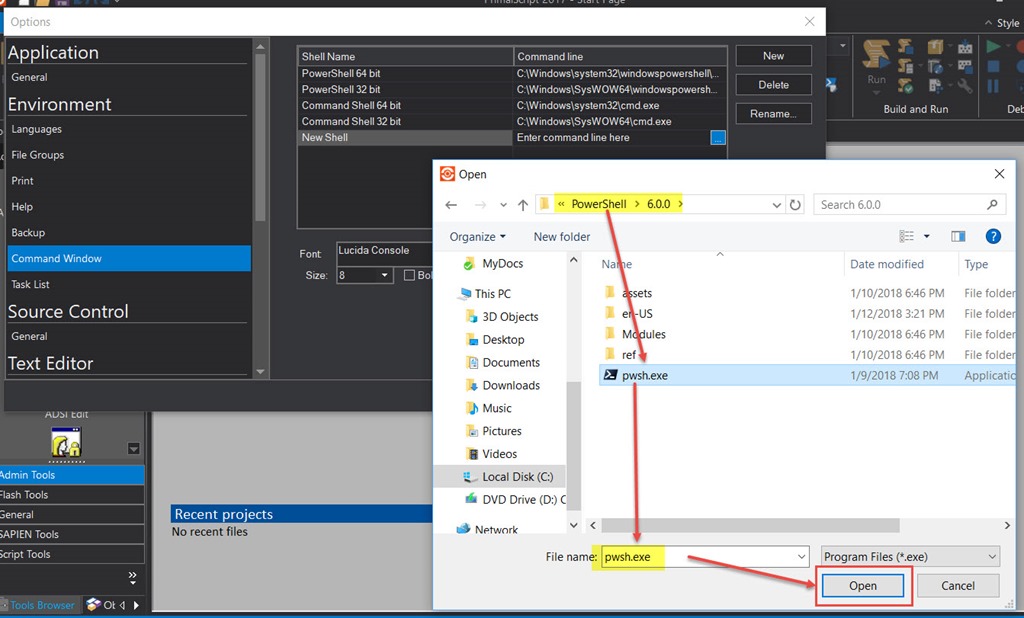
Or, simply type the following line:
C:\Program Files\PowerShell\6.0.0\pwsh.exe -noexit -Command Remove-Module PSReadline -ErrorAction Ignore
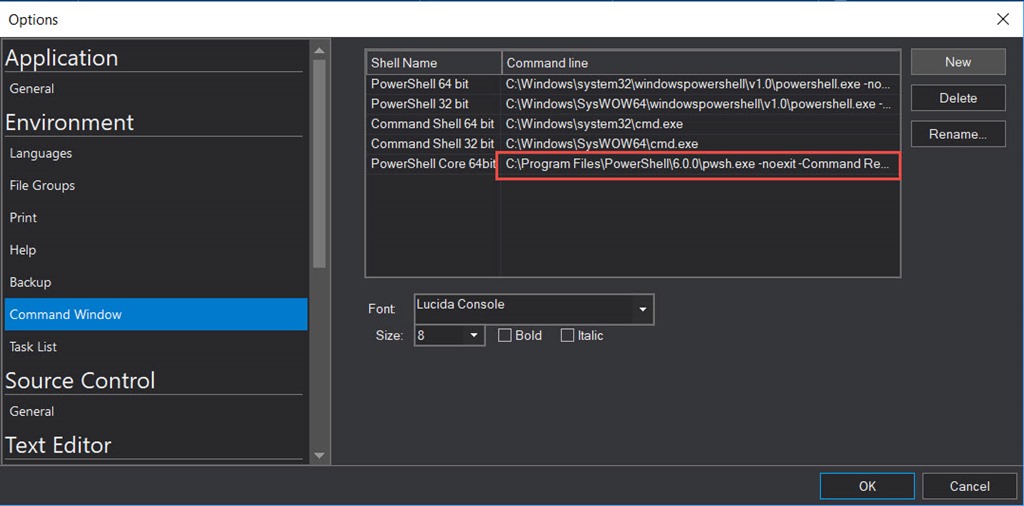
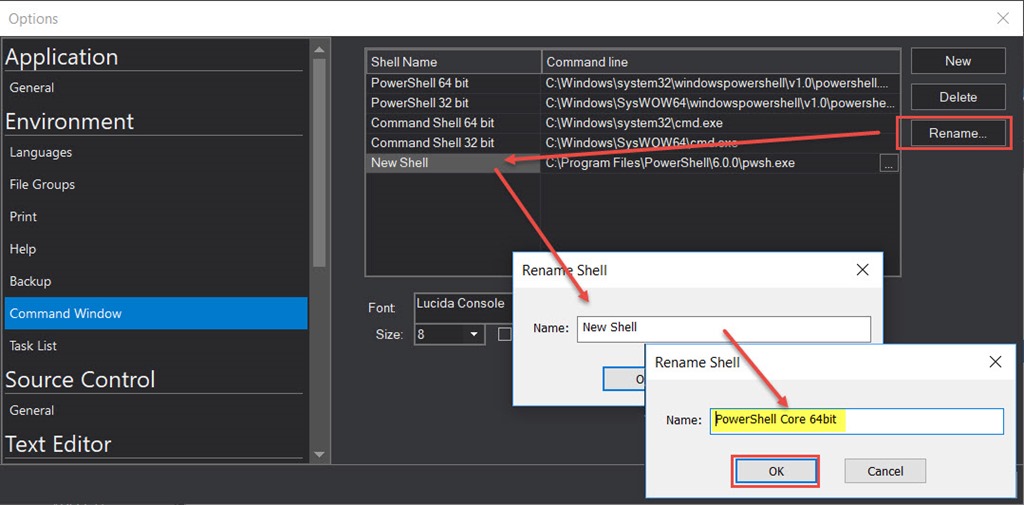
B. Now, click the Rename button to change the Shell Name field from New Shell to PowerShell Core 64bit:
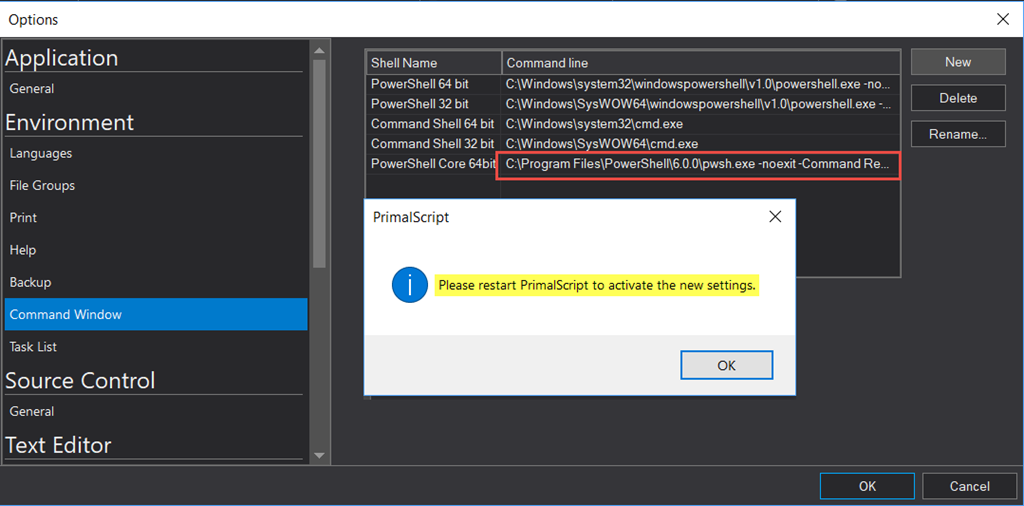
C. To complete the change, click the OK button and restart PrimalScript.
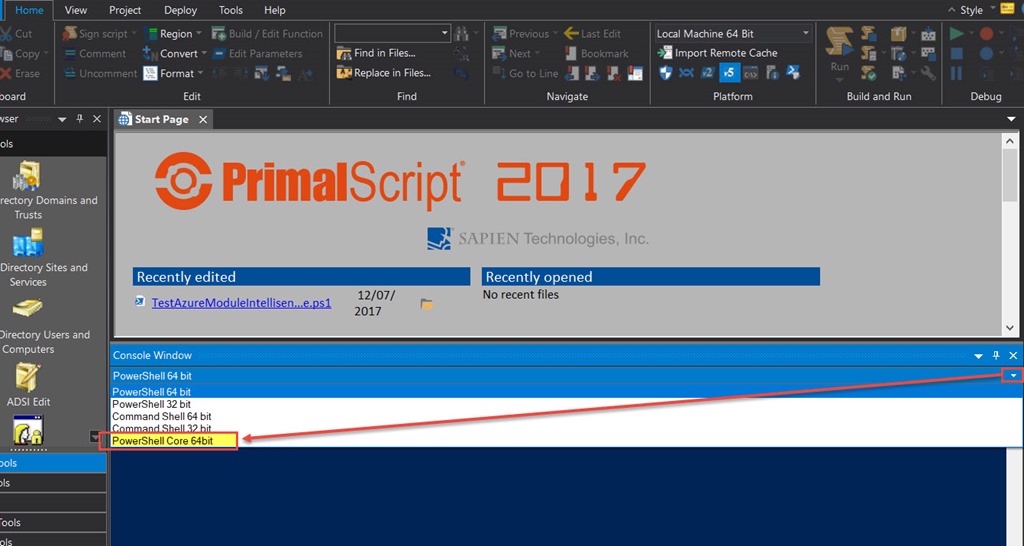
To verify the shell has been added to the Console Window list, go to View and click on the Shell option, then click the arrow-down to view the list.

Make PowerShell Core the Active Console Window
To activate the added shell, look for the Console Window panel and click on the pull-down list of available shells.
Proceed to select PowerShell Core 64bit shell and it will become active in PrimalScript. Then, type $PSVersionTable to check that the PowerShell version is PowerShell Core 6.0.0.
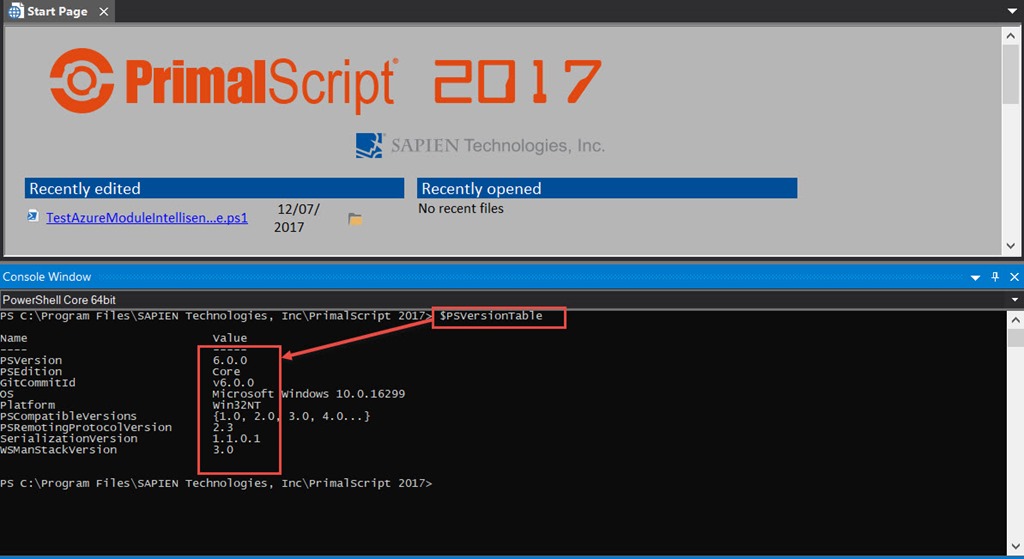
If there is any need to reset the console, this can be done by right-clicking on the shell and selecting Reset.

Testing your PowerShell Core Scripts
There are a couple of ways to test your script(s):
1. Just highlight and select a few lines of the code, then right-click and select Execute selection in PowerShell.
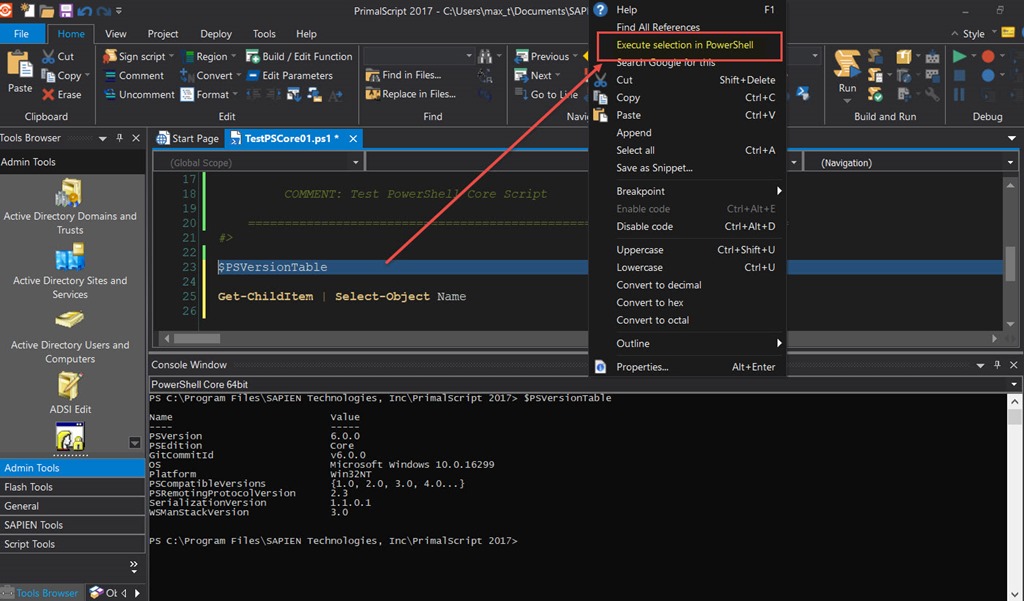
2. Or, to execute the whole script, from the Home menu click on the Script Run – Run* button, then select either Run in Shell or Run Selection in Shell.
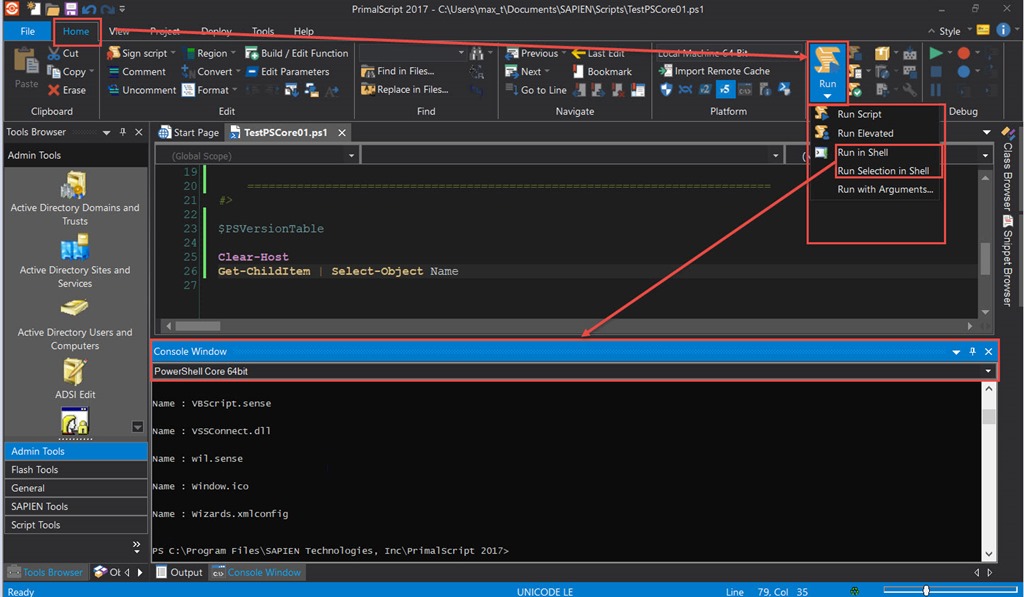
The script will run under the active console whether it is PowerShell Core or any other shell.
*Note: If you select to just Run the script, it will think you are executing a script for non-Powershell Core. This may give an error, but depends on how the script was built.
Some Caveats
Testing PowerShell Core scripts is doable! But, here’s the catch: PowerShell and PowerShell Core share the same core modules with slight differences, such as a few parameters changed and/or a very few non-supported cmdlets in PowerShell Core (for example: Out-GridView).
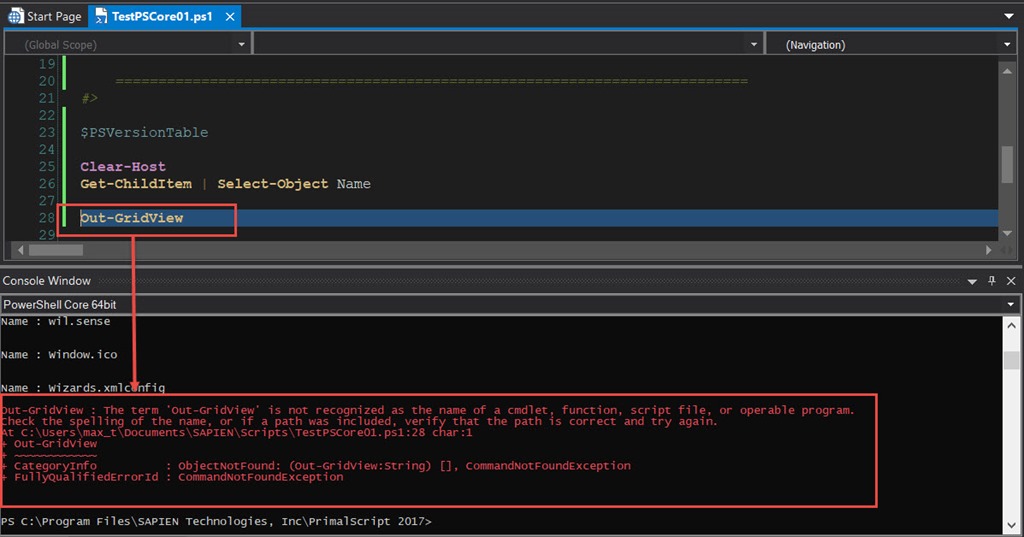
So, when using PrimalScript to develop PowerShell Core, test your scripts using the proper Run Shell option. At the same time, understand the difference between the two versions of PowerShell.
For licensed customers, use the forum associated with your product in our Product Support Forums for Registered Customers.
For users of trial versions, please post in our Former and Future Customers - Questions forum.


