The ImageList Control
- Details
- Written by David Corrales
- Last Updated: 15 June 2016
- Created: 19 October 2011
- Hits: 26249
ImageList [System.Windows.Forms.ImageList]
Provides methods to manage a collection of Image objects.
![]()
Default Event: N/A
Why use the ImageList control?
Use the ImageList to store a group of images that can be accessed by other controls, such as the ListView, TreeView, TabControl, or Toolbar.
Important Properties:
ColorDepth
This property represents the number of colors to use to render the images.
Values (Default: Depth4Bit):
Depth4Bit
A 4-bit image.
Depth8Bit
An 8-bit image.
Depth16Bit
A 16-bit image.
Depth24Bit
A 24-bit image.
Depth32Bit
A 32-bit image.
Images
This property contains the images in the ImageList.
Images can be accessed using the Images property:
#Access the first image in the ImageList
$picturebox1.Image = $imagelist1.Images[0]
There are several methods of adding an image to the ImageList:
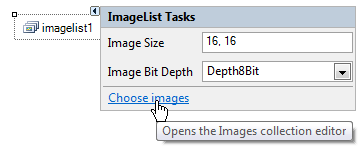
Via the designer:
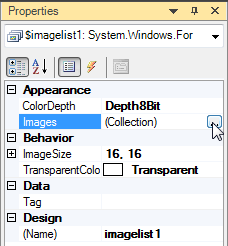
Or via the Property Pane:
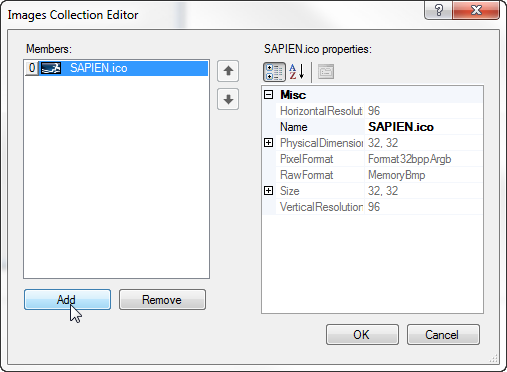
Using either method above you will be presented with a Image Collection Editor:
You can also add images to the ImageList via the Script Editor:
    #Add an image from the disk
    $imagelist1.Images.Add([System.Drawing.Image]::FromFile("C:\Image.png"))
As you may have noticed, we are using the Image class static function: FromFile. This function will load an image file from the disk and returns an Image object that can be added to the ImageList.
Supported Image Types include: png, jpg, gif, bmp, and icons files.
ImageSize
This property sets the size of the individual images in the ImageList.
Typical icons are 16 x 16, 24 x24 and 32 x 32, but you can specify any dimension. Note that all images included in the ImageList will be resized to the dimension specified by the ImageSize property.
Default Value: 16, 16
TransparentColor
This property sets the color that is treated as transparent.
Use this property when you are dealing with images that do not have a transparent layer such as most bitmaps.
For example the following Bitmap has a background color of Fuchsia:

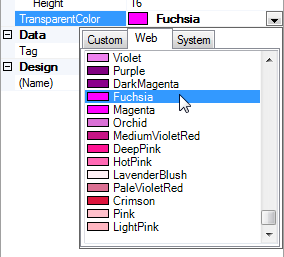
To make the background transparent, we set the TransparentColor to Fushsia:
And the resulting image displays an arrow with a transparent background:

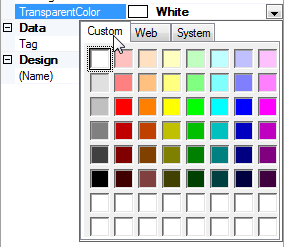
How to pick a custom color:
To pick a custom color, select the custom tab in the color selector:
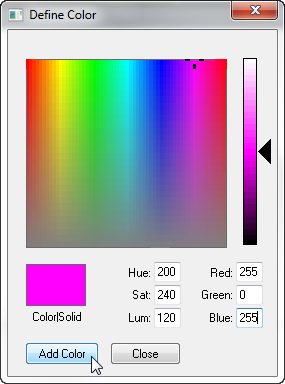
Next, Right Click on any empty square you will be presented with a Define Color Dialog:
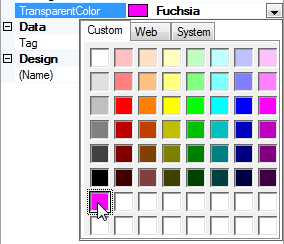
After defining the color you wish to use, press the Add Color button and it will appear in the selected square in the custom tab:
And finally to make the selection click on square containing the custom color.
Using the ImageList with other Controls:
Controls that can take advantage of the ImageList typically have a property called ImageList. After adding an ImageList to the designer, you will be able to select it as a value for the control.
To set a particular image from the ImageList look for either of the following properties:
ImageIndex
ImageIndex uses the index of the image to select it from the ImageList.

ImageKey
The ImageKey property uses the name of the image to select it from the ImageList.
Note: PowerShell Studio does not support this property. Please use the ImageIndex instead.

For licensed customers, use the forum associated with your product in our Product Support Forums for Registered Customers.
For users of trial versions, please post in our Former and Future Customers - Questions forum.


