Developing PowerShell scripts for other machines
- Details
- Written by Alexander Riedel
- Last Updated: 22 April 2016
- Created: 15 October 2012
- Hits: 17301
One of the challenges you face while developing any PowerShell script is that modules that reside on your target platform are not available on your local computer. Just as an example, try installing Microsoft SharePoint 2010 modules on your 32 bit Windows XP/Vista/7/8 machine. It just won’t work.
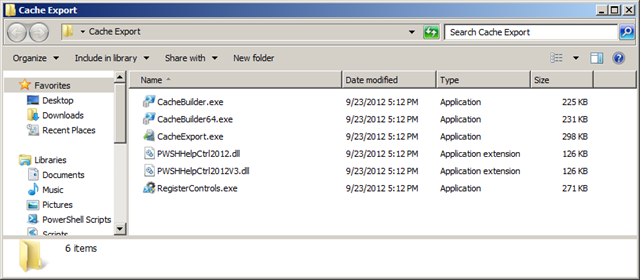
PrimalScript and SAPIEN PowerShell Studio support a mechanism which allows you to do that. As a first step you need to get the PowerShell cache information our products use from your target machine. To make this as simple as possible, we packed all the files required into a zip file. It’s called CacheExport.zip and you can find that in the products installation folder under “Redistributables”.
So just take that file, copy it to a flash drive, on a network share or wherever you need it to be so you can access it from your server.
Note that it is not required to install the full product on your server. Unless you really want to use it there the CacheExport tool is all you need.
We are using a Windows 2008R2 server as an example here. Copy the zip file to the server before unpacking. Otherwise all extracted files are marked as originating from another machine and you get a few extra dialog to acknowledge.
Start the CacheExport utility. We designed this process to be installation free, so anything that needs to happen will be done by the utility. Unless you have anything else SAPIEN already installed on that machine, CacheExport will launch RegisterControls.exe. As this requires elevation you may get the corresponding prompt. Please make sure to allow it to run, otherwise this just won’t work.
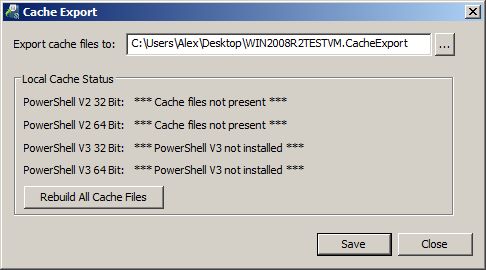
Most likely you see a status as shown above. Click on “Rebuild all cache files” if anything is not present. If you leave the CacheExport tool on your server, you can do this later on as needed if you install new versions of any module or additional modules or products on that server. Once you do that the status changes to show this:
Depending on platform and PowerShell versions installed this process takes a few minutes to complete. Once finished, you should see something like this:
Click on the “Save” button to save the newly built cache files to an export file. The default location for this is your desktop. The file is named with your computers name and a .CacheExport extension. Please do not modify the name of the file, because this name is what PrimalScript and PowerShell Studio will use to find that remote machine on a network.
Take that file and copy it back to your flash drive, network share or whatever location you can access from your development machine.
Let’s assume we put that file on the desktop of your local machine.
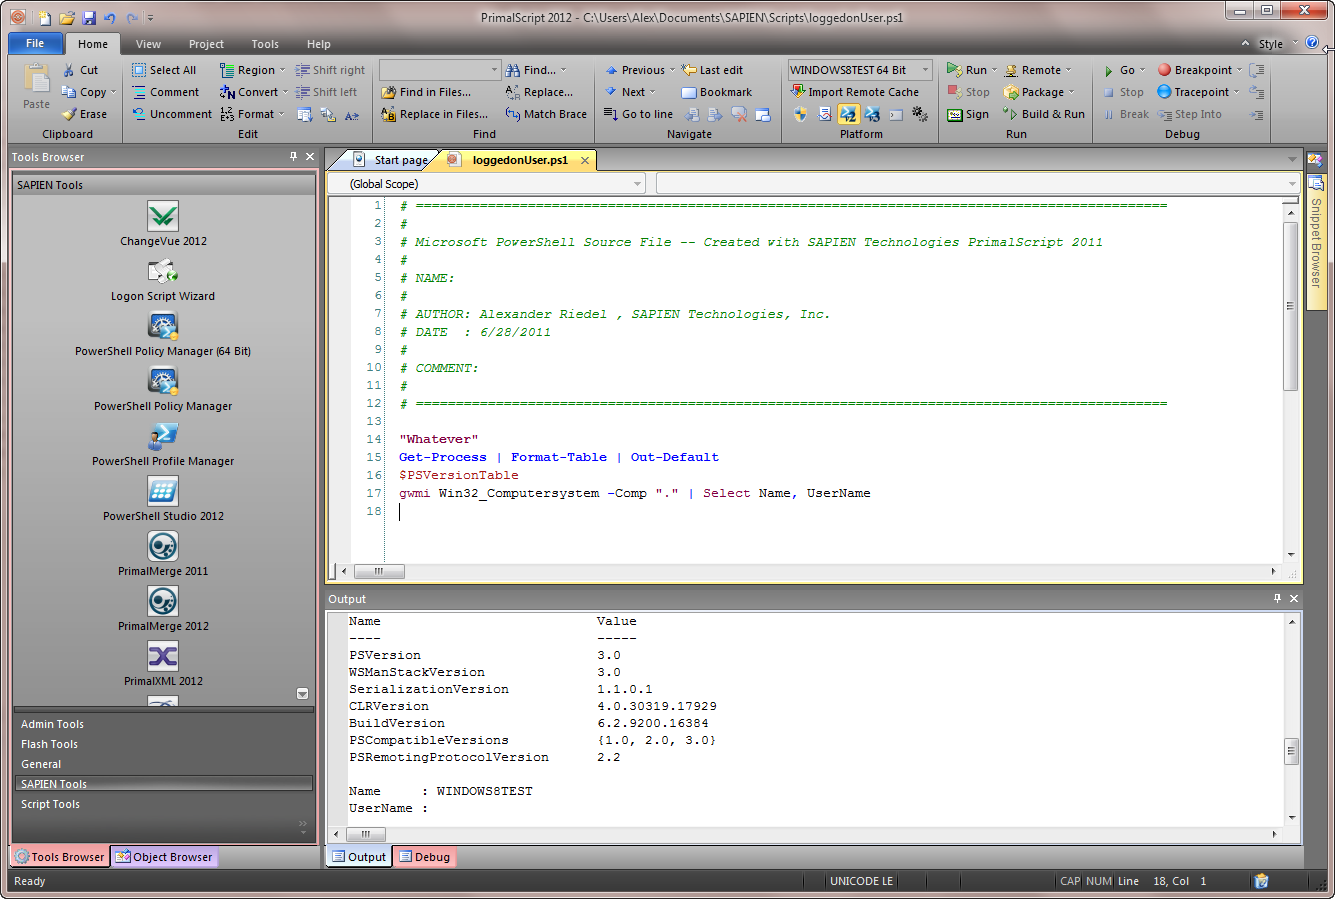
Now fire up PrimalScript and select “Import Remote Cache” from the Platform group on the Home tab:
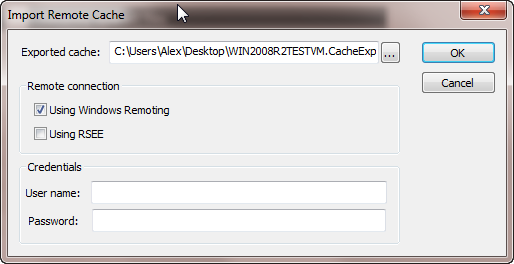
Select the cache export file on your desktop.
Select the appropriate choices for your remote connections. Depending on your selection some of the following options may not be available to you. For our example here we select Windows Remoting. If you plan on using Windows Remoting to run scripts on this machine you may have to provide a valid user id and password for that computer.
If you are using RSEE (Remote Script Execution Engine) to connect to the remote machine no credentials are necessary. If you plan on just running or testing script on that remote machine and you already have Windows Remoting working, there is no need to install RSEE there. If on the other hand Windows Remoting is not an option or you need to debug on that remote computer, installing the RSEE service on the target machine is recommended.
Once you have the cache information imported you can select the machine from the platform combo box:
Once you have selected this other machine as your target environment you will see cmdlets colored according to what exists on this machine but not your local computer. PrimalSense will also only show what is available on the remote computer. If you open the PowerShell part of the object browser you will also see the cmdlets, aliases and modules on the remote machine:
If you selected Windows Remoting as the remote connection to this other machine you can use the Remote console button to open a console to that machine. That console can come in handy to verify that scripts you ran did the right thing and conditions are what you expect them to be.
The first time you click that button a new console will be added to your list of embedded consoles. You can always use this button to bring up the corresponding console for your target machine. Additionally you can also select the remote console from the list even if you are using your local machine or some other computer as target.
So when you run your script (Ctrl+F5) it uses Windows Remoting, RSEE or your local machine, depending on what you have specified.
Both Windows Remoting and RSEE use the highest available endpoint when running a script remotely. That means that even if you don’t have PowerShell V3 installed locally, it will run in V3 on the remote machine.
Likewise, if you have a 32 bit machine and the remote machine is 64 bit your script will execute in a 64 bit PowerShell instance. (RSEE depends on whether you installed the 32 bit or 64 bit version of the service.)
So, now you can edit and run scripts against your servers from the comfort of your own computer. Next time we talk about remote debugging and different PowerShell versions.
This article applies to PrimalScript v6.5.132 or later.
This article applies to PowerShell Studio v3.1.9 or later
For licensed customers, use the forum associated with your product in our Product Support Forums for Registered Customers.
For users of trial versions, please post in our Former and Future Customers - Questions forum.


