Working with Azure Cloud Shell
- Details
- Written by Max Trinidad
- Last Updated: 09 October 2019
- Created: 07 April 2018
- Hits: 7837
User Rating: 2 / 5


I have been playing around with my Linux environment and AzureRM.Netcore cmdlets for some time now. I have also been using my Windows 10 WSL (Windows Subsystem for Linux) for working cross-platform with Microsoft Azure Cloud Shell.
Azure Cloud Shell has been around for some time and has undergone some significant improvements—notably the ability to pick which command line to use right from the browser.
This image shows the Microsoft Azure Portal with the Azure Cloud Shell integrated into the browser:
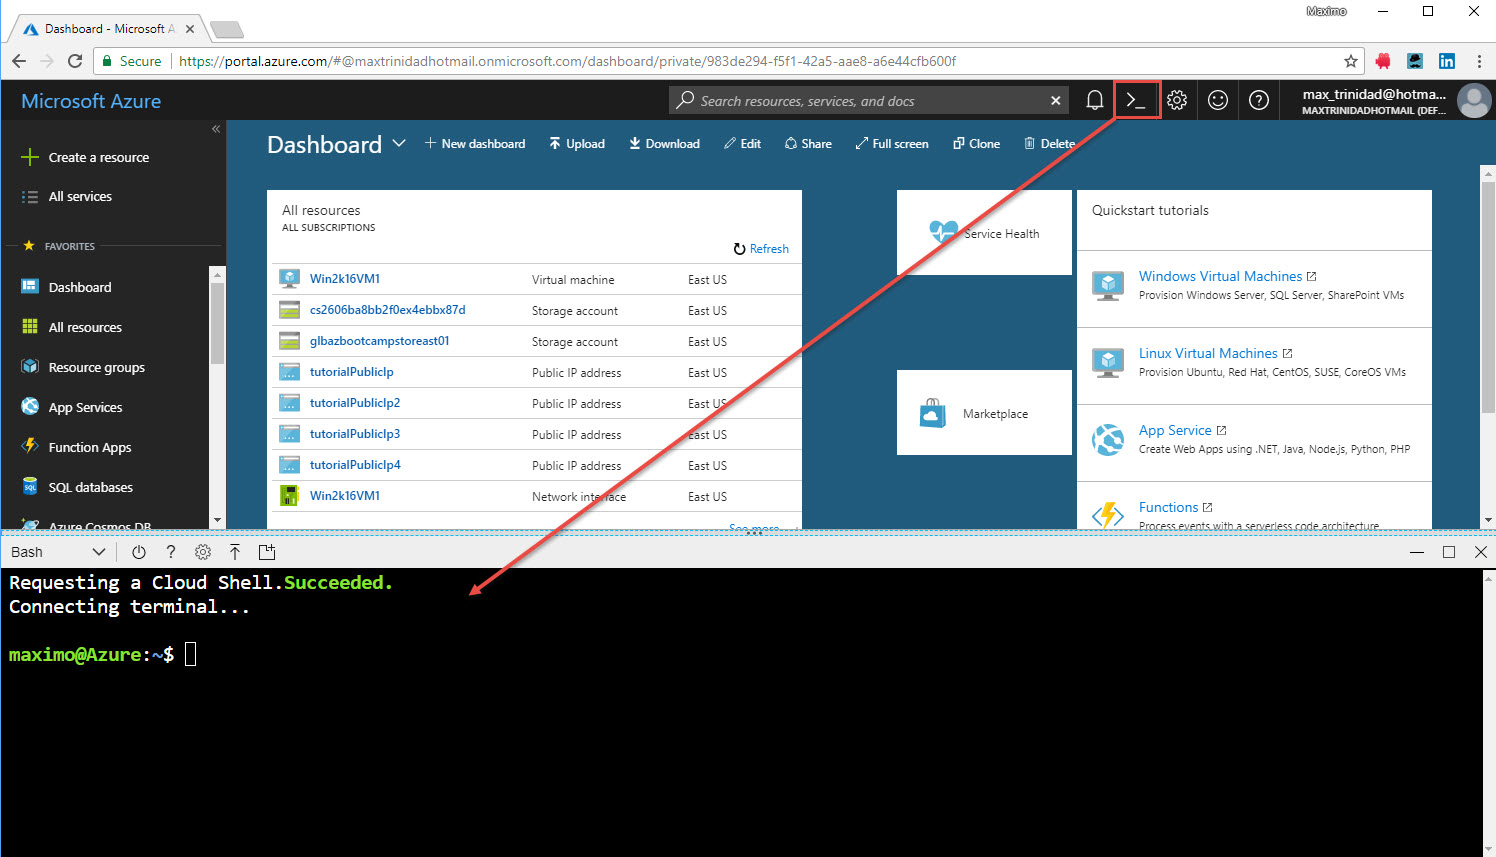
For more information check out Azure Cloud Shell documentation.
Be Creative
One thing I love about using PowerShell Studio by SAPIEN Technologies is the ability to be creative! The only limitation we put is on ourselves, so why not take it further with the Azure Cloud Shell?
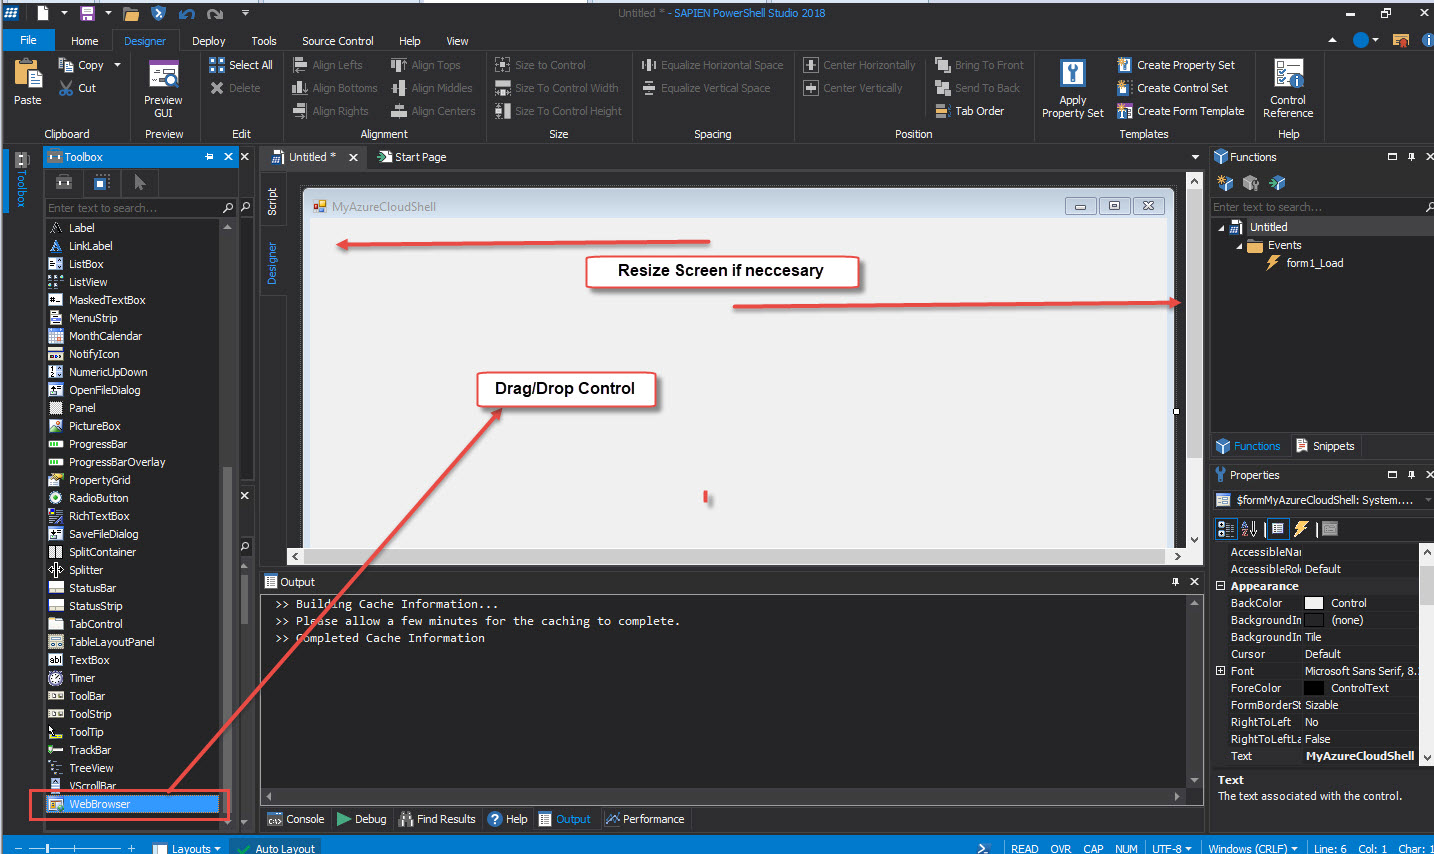
This is a good opportunity to take a moment and check out all of the Windows Controls that PowerShell Studio has available for building GUI forms:
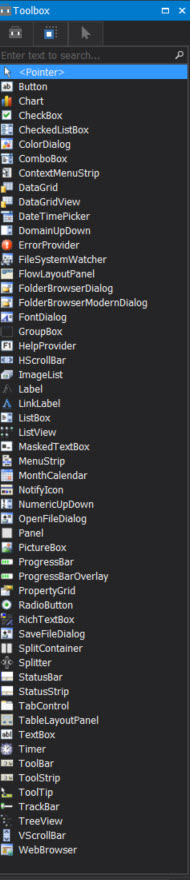
Let’s be creative and build a GUI form that uses the WebBrowser Control to host the Azure Cloud Shell.
Build A Simple GUI
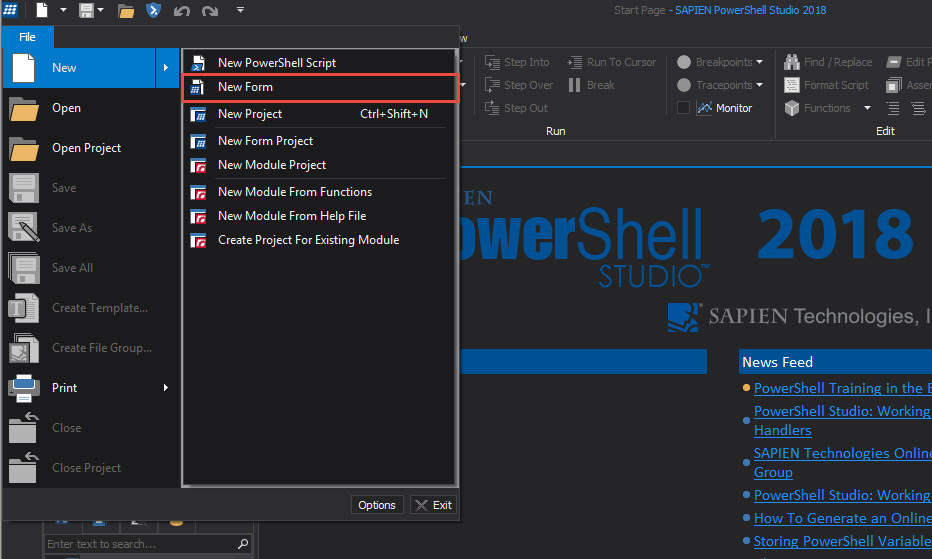
We can build a simple GUI and incorporate the WebBrowser control with the following steps:
Open a new empty form: File > New > New Form > Empty Form:
When the form opens, in the Properties panel change the Text property name from “Form” to “MyAzureCloudShell“:
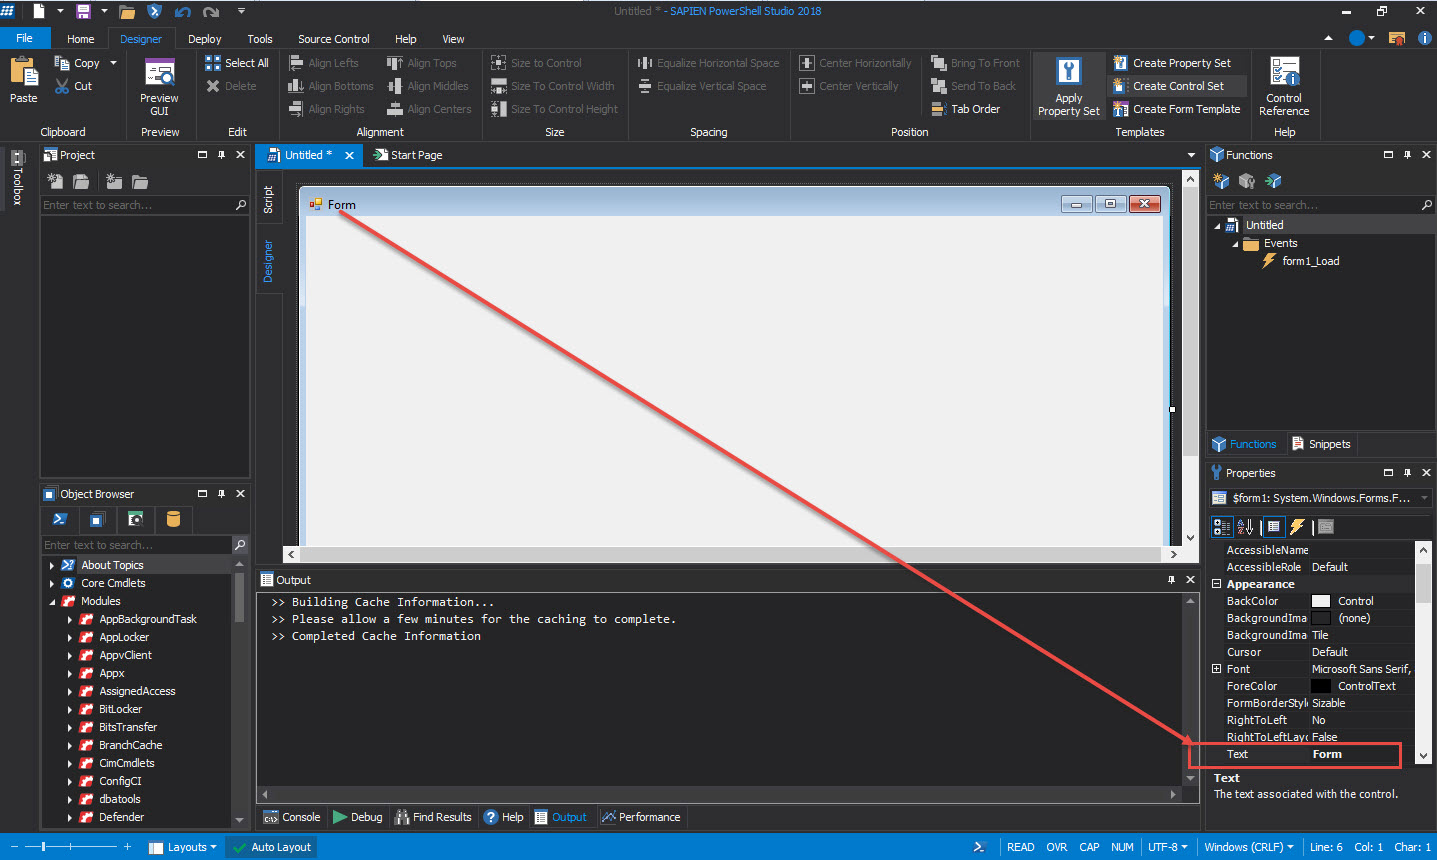
From the Toolbox panel > drag/drop the WebBrowser control into the new form.
If necessary, resize the form in the Forms Designer:
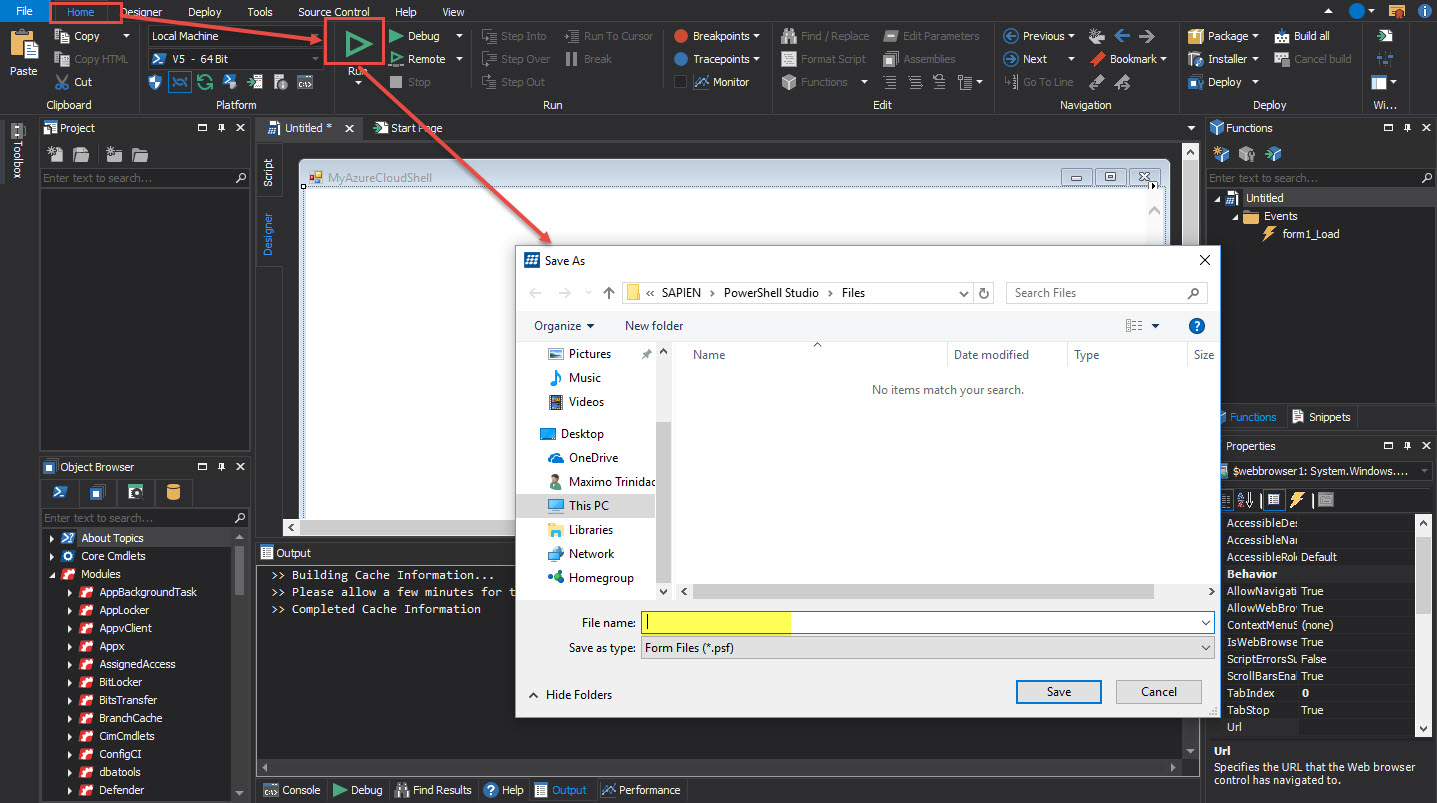
To preview the form > on the Home ribbon > select Run.
PowerShell Studio will prompt you to save the form > Enter an application name. It is also recommended to provide a folder name to create the executable:

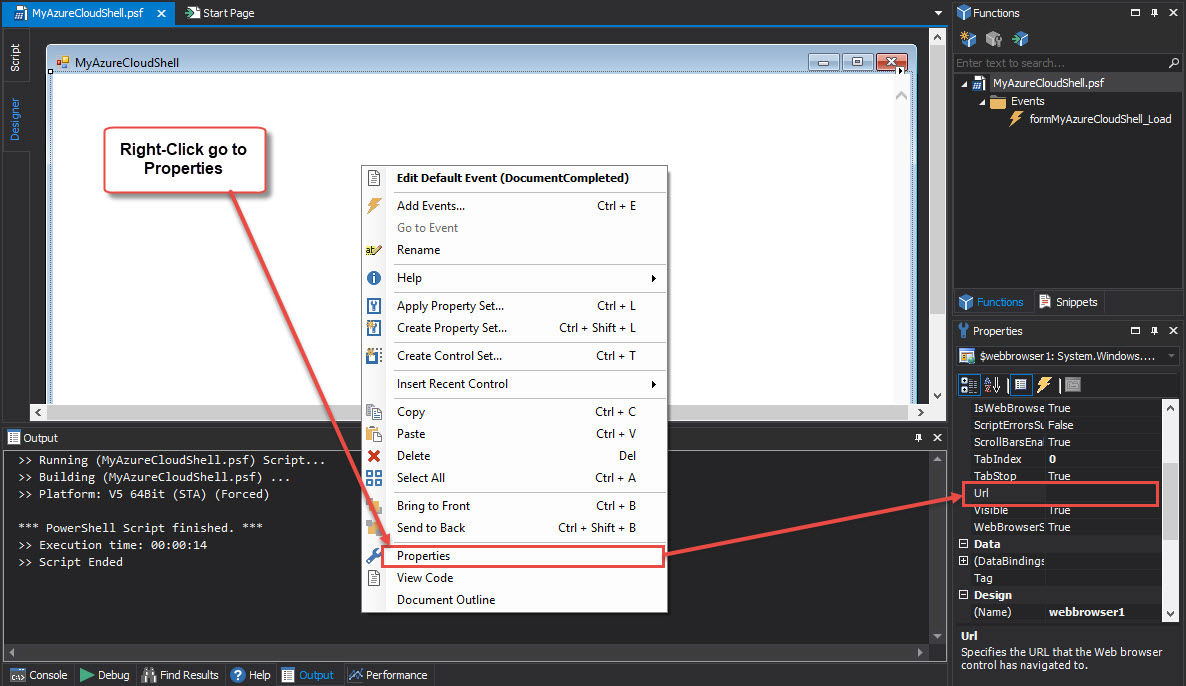
To complete the application we need to add the hypertext URL “http://shell.azure.com” to the WebBrowser control.
Click on the form where the webbrowser1 was added.
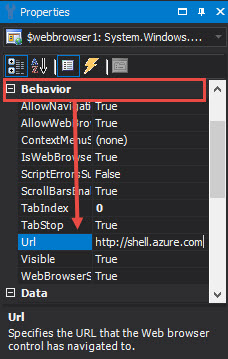
In the Properties panel > under the Behavior section > in the URL field > enter the value “http://shell.azure.com“:
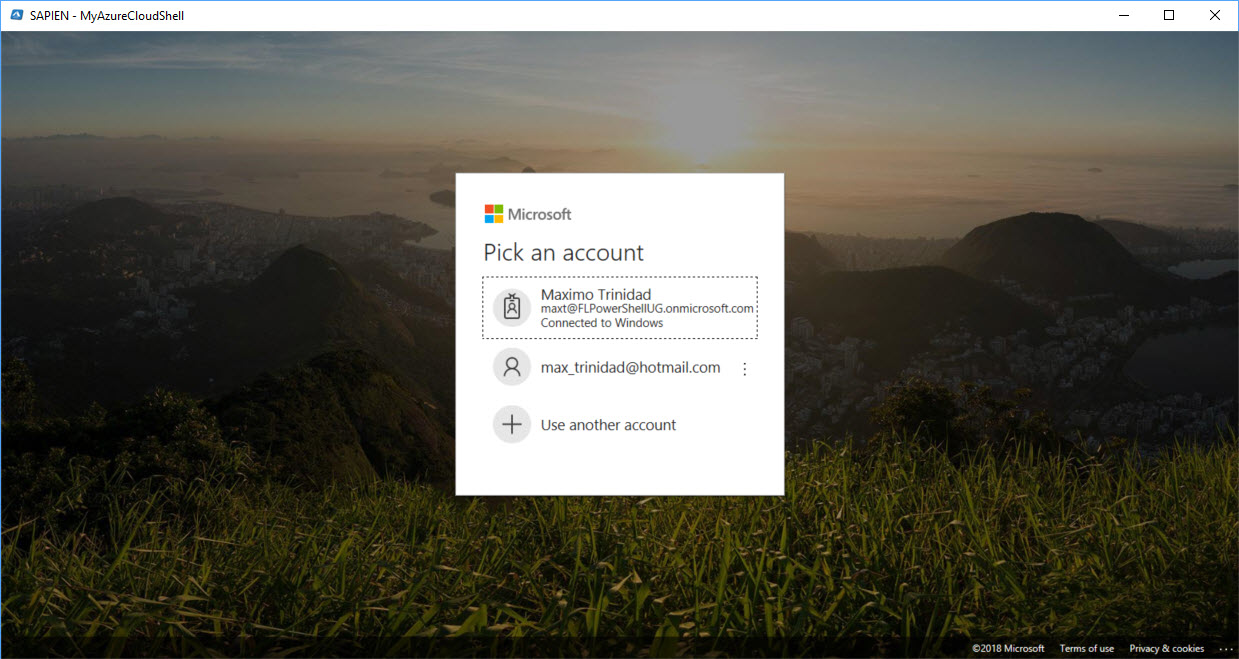
To preview the new application you will need to Sign In or Create an Azure account. A login message will be displayed when the application opens:
Preparing Application Settings
Now, after successfully testing the MyAzureCloudShell application, we are ready to create the executable.
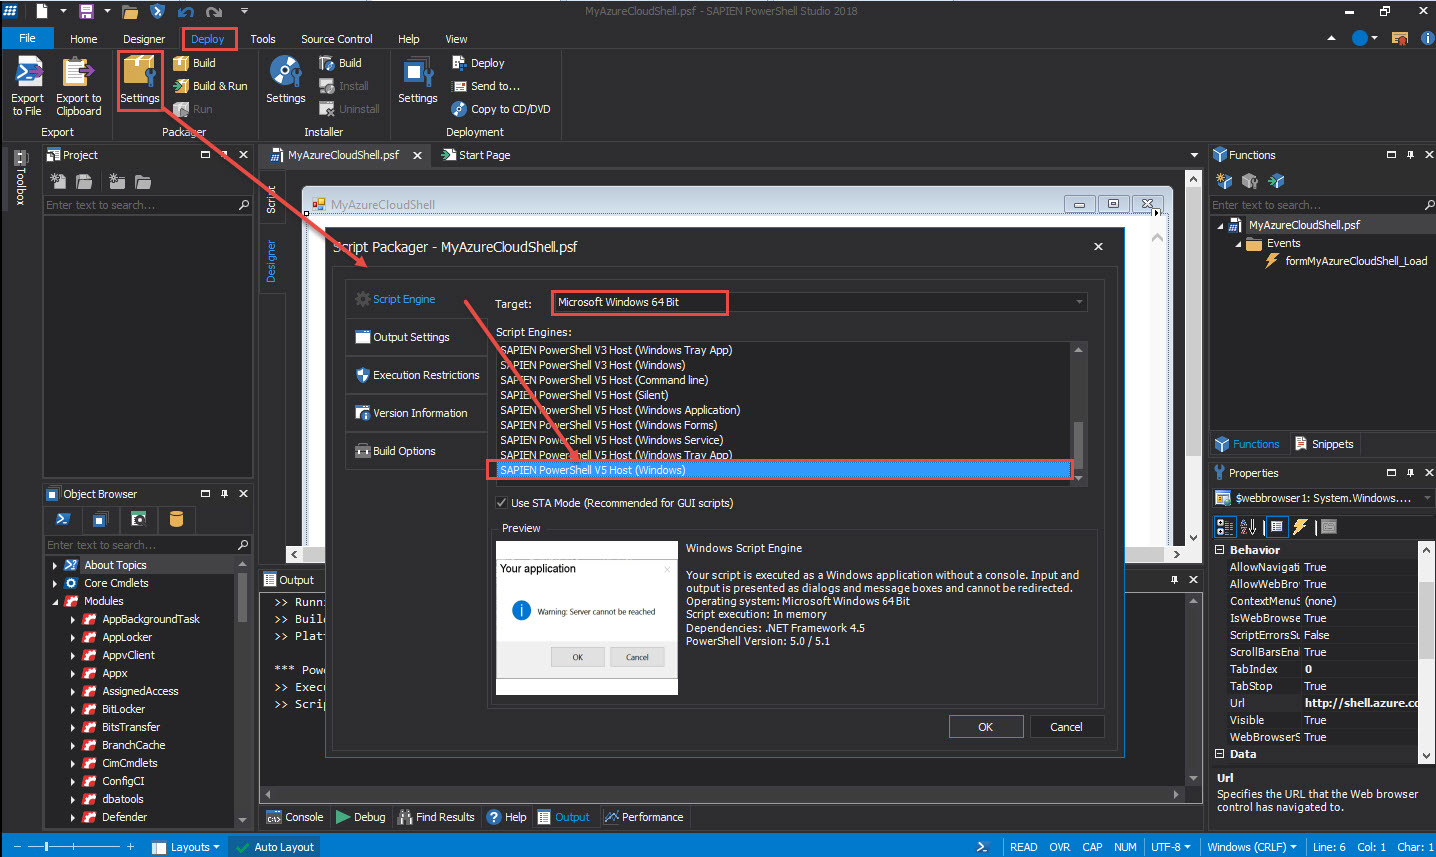
In PowerShell Studio, on the Deploy ribbon, in the Packager section, select Settings:

There are five Script Packager settings. We only need to configure the first four:
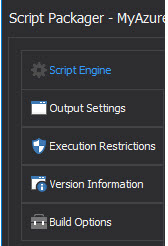
Script Engine – Identify which script engine will be used to build the application.
Select the Target as “Microsoft Windows 64 bit” and the Script Engines as “SAPIEN PowerShell v5 Host (Windows)“:
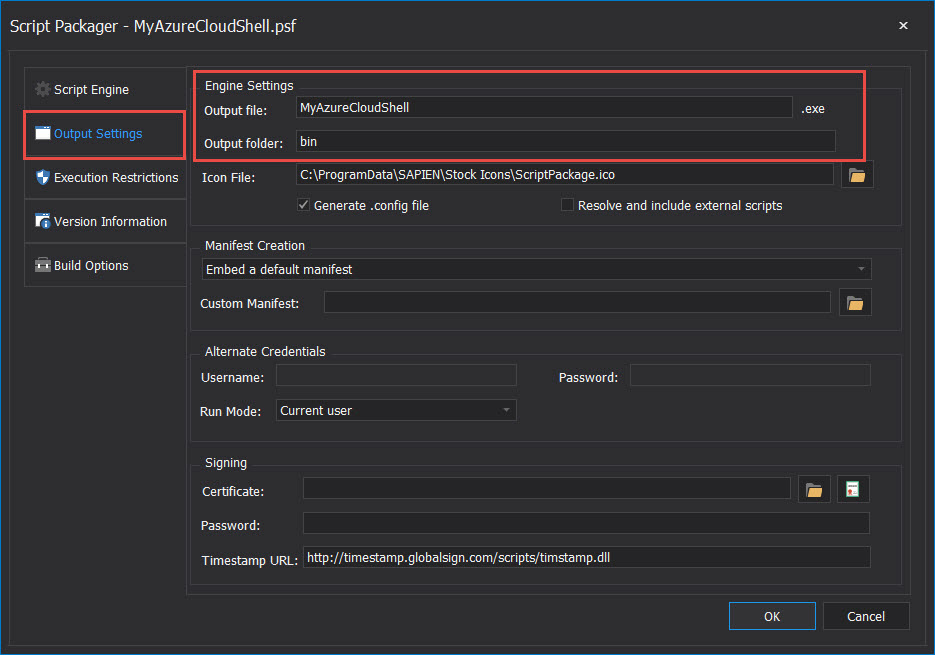
Output Settings – In the Engine Settings section, designate the Output file name, and the Output folder name where the executable will be created. The rest of the fields are optional:
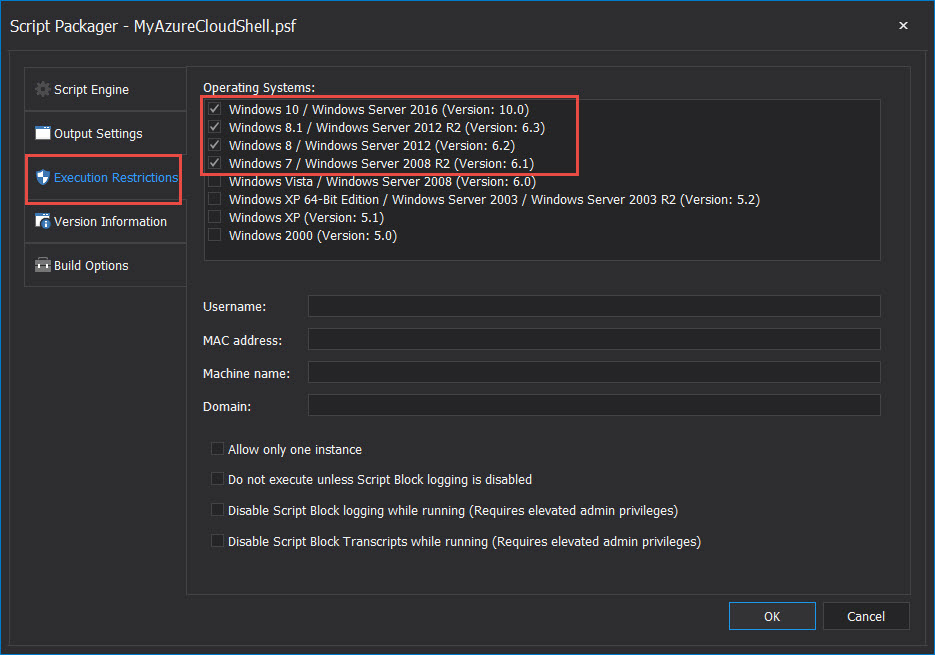
Execution Restrictions – In the Operating Systems section, select which Windows Operating Systems the application will execute (Window 7 – Windows 10):
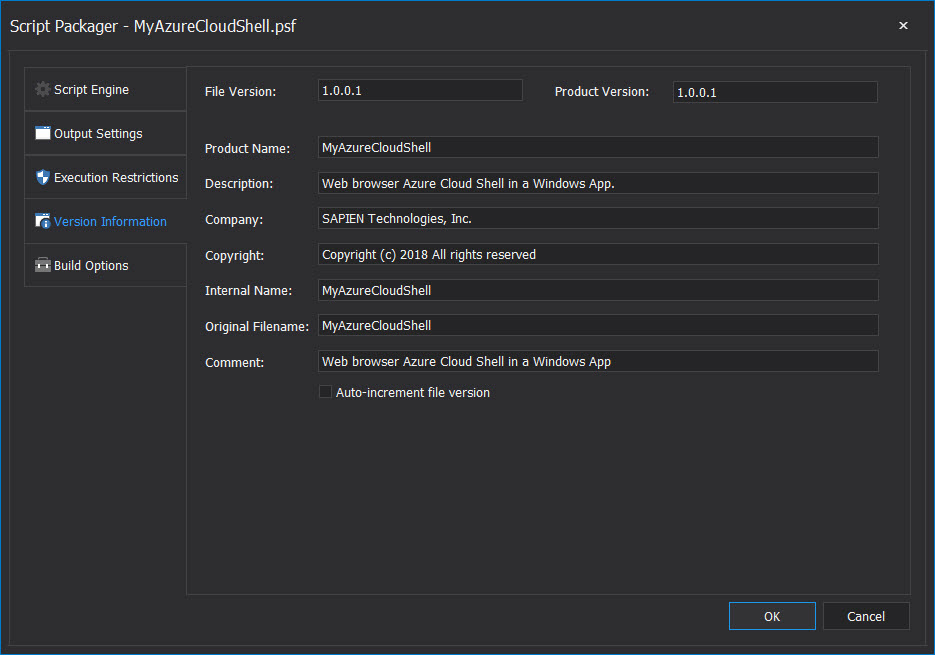
Version Information – Enter any application specific version information:
After you have completed selecting all of the required application settings, click OK. Now, it’s time to build the application executable.
Build Application Executable
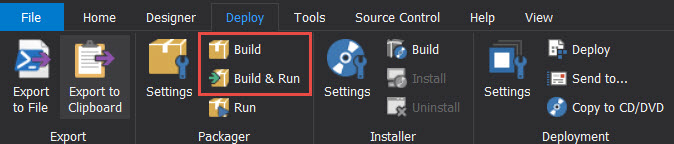
There are two options to create the executable:
Build – This option only builds the application executable.
Build & Run – This option builds the application executable and then executes the application.
Select the Build & Run option:

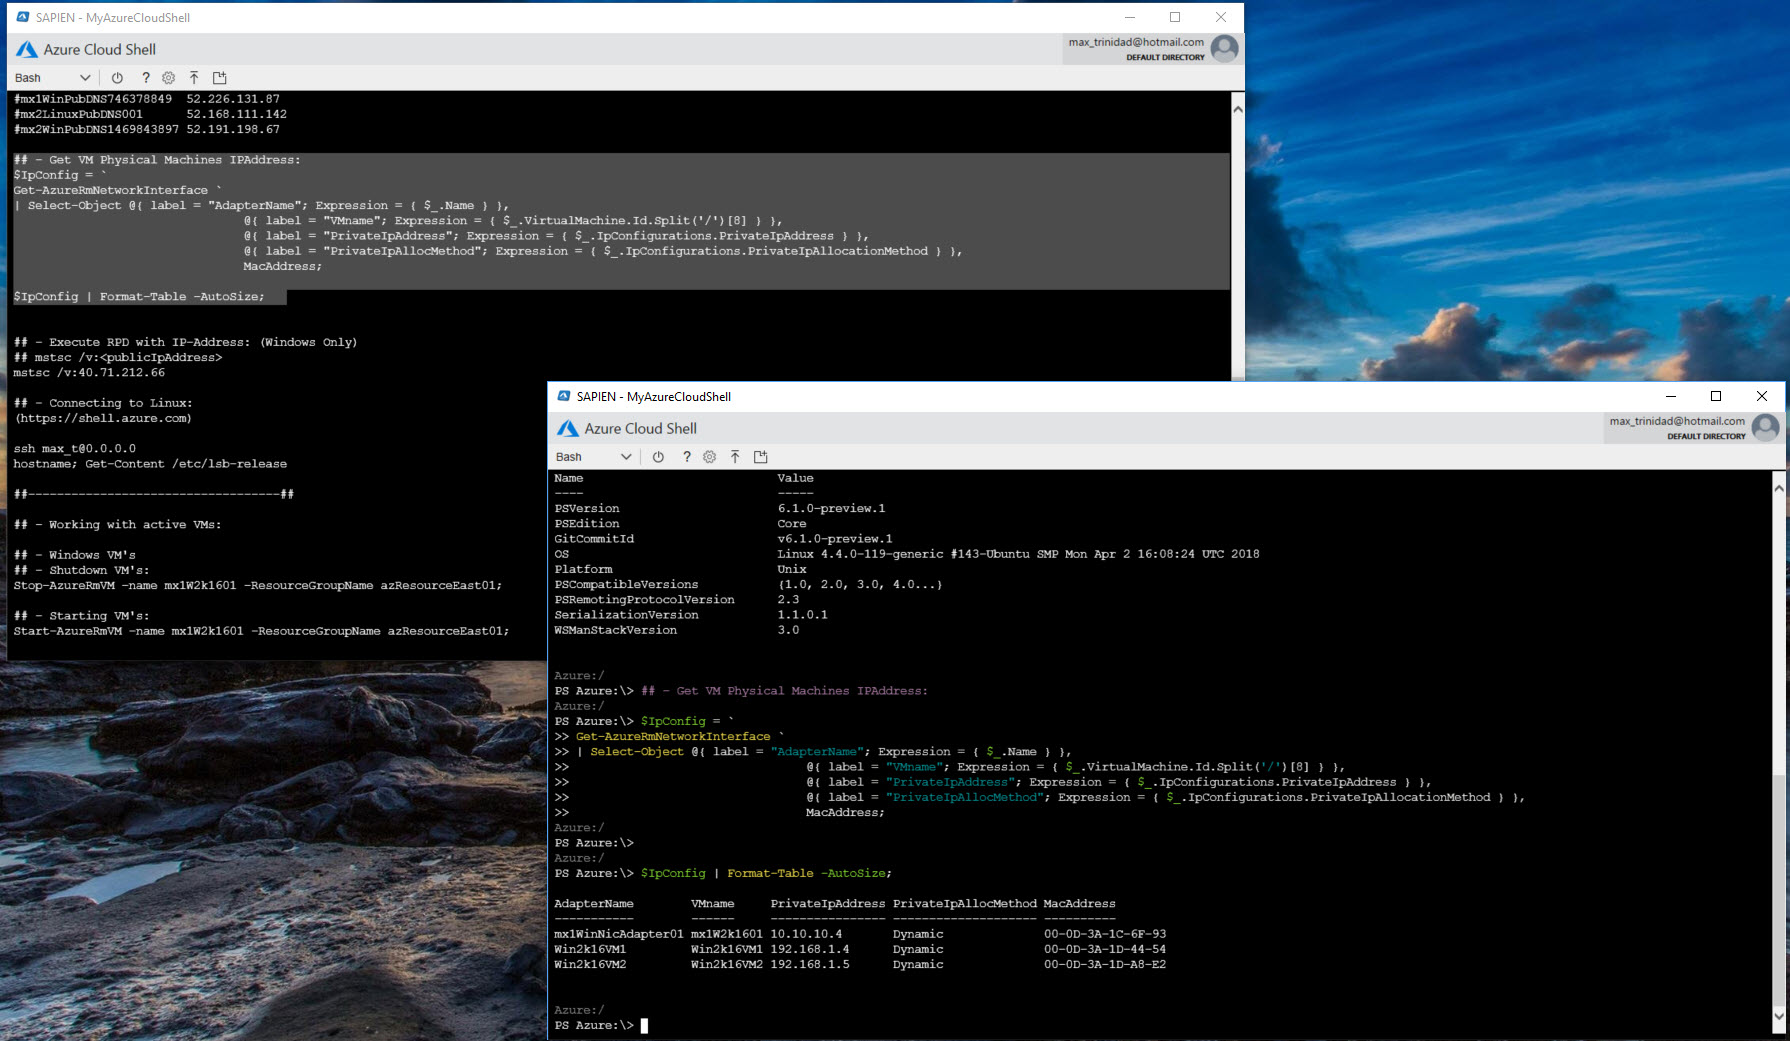
And, we are done!
Recap
This article showed how easy it is to build a simple and practical Windows application with PowerShell Studio with only one Windows Forms Control. In this example we extended a browser-based tool to a Windows Application that can allow multiple executable instances when needed.
Go ahead and try it out!
For licensed customers, use the forum associated with your product in our Product Support Forums for Registered Customers.
For users of trial versions, please post in our Former and Future Customers - Questions forum.