Control Set: TextBox - Watermark
- Details
- Written by David Corrales
- Last Updated: 14 November 2017
- Created: 14 August 2013
- Hits: 20860
Recently in the forums we had a request on how to create a textbox with a watermark.
What is a textbox with a watermark you ask?
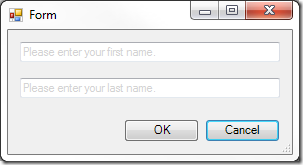
It is a textbox that displays hint information within the textbox using a lighter color. For example, a textbox that accepts a username, may have a watermark as follows:
![]()
Once a user types in the textbox, the watermark goes away.
![]()
Typically a C# developer would create this control by creating a new class that inherits the original textbox control. Next they would override some paint events and add custom members to keep track of the watermark. Since PowerShell does not support classes natively, this is not so easily done. Thankfully by taking advantage of the textbox control’s events we can mimic the watermark behavior in our PowerShell GUIs. We can also take advantage of PowerShell Studio’s control sets that allows us to drag and drop the new control in the designer instead of having to recreate the event block’s scripts every time.
Now let’s get started on creating our “new” control.
Step 1: Creating the initial watermark effect
In order to mimic the watermark, we will have to change the color of the text and display the watermark message. To do this, we will change the ForeColor of the textbox and use the Text property to display the hint message.
For this control we set the ForeColor to ‘LightGray’ when displaying the watermark text:
$WatermarkText = 'Please enter your username here'
$textBoxWatermark.ForeColor = 'LightGray'
$textBoxWatermark.Text = $WatermarkText
Step 2: Hiding the watermark
Next, we need to clear the watermark as soon as the user places the cursor in the textbox control. We can use the control’s Enter event to accomplish this goal. This event is called whenever the control gains the focus (i.e., The user clicks on the control).
$textboxWatermark_Enter={
    if($textboxWatermark.Text -eq $WatermarkText)
    {
        #Clear the text
        $textboxWatermark.Text = ""
        $textboxWatermark.ForeColor = 'WindowText'
    }
}
In the Enter event we must make sure that we only clear the text property if the control is displaying the watermark text. We also need to change the color of the TextBox back to its default value ‘WindowText’.
Step 3: Redisplaying the watermark
When the user goes to another field / control, we will need to check if the textbox is empty or not. If it is empty, then the control should display the watermark otherwise it should leave the user’s input as is. In order to do this, we need to use the TextBox’s Leave event. This event is called whenever the control loses the focus.
$textboxWatermark_Leave={
    if($textboxWatermark.Text -eq "")
    {
        #Display the watermark
        $textboxWatermark.Text = $WatermarkText
        $textboxWatermark.ForeColor = 'LightGray'
    }
}
In the Leave event we set the control’s Text property to the watermark text and change the color to Light Gray, only if the user left the control empty.
Step 4: Create the control set
Now that we have a functional watermark textbox let’s convert it into a control set. Before we do, let’s make the control more self-contained so that it is easier for the user to use multiple instances of this control set.
First, we don’t want the user to have to manually edit $WatermarkText variable every time they insert the control set. Instead we will use the textbox’s initial value as the watermark and store it in the Tag property (See related articles section for more information on the Tag property). In order to initialize the control automatically, we will use the textbox’s VisibleChanged event. The VisibleChanged event is triggered whenever the control is displayed or hidden.
$textboxWatermark_VisibleChanged={
    if($textboxWatermark.Visible -and $textboxWatermark.Tag -eq $null)
    {
        #Initialize the watermark and save it in the Tag property
        $textboxWatermark.Tag = $textboxWatermark.Text;
        $textboxWatermark.ForeColor = 'LightGray'
        #If we have focus then clear out the text
        if($textboxWatermark.Focused)
        {
            $textboxWatermark.Text = ""
            $textboxWatermark.ForeColor = 'WindowText'
        }
    }
}
The script above checks whether the control is already initialized when it is displayed. If it’s not, the script stores the textbox’s initial text as the watermark text in the Tag property. Next, it checks if the control has the focus. If the control already has the focus, it simply clears the text.
Next, we update the Enter and Leave events to use the Tag property instead:
$textboxWatermark_Enter={
    if($textboxWatermark.Text -eq $textboxWatermark.Tag)
    {
        #Clear the text
        $textboxWatermark.Text = ""
        $textboxWatermark.ForeColor = 'WindowText'
    }
}

$textboxWatermark_Leave={
    if($textboxWatermark.Text -eq "")
    {
        #Display the watermark
        $textboxWatermark.Text = $textboxWatermark.Tag
        $textboxWatermark.ForeColor = 'LightGray'
    }
}
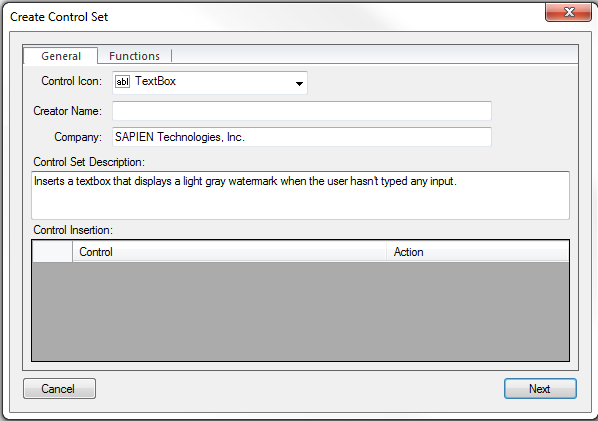
After we select the watermark textbox in the designer and create our new control set; we are ready to go!
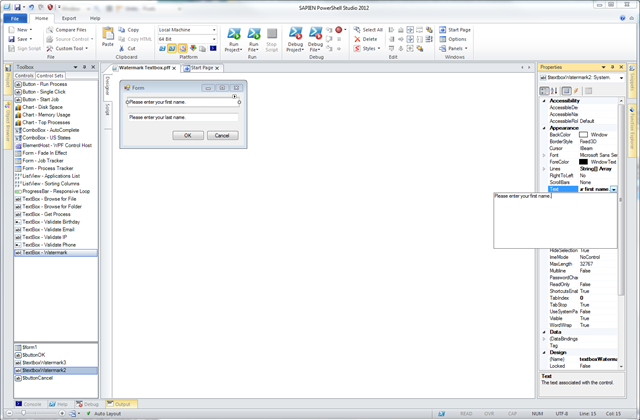
When you insert the “TextBox – Watermark” control set, you only need to change the control’s Text property in the designer.
And the resulting text is then displayed as the watermark:

Important consideration:
When checking the final value of the TextBox control, you must be sure that it is not equal to the watermark text before accepting the value:
    if($textboxWatermark.Text -eq $textboxWatermark.Tag)
    {
        #ignore or invalid input
    }
This article applies to PowerShell Studio v3.1.22 and later.
For licensed customers, use the forum associated with your product in our Product Support Forums for Registered Customers.
For users of trial versions, please post in our Former and Future Customers - Questions forum.


