Using iPowerShell Pro's PowerShell Web Access connection
- Details
- Written by Ferdinand Rios
- Last Updated: 14 November 2017
- Created: 31 July 2014
- Hits: 13974
User Rating: 2 / 5


First, connect to your PSWA server as described in this previous article. Once you are connected, that is where the fun begins.
Tap on the input line to bring up a keyboard.
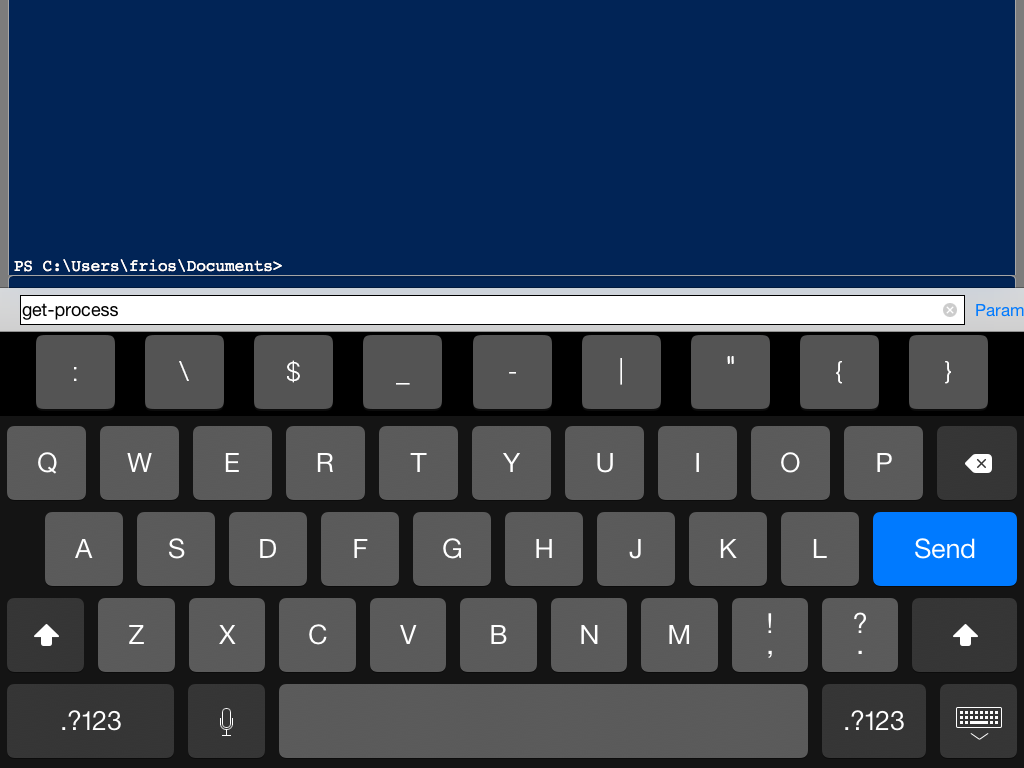
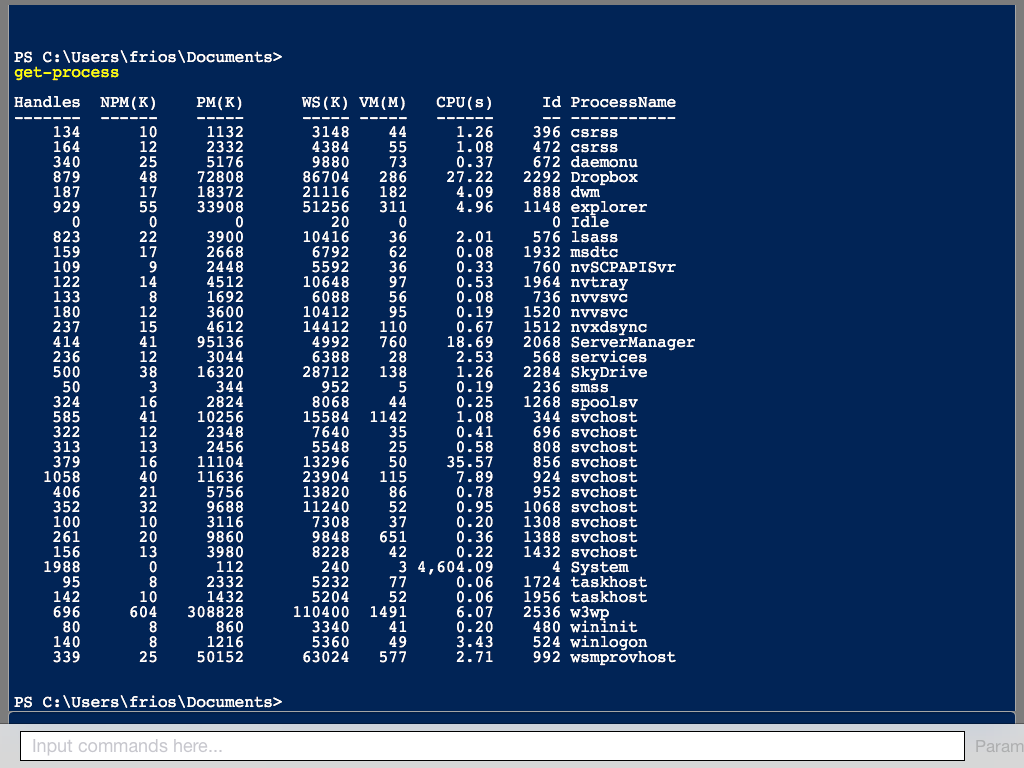
You can simply type in a PowerShell Command here and press SEND to execute the command on the server and see the results on the screen.
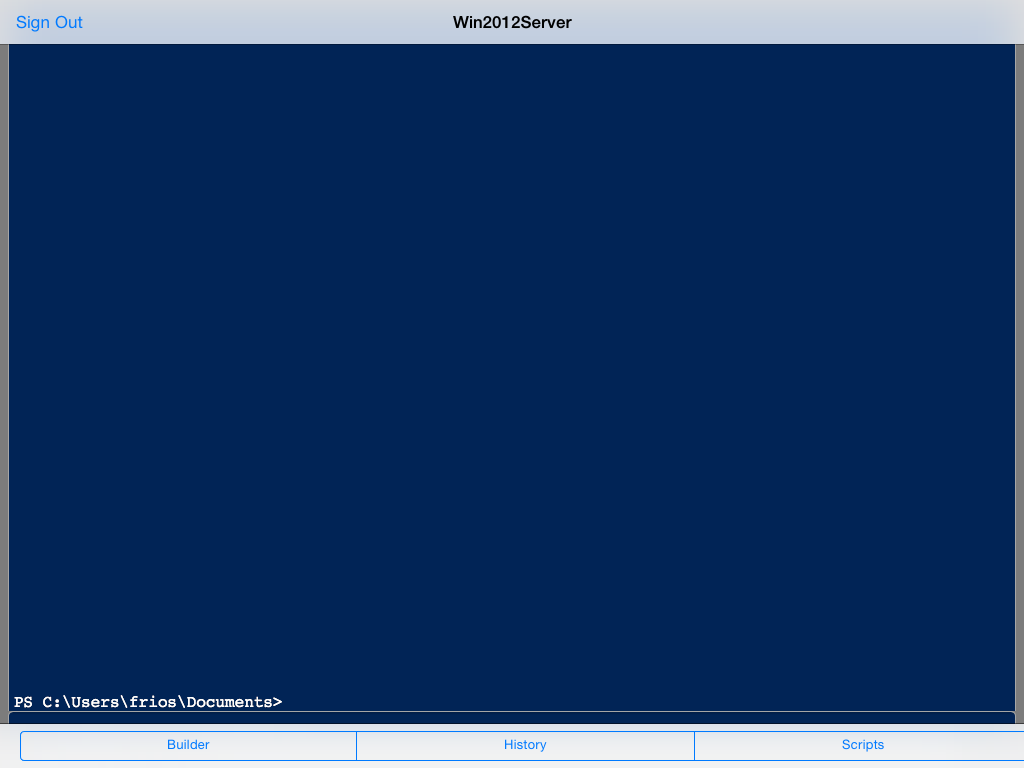
If you TAP once on the screen, the toolbar with three options (BUILDER, HISTORY, SCRIPTS) will replace the input line.
Tapping the BUILDER option brings up a popover list of all the cmdlets which iPowerShell Pro recognizes.
NOTE: the “i” at the right of the cmdlet name or the parameter name gives you a description of that item.
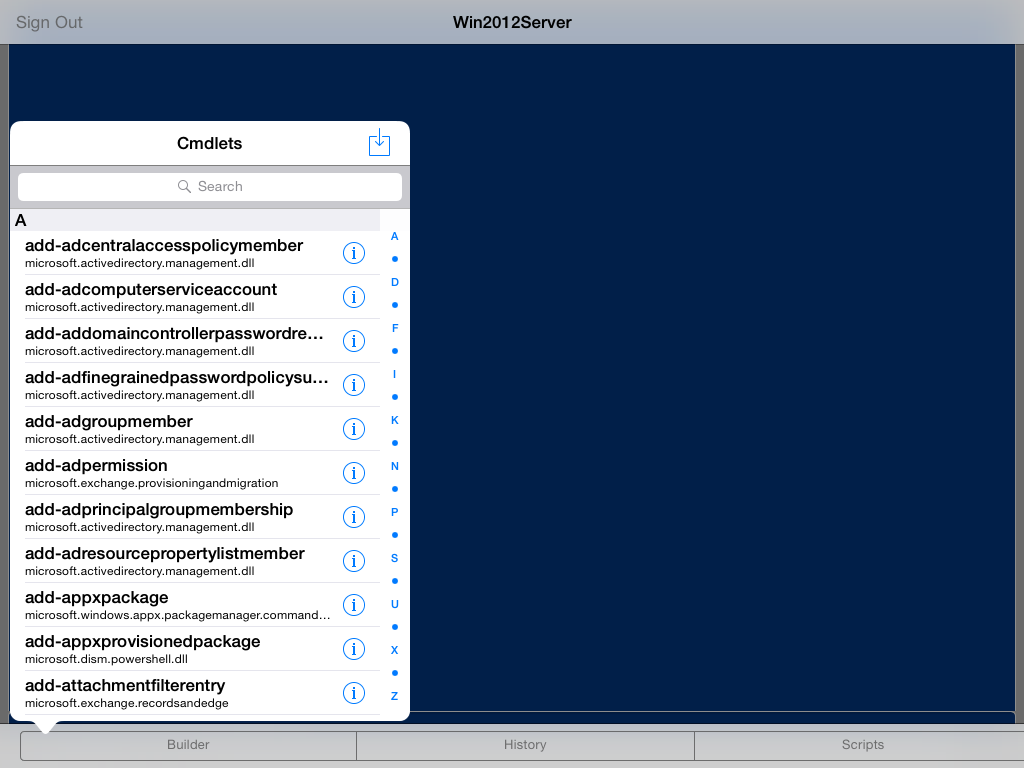
Tap a cmdlet to select it and display its parameters.
Tap on as many parameters as you want to use and then tap the Done option.
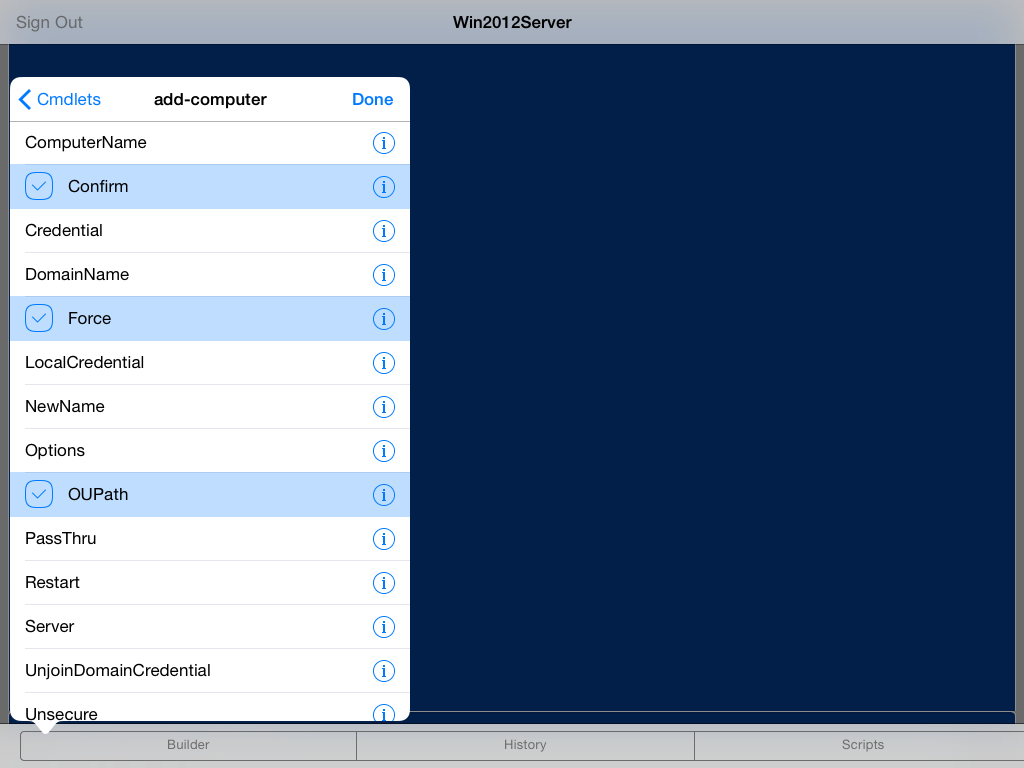
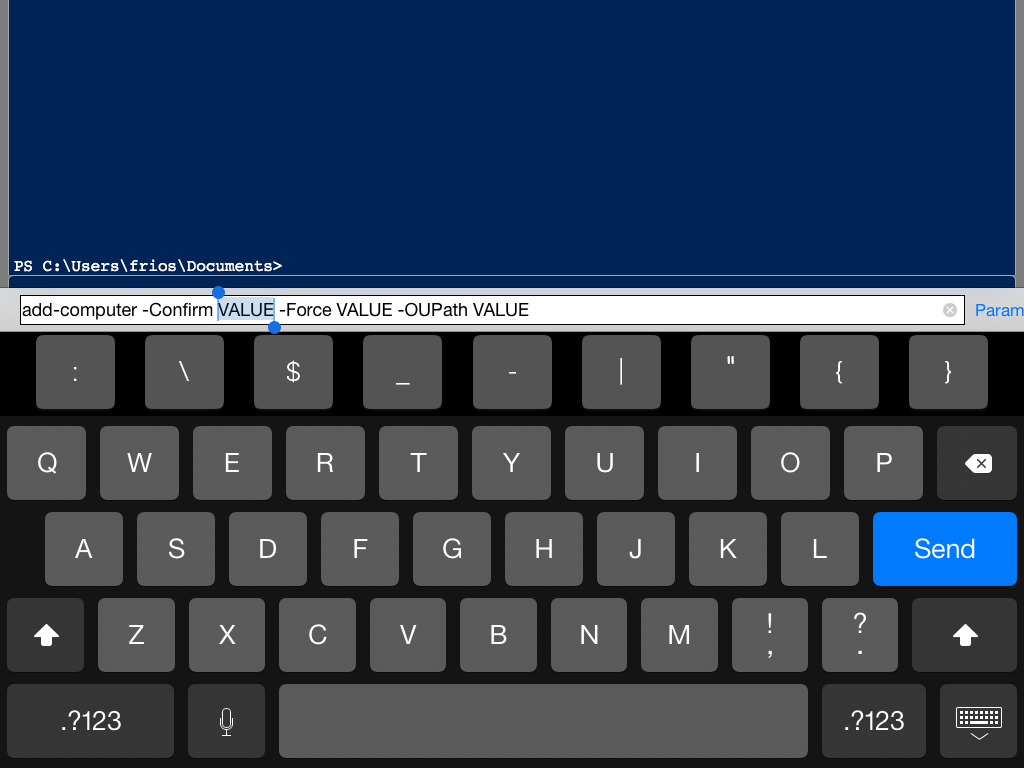
The command line will be filled with your cmdlet and its parameters and VALUE placeholders. If you tap on the PARAM button, each VALUE placeholder will highlight in sequence and you can type in the parameter value you want, then tap PARAM again to move to the next place holder. This process can be repeated over again when you pipe the output of one cmdlet to the input of another.
Tap the screen again to bring up the toolbar and select HISTORY.
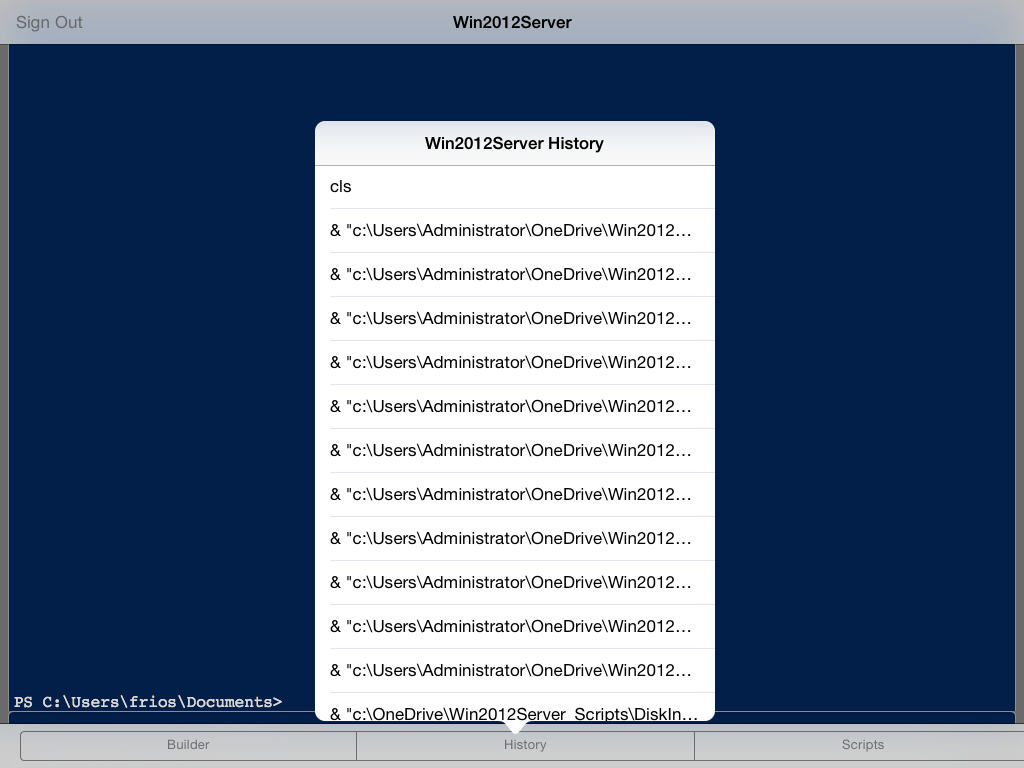
A popover with the last 50 commands issued to this specific server is displayed. Selecting any one of these items will place it on the input line where you can just press SEND on the keyboard to send it along to the server. This history is saved in your iCloud account and will appear on any device running iPowershell Pro that is connected to that iCloud account.
The last option in the toolbar is the SCRIPTS command. If you have not connected iPowerShell Pro to your cloud service previously, the first time you tap this will take you to the appropriate service login. After that, a list of scripts on your service will be displayed.
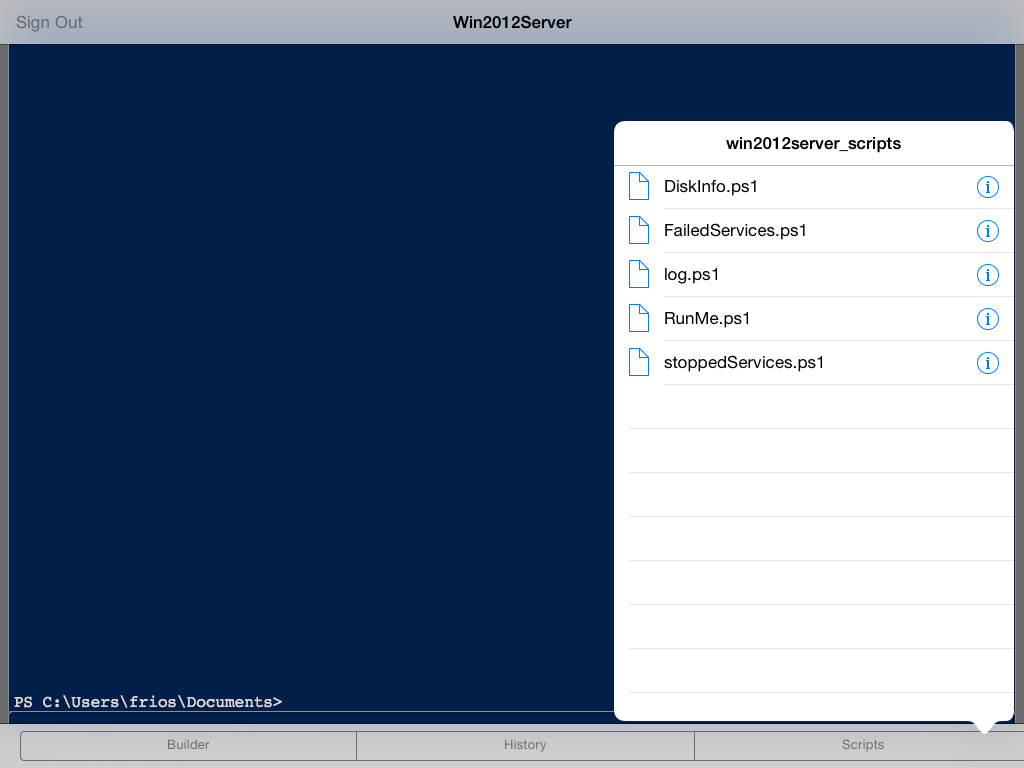
Tapping on the script name will place a call to that script on the input line. Execute it by tapping the SEND button.
Tapping the “i” at the far right of the script name in the list brings up a basic editor that you can use to make minor changes to the script.
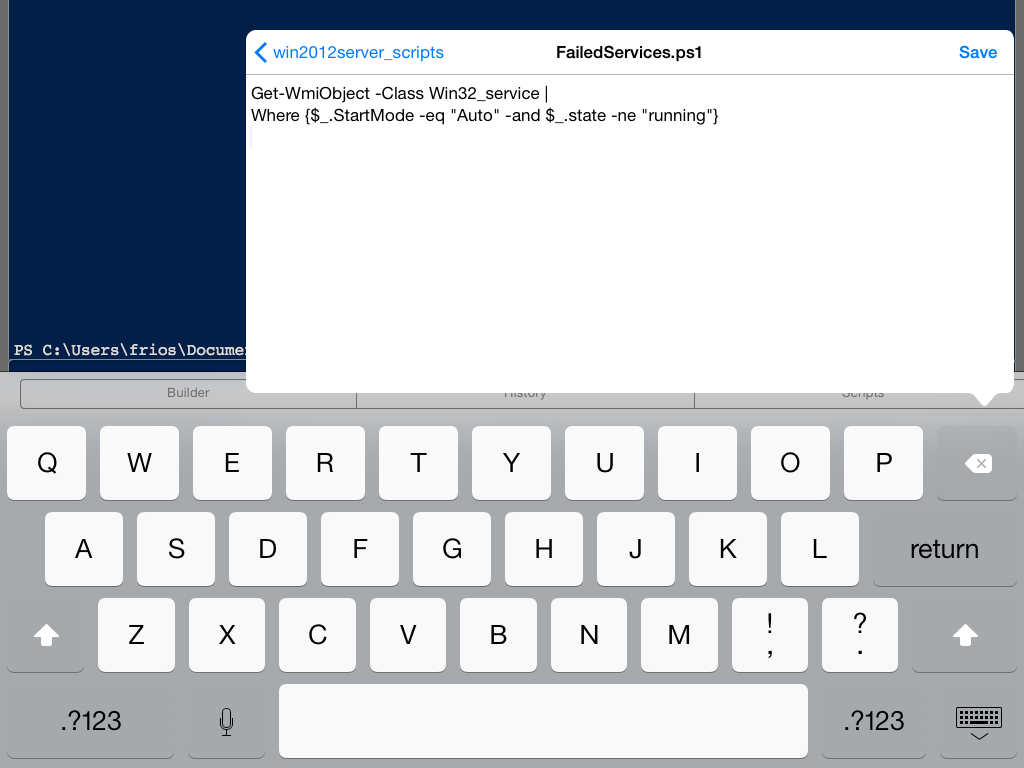
When you tap the back button, you will be prompted to save your file and then you will be returned to the script list where you can select a script to run. The saving process updates the script on the selected cloud service which in turn, will update the script on the server (assuming you have installed the cloud service on your server.)
For licensed customers, use the forum associated with your product in our Product Support Forums for Registered Customers.
For users of trial versions, please post in our Former and Future Customers - Questions forum.