New Script Engines for Windows PowerShell
- Details
- Written by Alexander Riedel
- Last Updated: 17 May 2019
- Created: 14 June 2017
- Hits: 19106

This article covers the use of three new engines for Windows PowerShell.
- The Windows Application Engine: Turning your Script into an Application
- The Packager Engine: Creating a System Tray Application with PowerShell
- The Windows Service Engine: Write a Windows Service in PowerShell
The Windows Application Engine
Turning your Script into an Application
One of the more common tasks for an administrator is to write a script for a helpdesk employee or a fellow admin who is maybe not so PowerShell savvy (yet). Many of you like to package that script as an executable file to prevent the user from “experimenting” with your code and messing things up in the process.
From what we hear, it is quite common for these users to come back and say they only see a flashing window when they try to run your script. Now you have to go and explain that this is a console window flashing and they need to open a console to run that exe or script from there.
After wasting this perfectly good explanation you most likely have to go in person and set up a shortcut for the user to do all you just explained.
Let’s face it, PowerShell is a console language, but not everyone is familiar or comfortable with using a console.
So here you are, trying to make your life easier by writing a script only to have to go into either development mode and make that script a GUI application or to go into teaching mode and lecture helpdesk employees on the use of consoles.
If only there was an easier way …
I did what many do today, I searched the internet for a script and modified it to suit my purpose. So here is my shoutout to Martin Pugh, thanks for the network speed script!
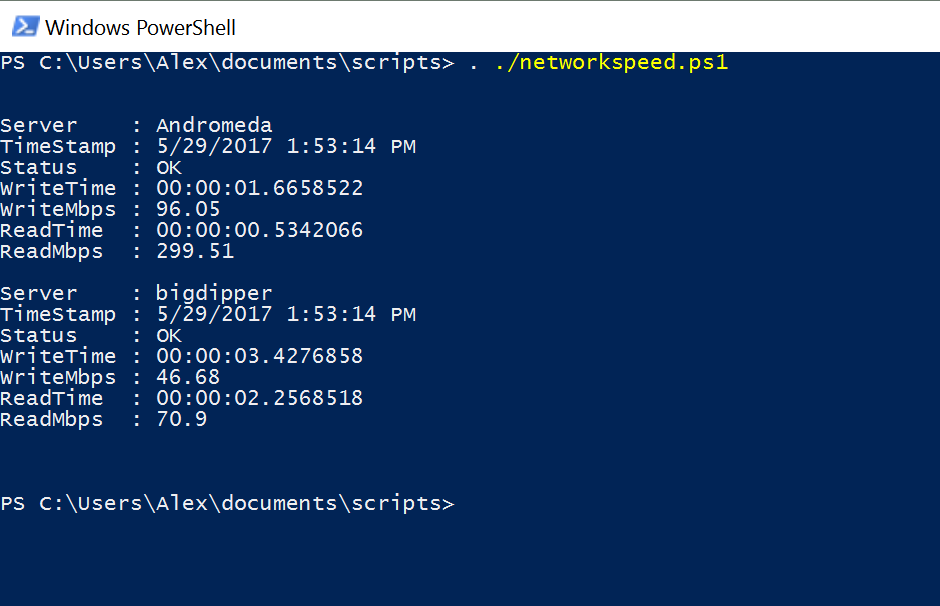
Here is what it looks like when you run the script. Pretty simple. The seasoned admins among you know that it gets squirrely when there are many more servers and content scrolls. Consoles have buffer limits and, for some reason, those more inclined to use a mouse, have an inexplicable dislike for anything in a console.
But wait, Notepad, everyone knows how to use Notepad, right?
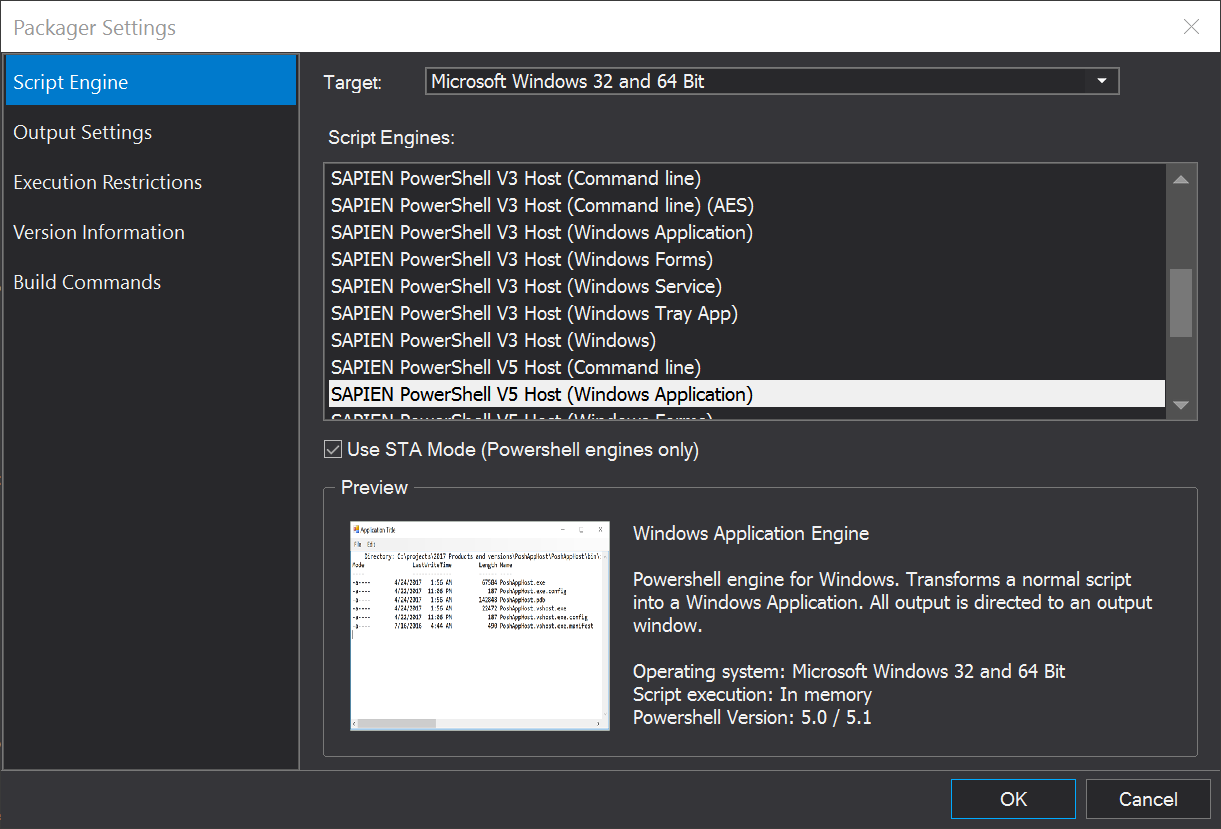
Now lets package that script with the Windows Application engine and see what happens.
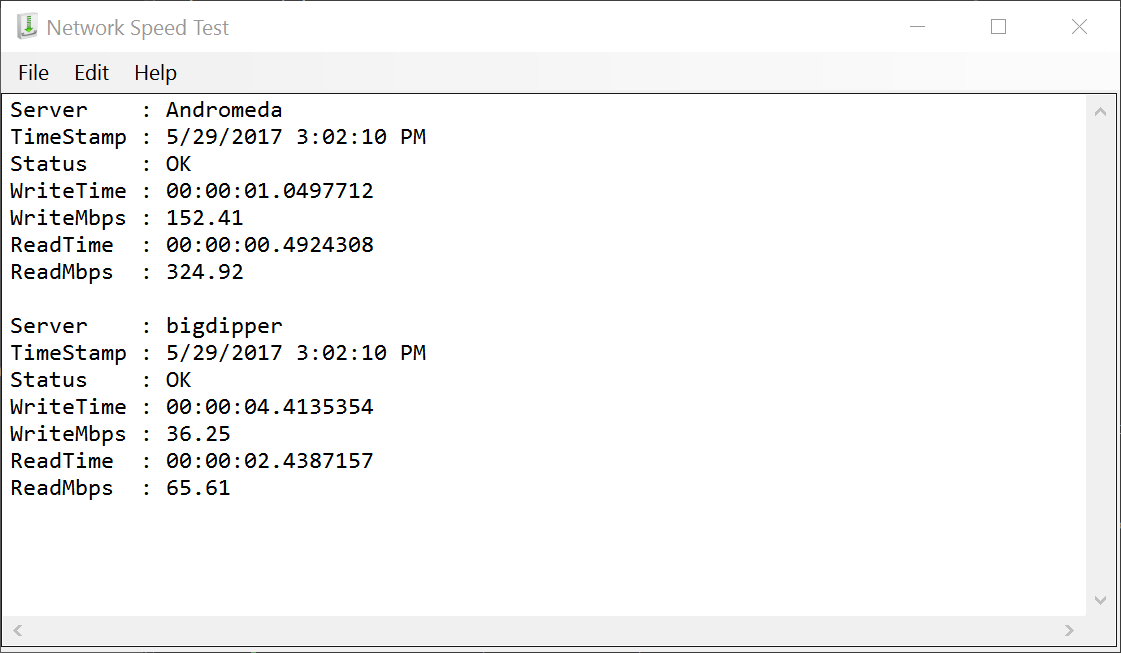
Much better. Anyone familiar with Notepad can handle that.
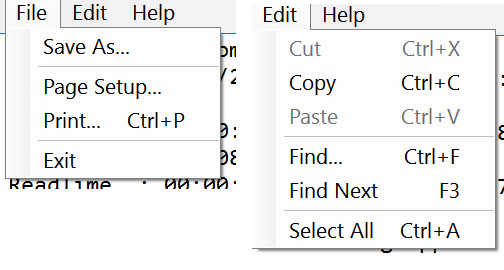
The File and Edit menus provide the usual functions, you can save the output of your script as a text file, the edit menu can find and copy specific text, so if things go wrong it is quite easy for the user to provide you with actual feedback and error messages.
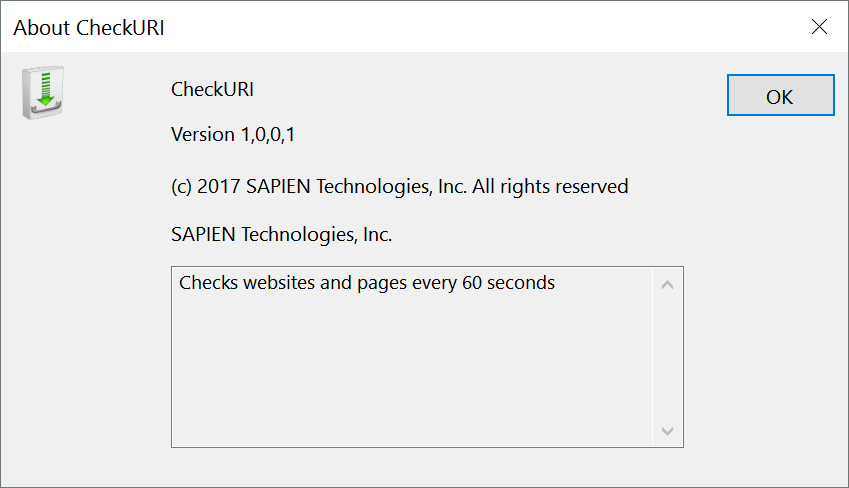
Additionally, there is an automatically generated About box in the Help menu which contains all the information you specified in the version resource while packaging.
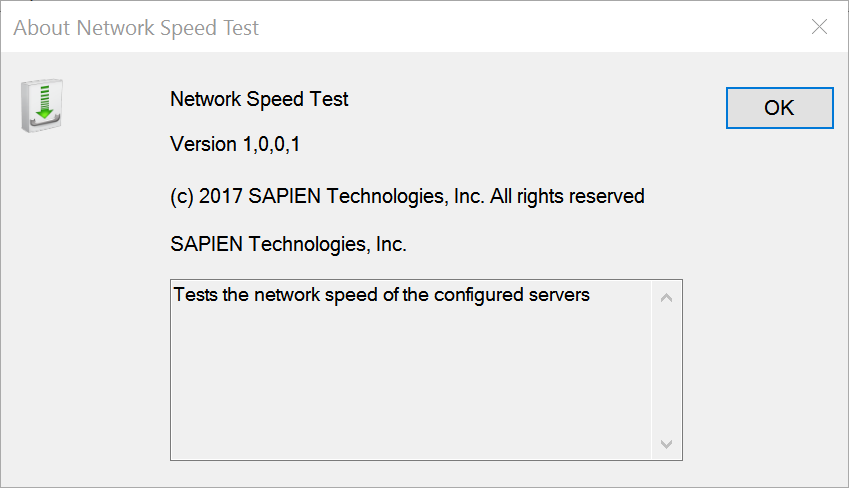
Now you can actually determine what version your users run by asking them to simply go to the about box.
It took about ten minutes and some minor modifications to make a simple command line script into a Windows Notepad style application.
There are some limitations of course but we here at SAPIEN think you will find this very useful in enabling others to use your scripts.
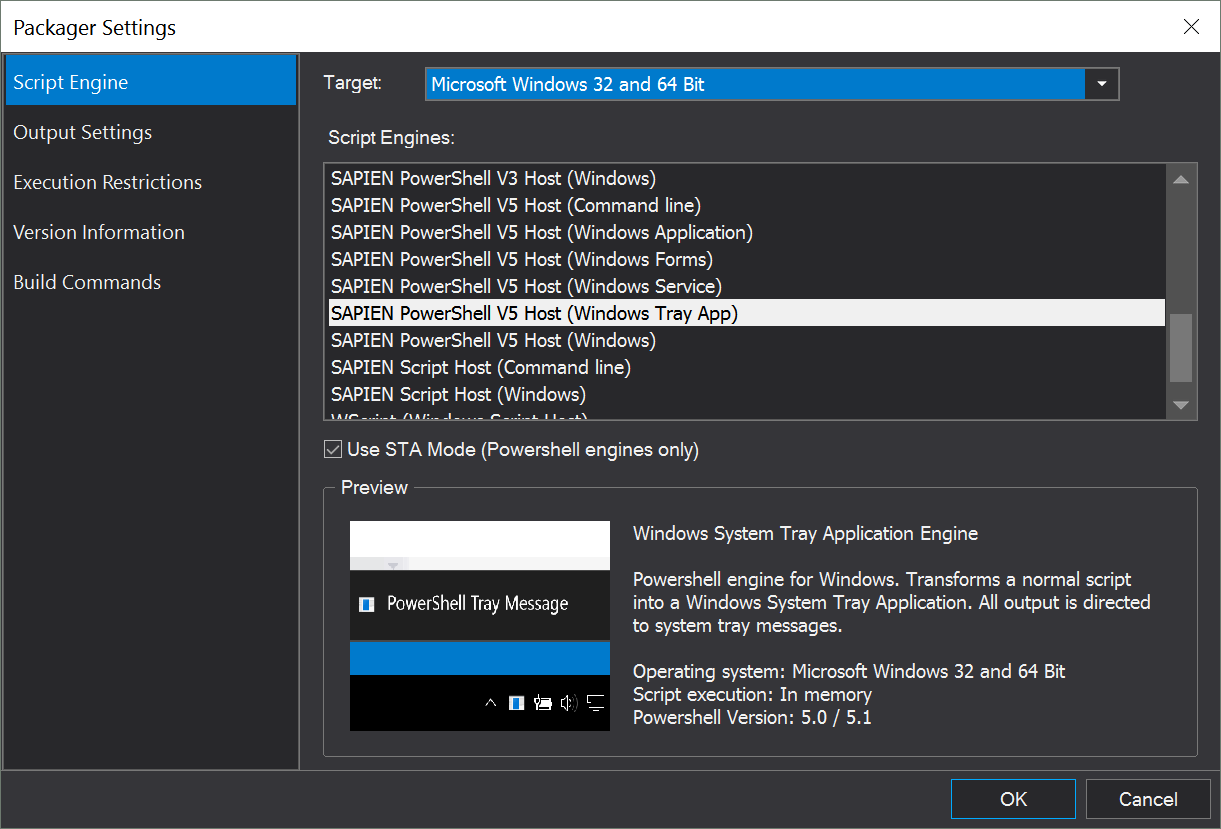
The Packager Engine
Creating a system tray application with PowerShell
One of the great benefits of PowerShell is the ability to very quickly retrieve system information and metrics. Again, we start with a script I found on the internet.
Here is a shout out to Sravan Kumar for sharing his script to check website availability and response times. His script produces an HTML report that we will not use. We want a tray application that checks a list of web sites in intervals and alerts us if one is not available or slow with a tray message.
The list of sites the application checks must come from a text file that is loaded for each iteration, so that there is no need to stop and start the application to pick up new URLs. The goal for this engine was to allow you to convert a simple script to a system tray application while only using Write-Host, Write-Output etc. You should not have to know much about how tray applications actually work.
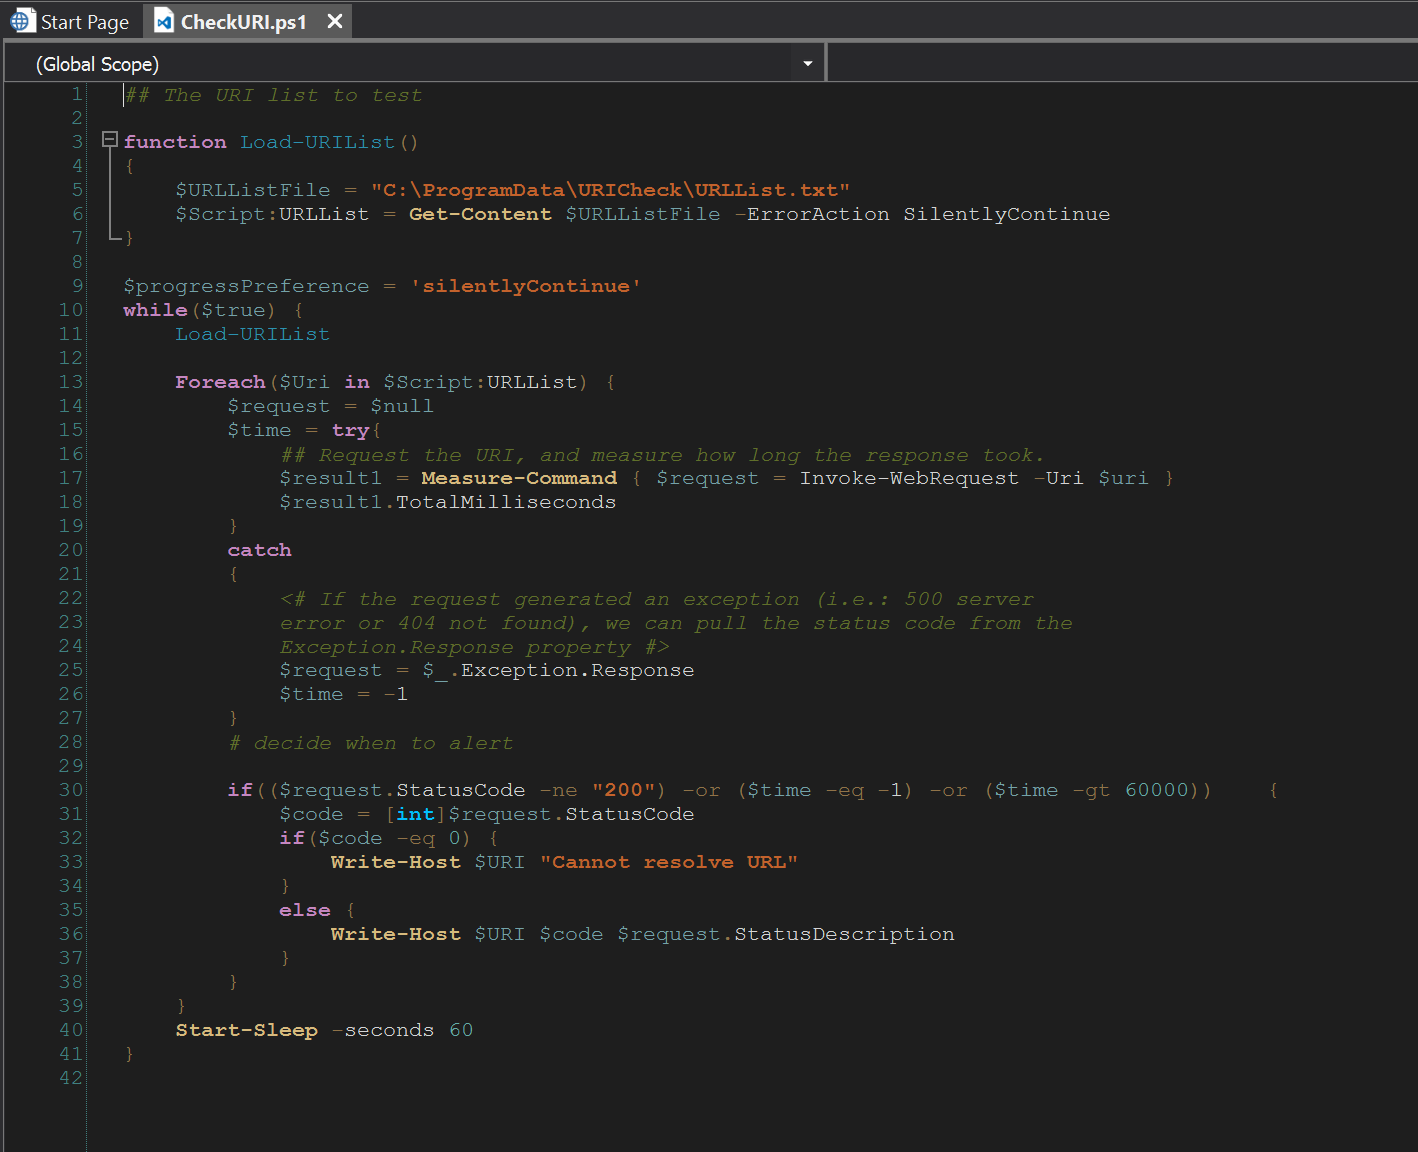
Don’t worry, the source for this script is attached to this post.
The file containing the URLs to be checked has to be here: C:\ProgramData\URICheck\URLList.txt and it contains one URL per line.
There are a few simple things you need to do when making a script into system tray application:
- It needs to be a loop. As you can see, this script has a while($true) loop. If you do not do that, your tray app will do things just once and then sit there.
- Sleep when you are not doing anything. The example sleeps a minute after checking the list. Realistically, it could check only every ten minutes and still be fine. If you omit that, you will be using up way more CPU cycles than you need.
Your script runs on its own thread, so exiting the tray application is not dependent on your script sleeping or not. - Set $progressPreference = ‘silentlyContinue’, unless you really, really need progress windows. Since the System Tray App engine is a Windows Application, it will display progress notifications as a popup window. Cmdlets like Invoke-WebRequest will display progress, no matter how quick. This can result in flashing progress popups from your applications. We did not generally disable progress display, because you may need to use it for some lengthy operation.
- Limit your output. Every time a tray app uses any PowerShell output method, a notification in the lower right corner will pop up and the associated system sound will be played. So only produce output if there is something that requires the user’s attention.
- Supply a meaningful icon. The icon of your application will be display in the system tray. You want to have a distinguishable icon in case you have more than one PowerShell based tray application.
- Fill out your version resources. A tray application package has an automatic about box, which displays the information in your version resources.
Last but not least, here is how you do all that. It is pretty simple. After running and debugging your script just as you always would, package it using the new Windows Tray App engine:
That’s it.
You can download the script and the packaged executables from here.
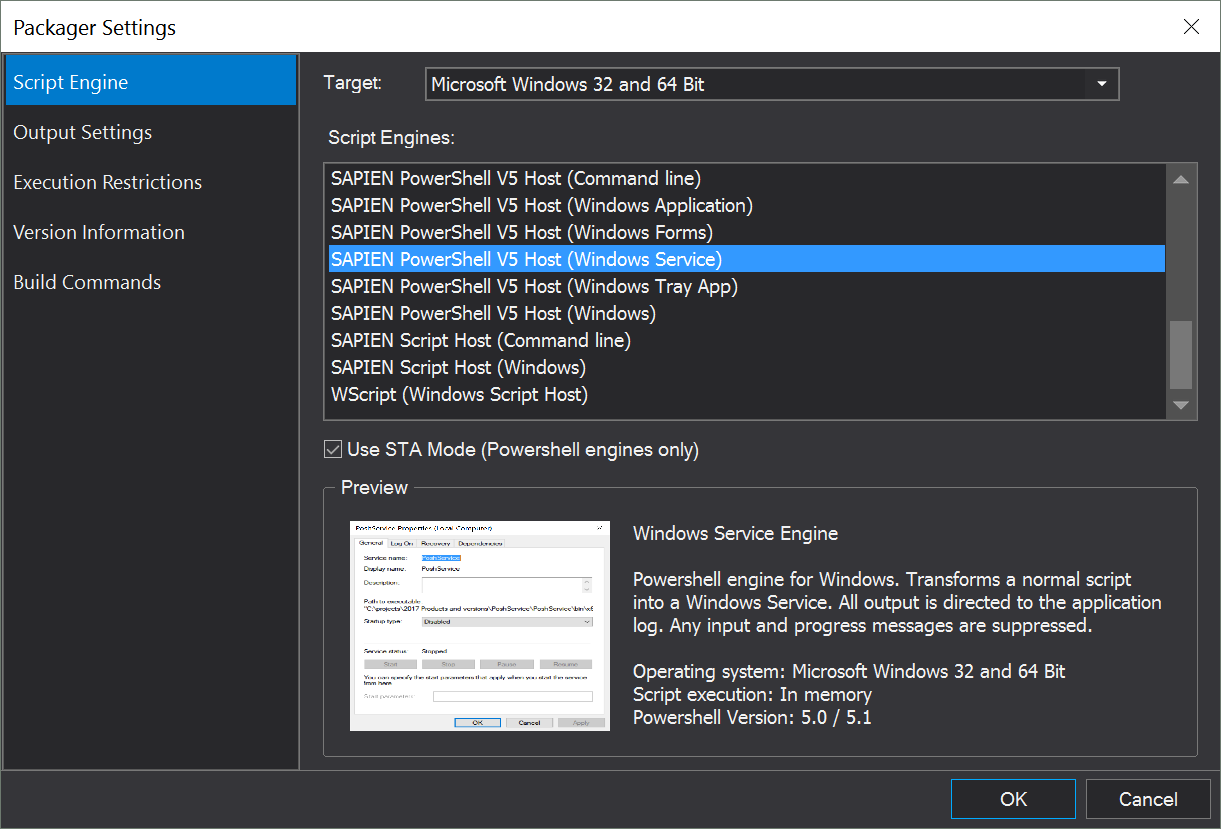
The Windows Service Engine
Write a Windows Service in PowerShell
Writing a Windows Service can be a challenging experience, even for a programmer. Generally, unless you do that exact thing for a living, nobody writes a Windows Service very often. So most folks don’t have a lot of experience with this particular task.
You do what most programmers do, you Google the task at hand. If you google “write a windows service in powershell” the first hit points to an MSDN magazine article. My compliments to the author, Jean-Francois Larvoire, who did a great job explaining the intricate details of building a service in Windows PowerShell. If you do this very often, you should definitely read that article.
But, for most of us, this is not a very frequent task. So I will show you a way of doing this without knowing much about services or C#. All you need is PowerShell. Instead of using a script from somewhere on the internet we use a one-liner today.
Get-Process solitaire -ErrorAction SilentlyContinue | Stop-Process –PassThruI am assuming you can see that this will simply terminate any process named ‘Solitaire’. We will call our service “SolitaireKiller”.
Just as previously with the System Tray Application in the last post, the script needs a loop, so it executes the code inside again and again. Also like the tray app, we need to sleep in between iterations so we don’t hog a CPU core for no reason.
For terminating a solitaire game it is not necessary to do that within a second of startup anyway, so we just go with a minute. I don’t think many folks will finish a game in that time.
while($true) {
    Get-Process solitaire -ErrorAction SilentlyContinue | Stop-Process –PassThru
    Start-Sleep –Seconds 60
}
Run that as a script and it will just kill any Solitaire game you are playing within a minute. We do want to get a notification when a process was terminated, so we make a little adjustment to our script
while($true) {
    $ProcessList = Get-Process solitaire -ErrorAction SilentlyContinue
    if($ProcessList) {
        Write-Host “Terminating Windows Solitaire process”
        $ProcessList | Stop-Process –Force | Out-Null
    }
    Start-Sleep –Seconds 60
}
That’s all. So now we make that a service. Package your script with the Windows Service engine and the PowerShell version most appropriate for your script.
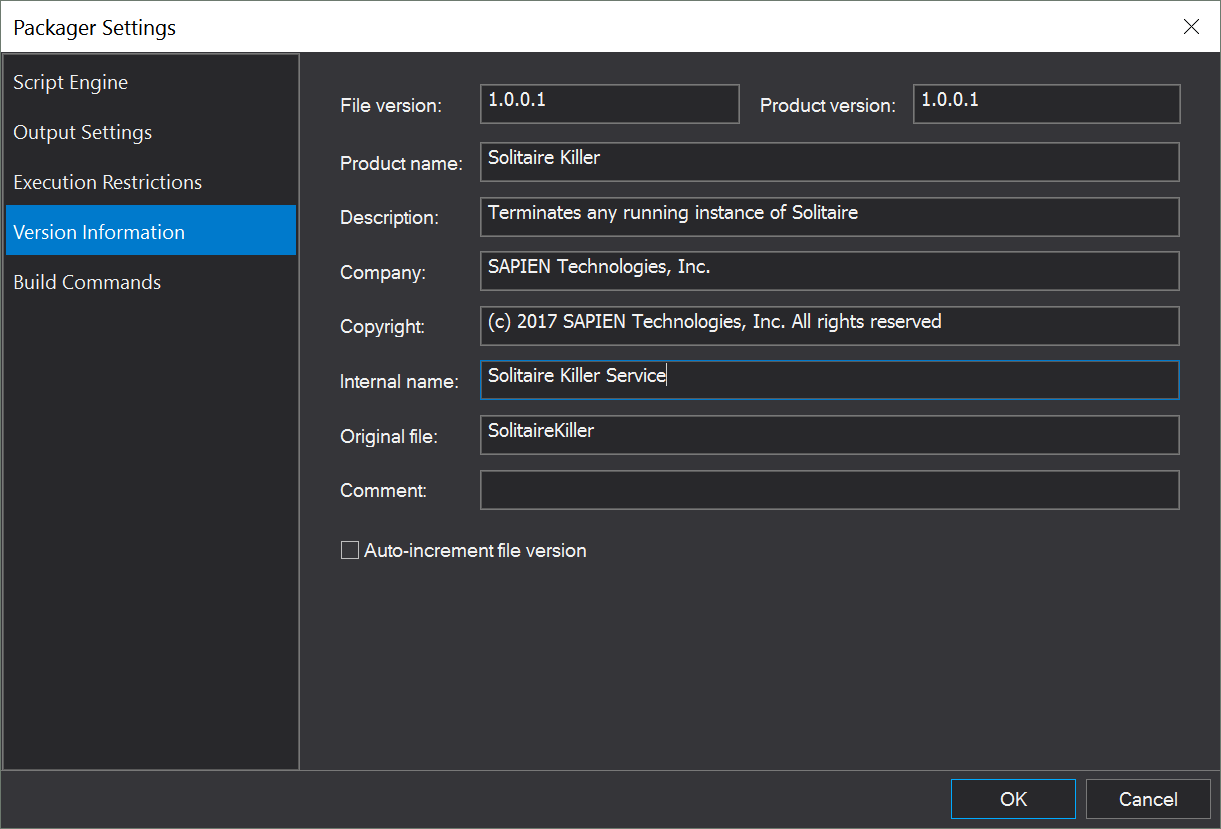
Make sure you enter all pertinent information in the Version settings.
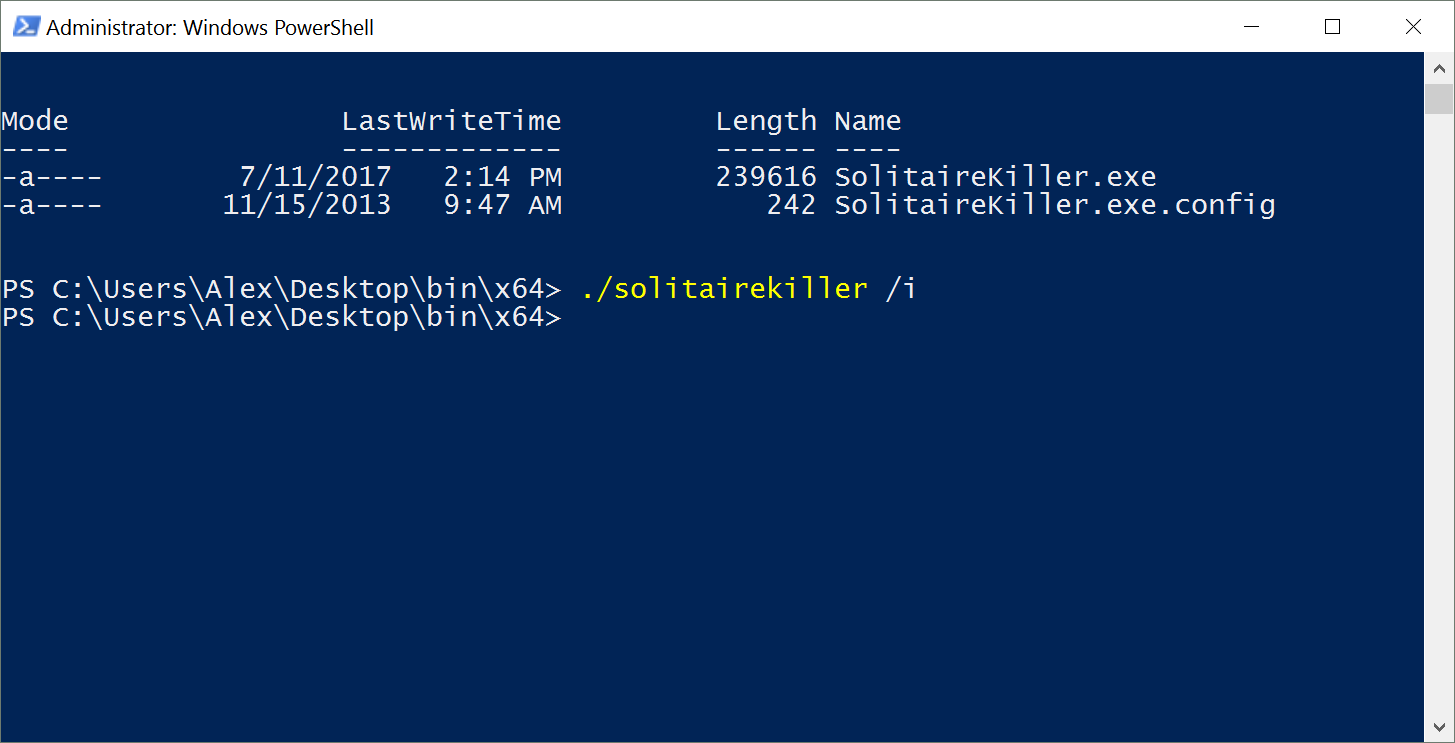
Services need to be installed on a system. To make your life easer, all that is also already build in. All you need to do is run the service executable from an elevated command prompt with /i (as in install)
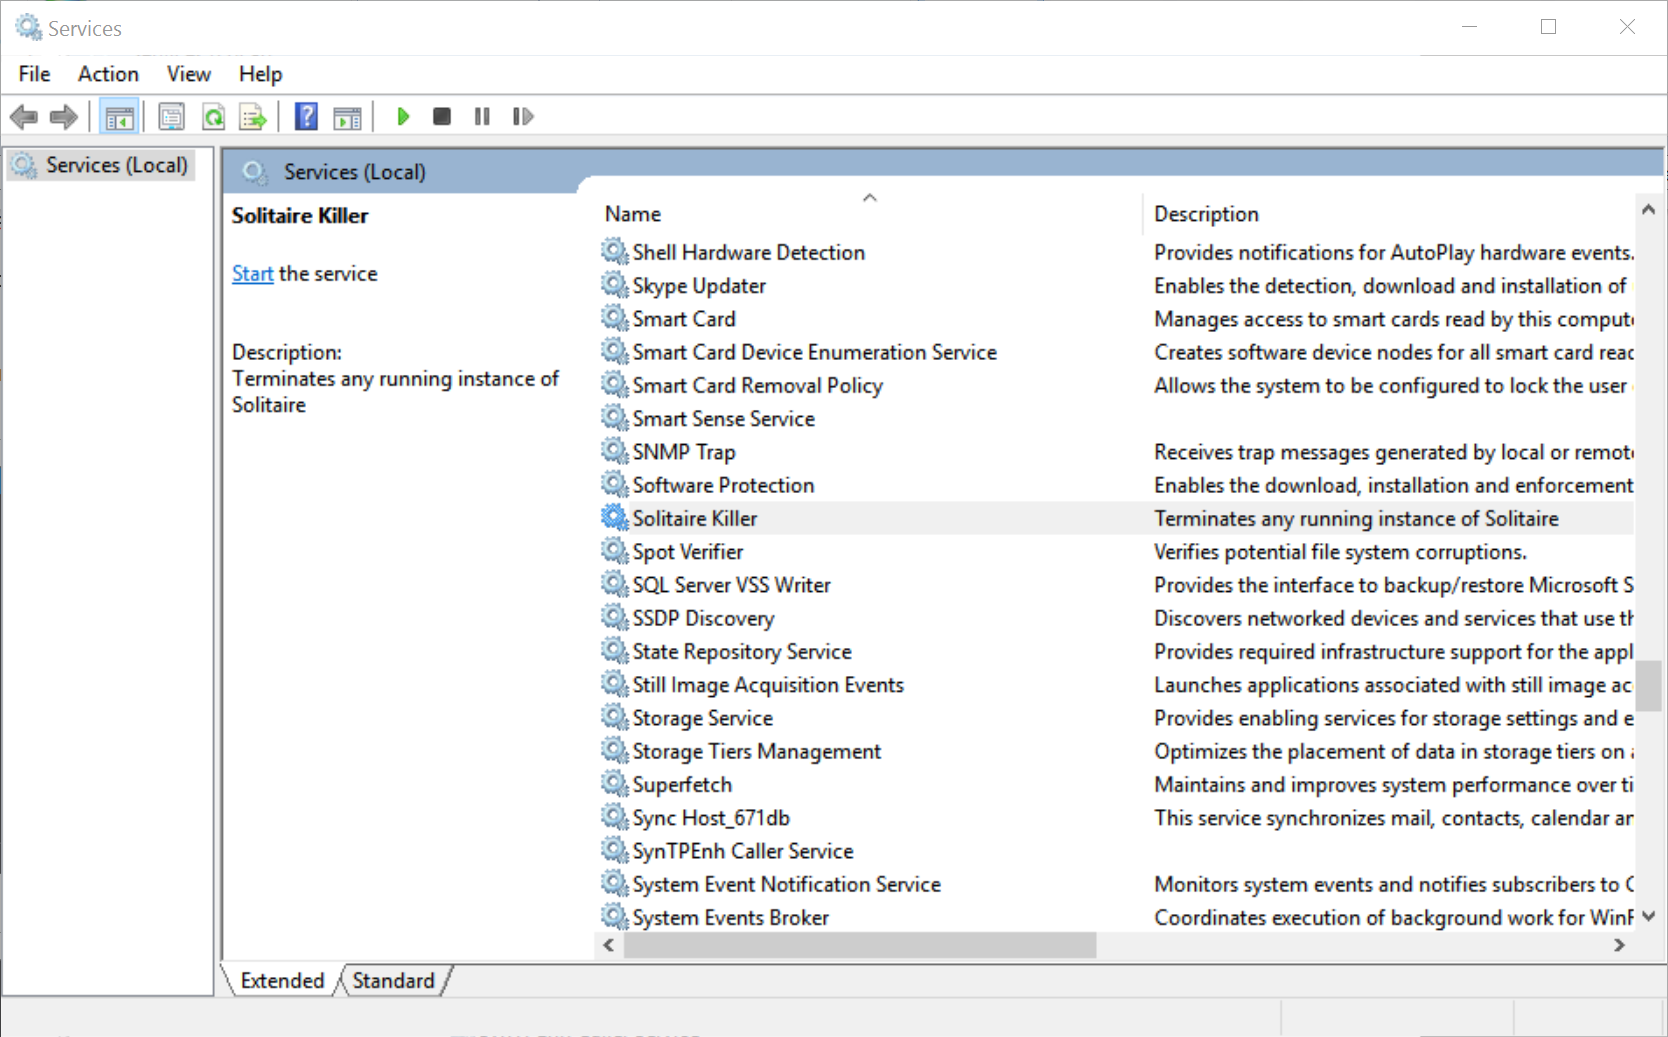
Now you can look at your service control panel and you will see the Solitaire Killer service. Remember the items you wrote in the ‘Product name’ and ‘Description’ fields for the version information? They are automatically used for the service name and description.
So now go ahead and start that service. Launch a game of Solitaire and wait. Within a minute it will be gone.
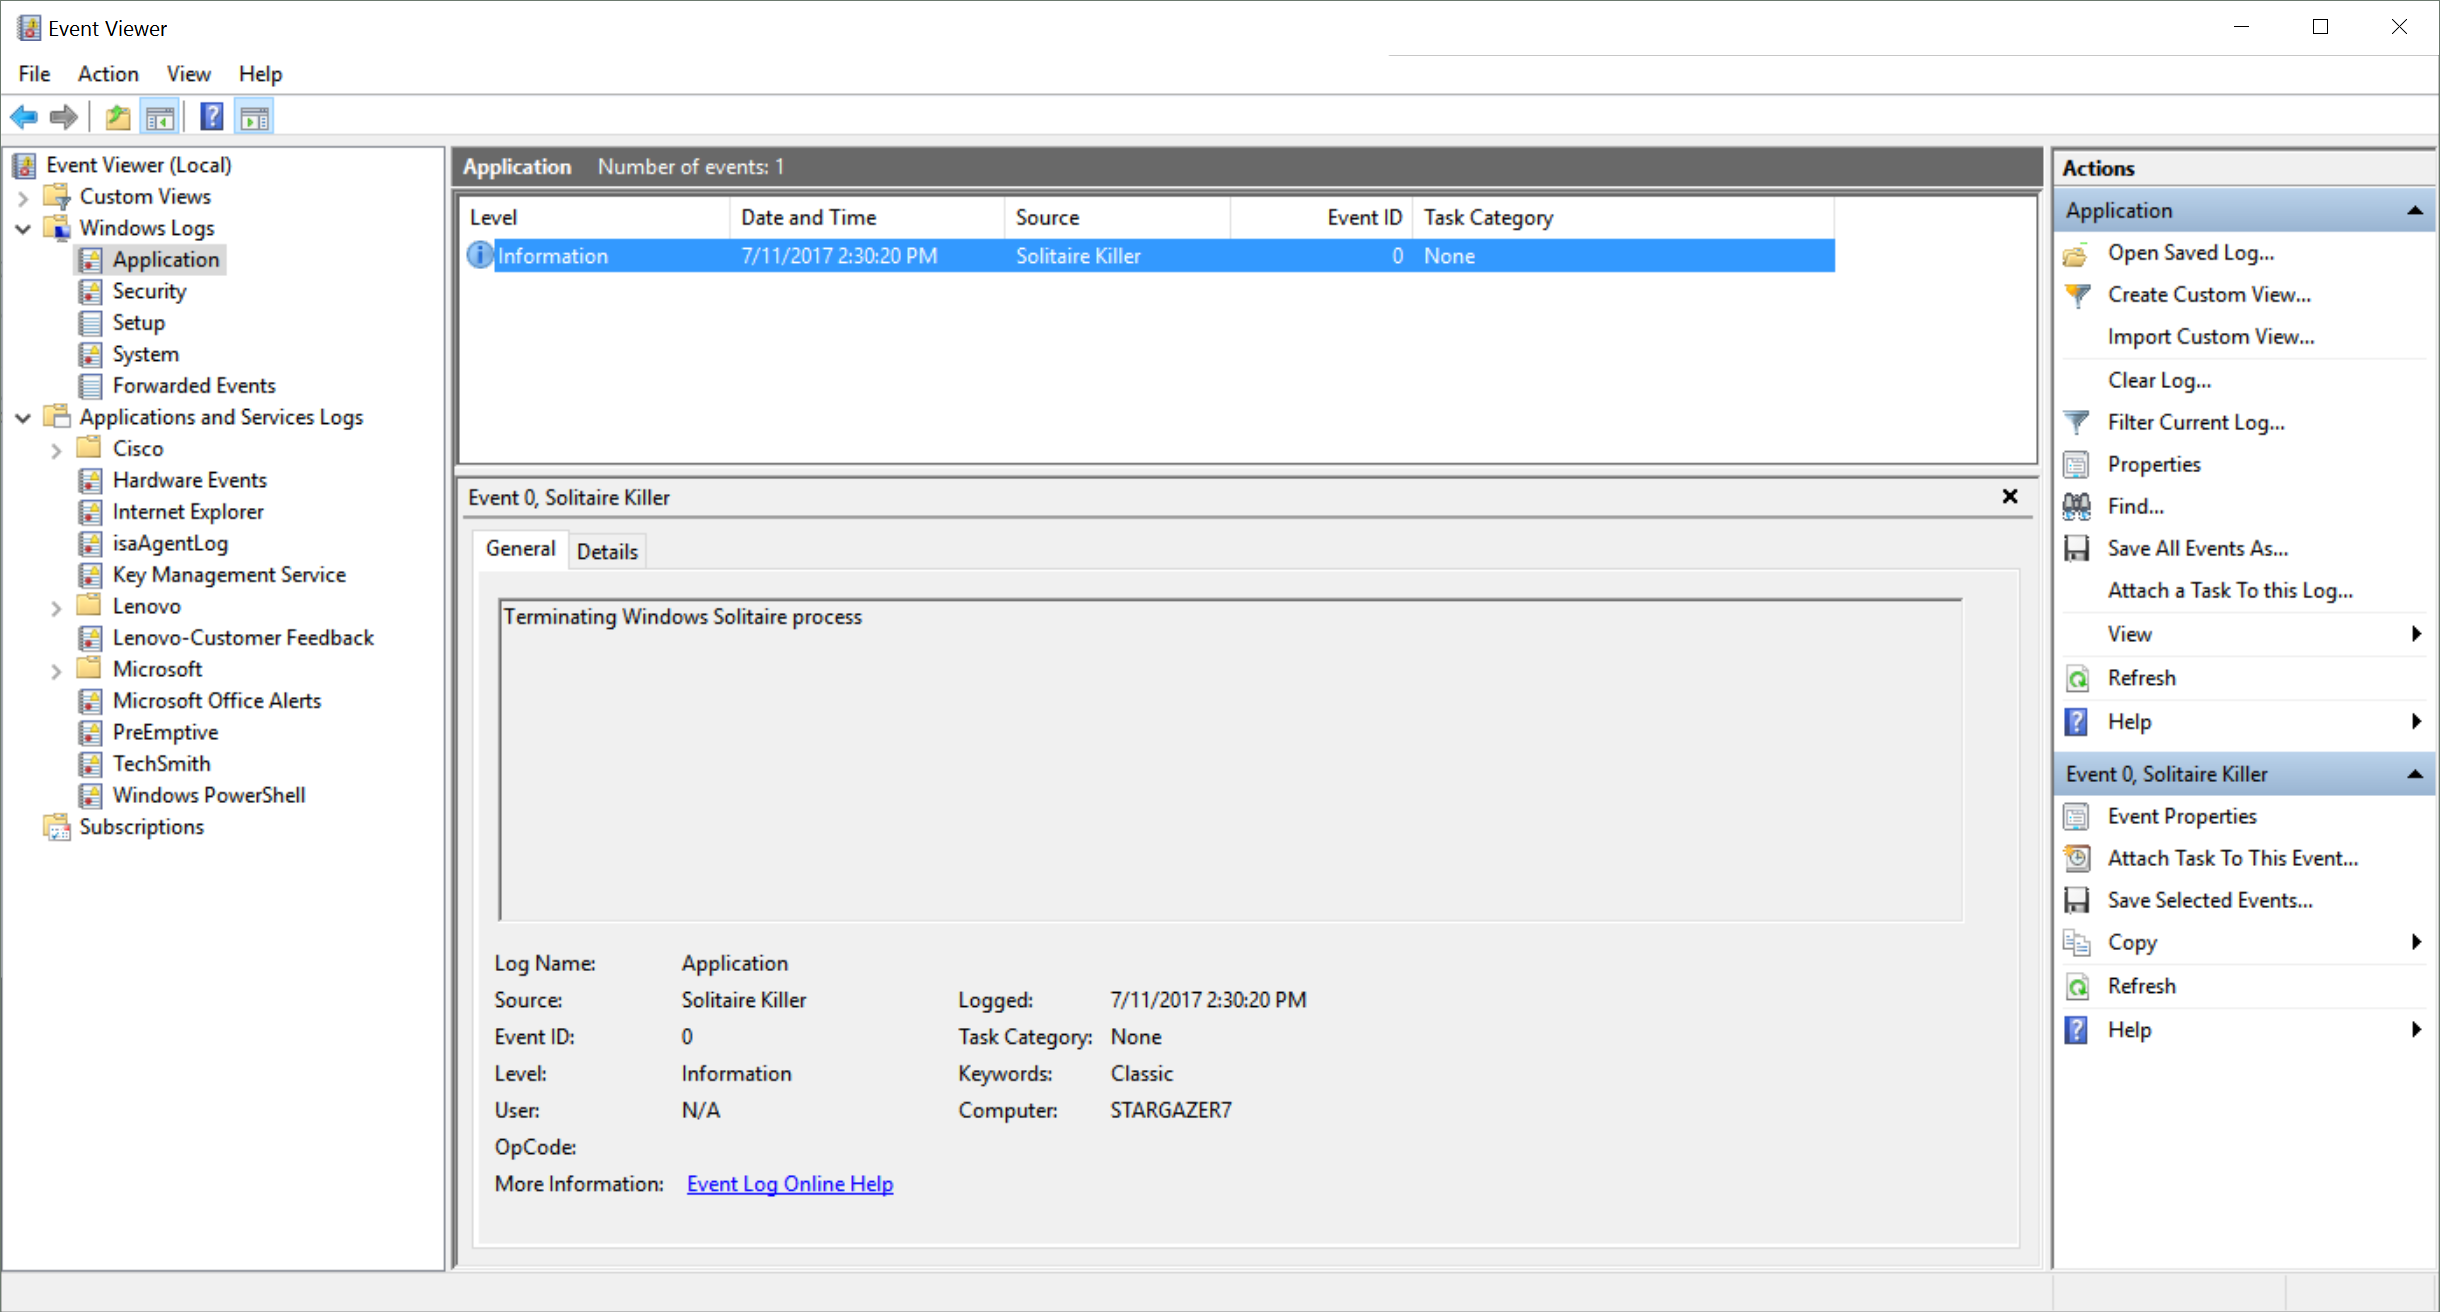
Now look at your event log. What you wrote there with Write-Host (or any other PowerShell output mechanism) will show up here in the Application Event Log.
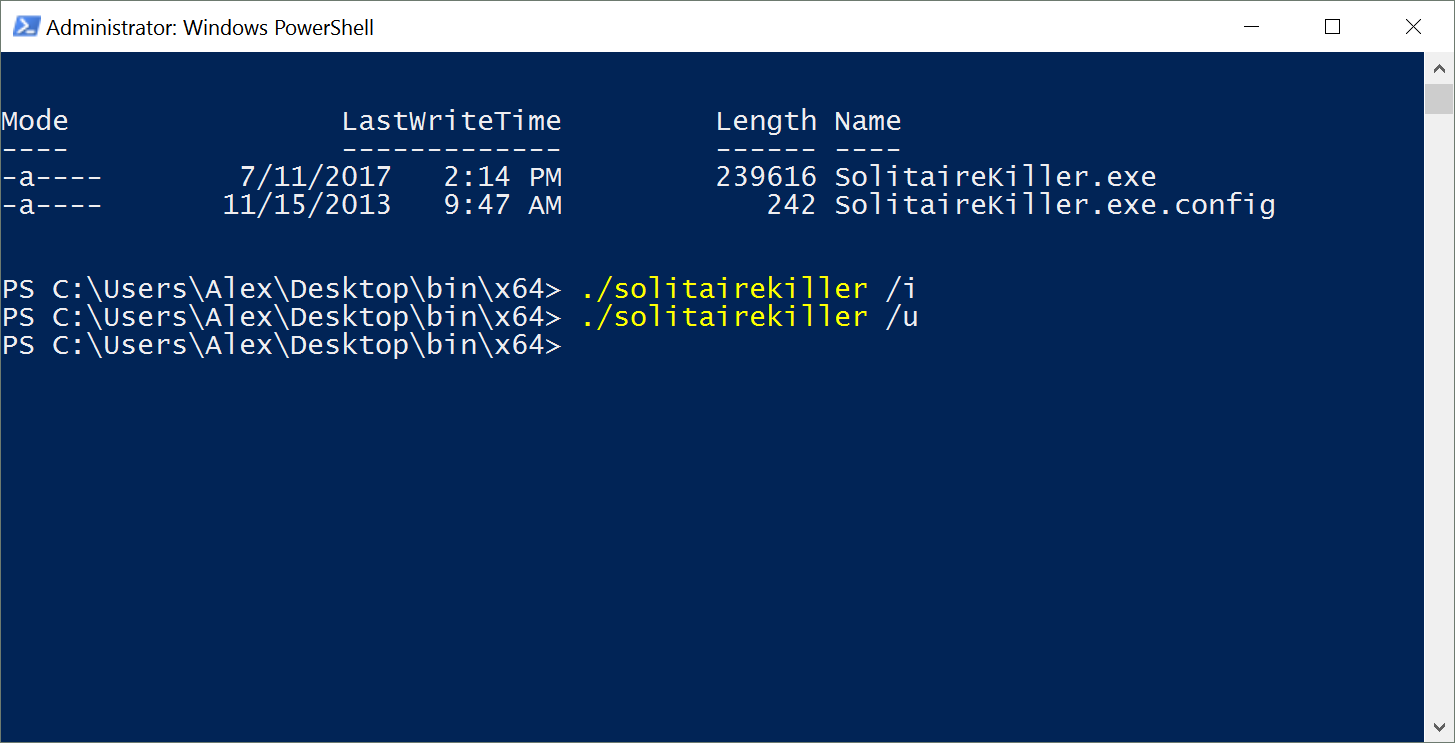
To remove the service from your system, simply stop the service and use the /u parameter (as in uninstall) and it will be gone. Please note that it may take a few seconds to exit and that you may need to restart the services control panel to see that.
You can download the script and the packaged executables here.
For licensed customers, use the forum associated with your product in our Product Support Forums for Registered Customers.
For users of trial versions, please post in our Former and Future Customers - Questions forum.