Single form or multiple dialogs?
- Details
- Written by Alexander Riedel
- Last Updated: 20 April 2016
- Created: 11 June 2012
- Hits: 17498
Transforming a command line script to a Windows application
We start with a simple little script as shown below:
It just prompts for a computer name on the command line, uses that information for WMI query and outputs the result to the console. Your existing command line scripts may just use a parameter instead of a prompt but that makes no difference for the purpose of this article.
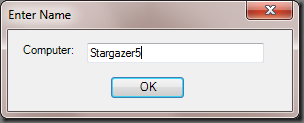
It follows, like most scripts, a basic Input-Processing-Output pattern. If you have previously used VBScript you may feel tempted to design your user interface in the same manner: Use a message box to prompt for the computer name, process the query and then somehow display the output. This would look something like this:

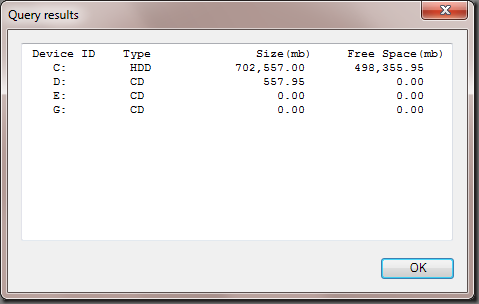
Then run the query and show the output:

This follows the same I-P-O pattern and it does the job, but it’s not ideal. For one, you have two forms or windows to maintain and change if so required and, secondly and most importantly, you have to restart the application for each computer you want to query. One of the most important questions you have to ask yourself when designing user interfaces is: “How will others use this?” If you only were to query ONE computer you could omit the whole entering a computer name business altogether. So the assumption is that a user will want to query more than one computer, maybe even more than one computer at the same time.
So let’s start with a design that allows a user to query one computer at a time:

Now we can enter one computer after another, press enter or click the button and see the results, lather, rinse, repeat.
Here are some things that you should note about this form:
- There is a horizontal bar between the input and the output are of the form. It’s just a group box with no text and a height of 5. It serves no other purpose other than to visually divide the space, but these small touches make a tool look better and easier to use.
- The “Run Query” button does not have to be clicked, entering a computer name and pressing enter is sufficient. This is accomplished by setting the button as the “AcceptButton” of the form. On every form you should evaluate what the default action is and set an accept button. Please note that the default button does not need to necessarily close the form. Only in secondary dialogs the OK button is expected to close the dialog.
- Note that the entry field for the computer name is long enough to allow the Run Query button to align with the right edge of the other controls. It doesn’t need to be that long to accommodate normal machine names, but filling the available horizontal space links the controls together.
- Last but not least, the size of the form is determined by the text box control displaying the output. It has to be wide enough to display the normal output from the underlying command. Since console output uses a fixed width font we have to set this text box’s font to something other than the default variable pitch font. Pick a font that is likely to be available on every target system. I chose Courier New in this example.
The PFF file for this form is available as QueryDriveSpace.zip here.
For licensed customers, use the forum associated with your product in our Product Support Forums for Registered Customers.
For users of trial versions, please post in our Former and Future Customers - Questions forum.


