Common Properties and Methods
- Details
- Written by David Corrales
- Last Updated: 14 June 2016
- Created: 01 June 2011
- Hits: 34056
User Rating: 3 / 5


Properties and Methods common to many WinForms controls
Common Properties
Common Methods
Common Properties
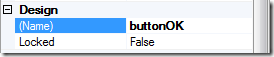
Name property: Specifies a name for the control
Use the Name property to assign a meaningful identifier to the control.
Value type: System.String
Default: (None)
As a best practice, the name consists of the control type followed by the control text. For example, $buttonClose identifies the Close button.
PowerShell Studio uses the Name and Text properties to assign a default name to the variable that contains the control object. This feature is effective on the following controls: Form, Button, RadioButton, CheckBox and Label.
Notes:
- To disable the automatic naming of controls, click Home, Options, Designed, and then uncheck “Sync control names with text”.
- When you change the Name property of a control in the designer, PowerShell Studio automatically renames the variable that represents the control in your script.
Name property in Property Pane:
Name variable in Script Editor:

Text property: Specifies the text displayed in the control
Use the Text property to change text in a control. For example, use the Text property to change the title of a Form or the text on a button, label or textbox.
Value type: System.String
Default: (None)
You can also use the Text property to get, set, and change the Text property value. For example, this statement displays a string in a Textbox.
$textbox.Text = "This is the text in my Textbox" |
Enabled property: Enables and disables a control
Use the Enabled property to temporarily enable or disable the default event of the control. For example, when a button is disabled, the user cannot click it. GUI designers often disable controls until the user has provided the input required by the command that the control runs.
Value type: Boolean ($True, $False)
Default: $False
For example, the following statements disable a Start button and re-enable it only when the user enters (non-space) text in the textbox.
$buttonStart = $false if ($Textbox.Text.Trim() -ne '') { $buttonStart = $true } |
Visible property: Determines whether the control is visible or hidden.
Use the Visible property to hide controls. Typically, you can hide controls that a user doesn’t need to to see or interact with. A good use for this property is to temporarily display a progress bar.
Value type: Boolean ($True / $False)
Default: $True
For example, this code makes a label visible when a user clicks a button.
$buttonDetail_Click = { $LabelDetail.Visible = $true } |
Dock property: Attaches a control to a border of a container
Use the Dock property to attach a control to the side of the parent container or make a control fill the parent container. Containers can be Forms, Panels, or Group Boxes.
Value type: System.Windows.Forms.DockStyle enumeration (Left, Top, Right, Bottom, Fill, None)
Default: None (not docked)
To set the value of the Dock property, use the Properties pane in PowerShell Studio. On the Dock row, use the Dock setting selector.

For example, this image shows a button docked to the top of a form.

This image shows a label with a Dock value of Fill.

Anchor property: Binds a control to the edges of a container
When a control is anchored to an edge, the distance between the control’s closest edge and the specified edge remains constant. Use the anchor property to move or size a control when the parent control is moved or resized.
The anchor property prevents a control from floating inappropriately. Typically, controls are not anchored only when the parent container is a fixed size.
Value type: System.Windows.Forms.AnchorStyle enumeration (None, Top, Left, Right, Bottom)
Default: Top, Left
To set the Anchor property of a control, use the Property pane in PowerShell Studio. On the Anchor row, use the Anchor selector.

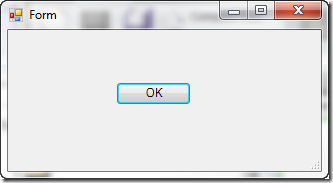
For example, the OK button in this form has default Anchor values, Top and Left

When a user drags the lower right corner of the form outward, the button appears to float inappropriately. In fact, it remains anchored to the top left corner.
In this image, the Anchor value is Bottom, Right. Now, when the user resizes the form, the button remains in the bottom right corner with its original offsets.

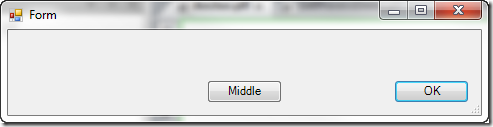
In this example, the Anchor property of the Middle button is set to Bottom.
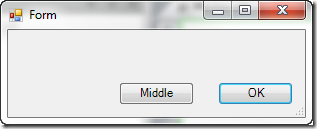
When you expand the form, the Middle button remains in its position at the bottom center of the form.
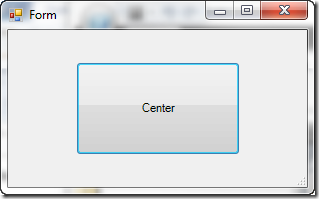
In this example, the Center button is anchored to all sides of a form (Top, Left, Bottom, Right) …
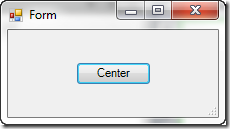
When a user enlarges the form, the button expands because the control maintains the same distance from every anchored side. When anchored to all sides, the control is resized whenever the form is resized.
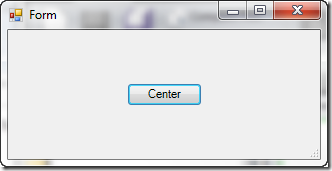
To keep a control centered, set the value of the Anchor property to None. Now, when the form is resized, the button stays at the center and maintains its size.
Common Methods
Focus method: Makes the control active and ready for input
Use the Focus method to select a control. For example, when you call the Focus method on a TextBox, the Textbox becomes active so that user can begin typing in it without clicking on the TextBox.
The Focus method might be affected by the tab order and other properties of the form. If Focus doesn’t seem to work, try the Select method.
Select method: Activates a control
Use the Select method to activate a control. For example, when you call the Select method on a TextBox, the Textbox becomes active so that user can begin typing in it without clicking on the TextBox.
For example, the following statement in the Load event handler for the Form activates the first textbox so the user can begin typing in it.
$FormRunScript_Load = { $TextboxUserName.Select() } |
You can also use the Select method to switch from one object to another object. For example, when a Textbox object is activated or has focus, a blinking cursor appears in the Textbox, even when the value of the ReadOnly property of the Textbox is True. To avoid the blinking cursor, use a Label instead of a Textbox, or use the Select property to activate a different object on the form, such as a button.
$FormRunScript_Load = { $ButtonStart.Select() } |
Want to learn to about other PowerShell GUI application controls? See the posts in our Spotlight on Controls series.
For licensed customers, use the forum associated with your product in our Product Support Forums for Registered Customers.
For users of trial versions, please post in our Former and Future Customers - Questions forum.