A Branded Image for a PowerShell GUI App
- Details
- Written by June Blender
- Last Updated: 22 September 2016
- Created: 08 September 2016
- Hits: 25945
User Rating: 5 / 5

Even though we're primarily scripters, we occasionally build applications with a graphic user interface (GUI). And, we want them to look nice. Specifically, we want them to look like we built them in 2016, not 1996.
PowerShell Studio gives you awesome flexibility for beautiful design. More importantly, it lets you save the entire design and selected elements of the design so you can share them among your team and reuse them.
So, for this project, we'll take one of my GUI apps and give it makeover. You can find all of the design files -- form templates, property sets, and control sets -- at https://github.com/juneb/ThinkingInEvents/tree/master/BrandedGUIApp.
Case Study: Get Online Links
When I mention a command in a blog post, I make the command name a hyperlink to its help topic online. To make that task easier, I have a little app that gets the online links to help for PowerShell commands from two dynamic sources, Get-Help and Get-Command, and gets online links to PowerShell About topics from a CSV here-string in the script.
To use it, I type the command name in my little app (it has dynamic auto-complete to make it easy), press Enter or click the Get button, and it displays the URL. Then, I click a Copy button and paste the URL in my blog post. Or, click Open to open the online version of the help topic in the user's default browser.
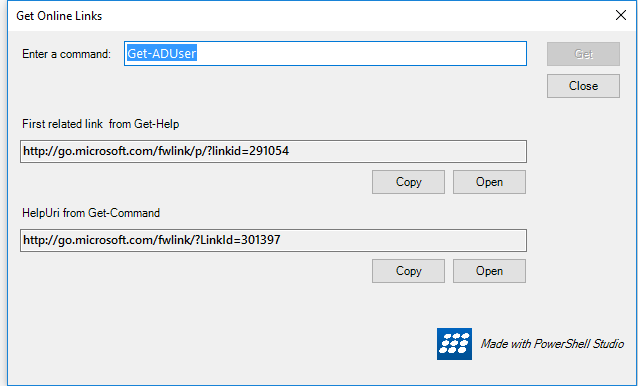
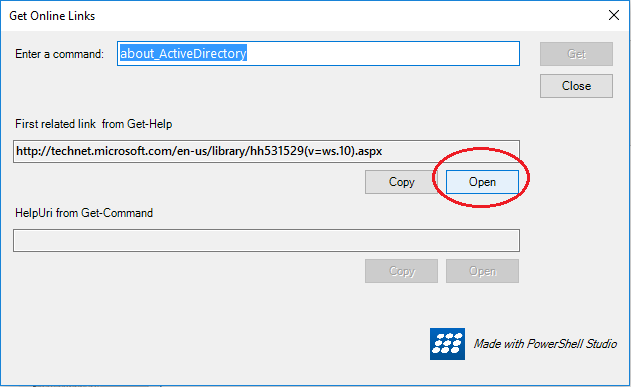
Because Get-Help -Online doesn't work for About topics (they're text), I have Copy and Open features for those, too.
It's not going to win any awards, but it works for me.
But, it wasn't very pretty, so I've given it a makeover. Snazzy*, eh?
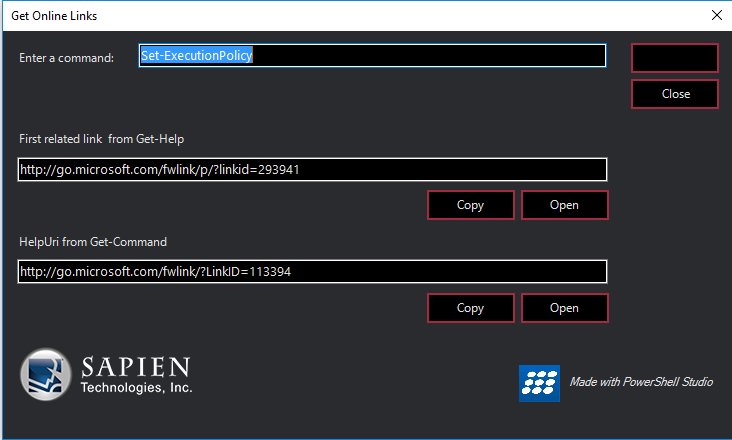
** Huge thanks to SAPIEN Graphic Designer, Maricela Soria, for her help. Let's just say my first draft wasn't this nice.
It has some nice effects that were easy to code. When you hover over and click the buttons, they change color. You can see for yourself.
To leverage the work that you've put into the design, you can save all and parts of it for sharing and reuse.
Design your Form
To begin, in PowerShell Studio, design the appearance of your form. I did almost all of my work in the Properties Pane in PowerShell Studio.
- Backcolor: Custom '42, 43, 47'
- Forecolor: ControlLight (System tab)
- Font: Segoe UI 9pt
- Logo: For the logos, I used a PictureBox control. To set the Image property value, I browsed to image files on disk. I found that .png files were best for small, distinct images.
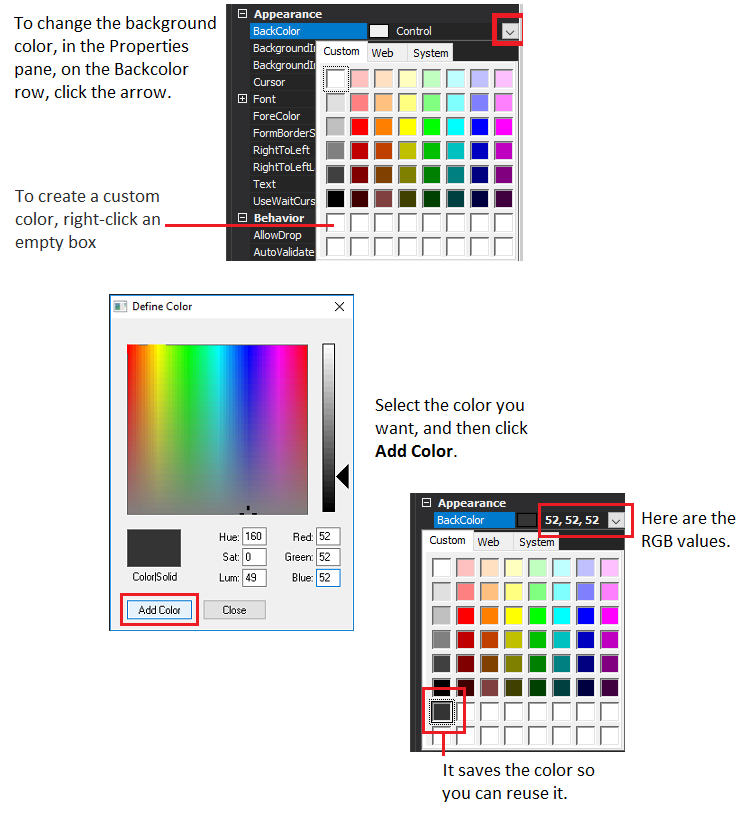
Create a custom color
I wanted a nice dark-themed background color, but I couldn't find one on the Web or System tabs, so I created a custom color with RGB values of 42, 43, 47.
Save your form as a template
When the form is complete, save it as a template, so you can share and reuse it. PowerShell Studio saves the .psf file, so it can be as simple or as complex as you like.
You can apply form templates only to new forms. To save only properties, so you can apply them to existing forms, see Save a form as a property set.
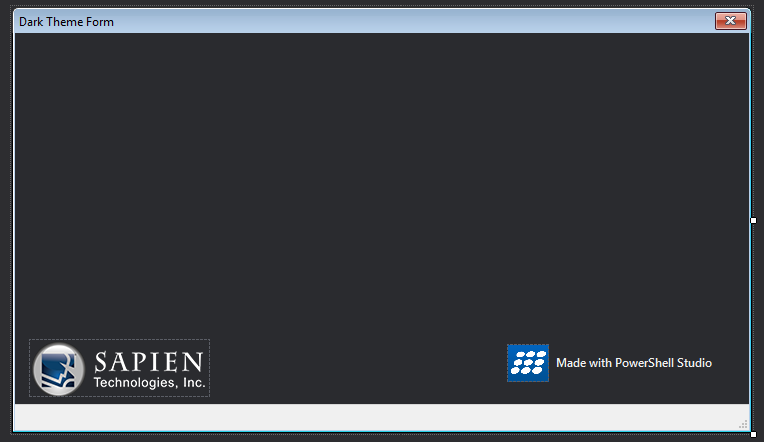
I could have saved my entire GUI app with all of the buttons, textboxes, logos, and the code as a template, but I wanted to maximize the reuse of my template, so I kept it very simple. Here's my form template file.
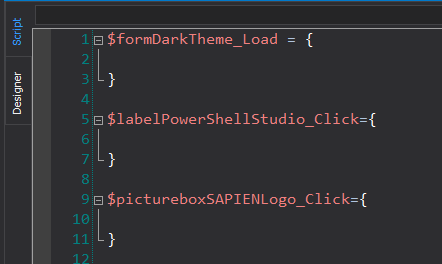
And here's the script with the required, but empty, default event handlers.
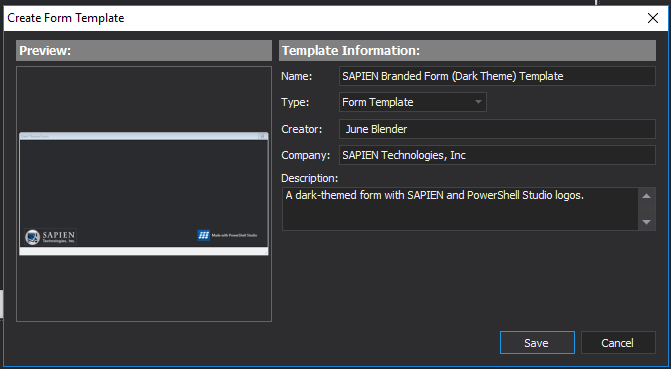
To save the form as a template:
- On the ribbon, click the Designer tab and, in the Templates group, click Create Form Template.
- Enter a name and description (the rest is pre-filled) and click Save.
For the template to work, save it in the default template location, $home\Documents\SAPIEN\Templates\Forms. To change the default Templates location, use Options/General/Directories/Templates Directory.
To use a form template:
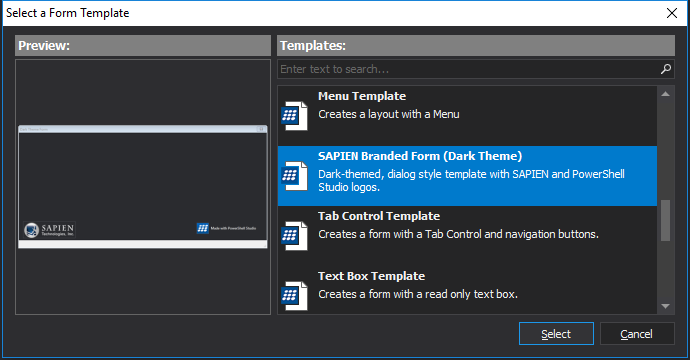
When you use a form template, you start with a branded form, instead of the default form.
- Click File, New, New Form, and then select the template.
Save your form design as a property set
A form template, which includes the entire .psf, can be used only to create new forms. To apply selected properties of a form to existing forms, save the properties in a property set. Here's my form property set file.
To create a property set for a form:
- Right-click the form and then click Create property set.
- Select the properties of the form you want to save.
- Add a description (required), and save the property set as a .properties file in in the default template location, $home\Documents\SAPIEN\Templates\Property Sets.
To apply the property set to a form:
- Right-click the form.
- Click Apply Property Set.
- Select the property set.
Design the Buttons
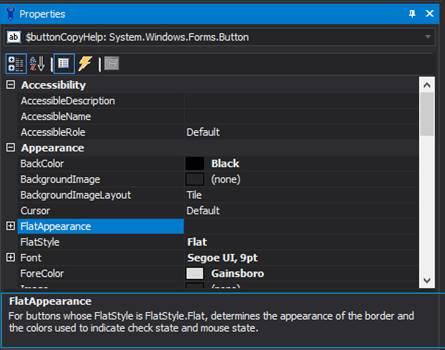
I wanted that pretty deep rose-colored border on my buttons. To find the property that controlled the border color, in the Properties Pane, in the Appearance category, I click each property and read the help at the bottom of the pane.
I found FlatAppearance and the help gave me the big hint that it works only when the value of FlatStyle is Flat.
Bingo! Here are the property values that I used for my buttons. Now you know how I got the cool effect when you hover over and click the buttons.
And, here are the .properties files for buttons and text boxes.
- BackColor: Black
- ForeColor: ControlLight *
- Font: Segoe UI 9pt
- FlatStyle: Flat
- FlatAppearance:
- BorderColor: 163, 42, 64
- BorderSize: 2
- MouseDownBackColor: 237, 56, 89
- MouseOverBackColor: 42, 43, 47
*Controls, like buttons and textboxes, inherit the ambient properties of the form, including the ForeColor and Font, although you can override them.
Save Property Sets
Now that I have one beautiful button, I wanted to copy and paste the design to all of the other buttons on my form. To do that, I created a property set.
A property set saves the style, appearance, and behavior of controls on the form, like buttons and textboxes. You can create property sets that can be applied to any control, or just the same type of control as your model. Unlike Form templates, a property set saves only property values, not the script associated with them.
To create a property set:
- Design one control, such as a button.
- Right-click the designed control, and then click Create Property Set.
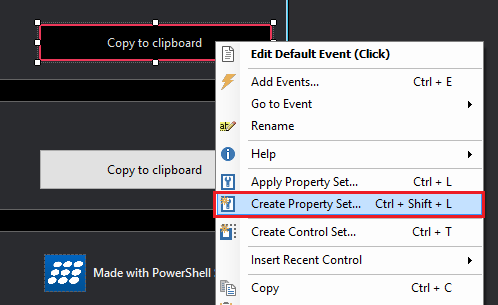
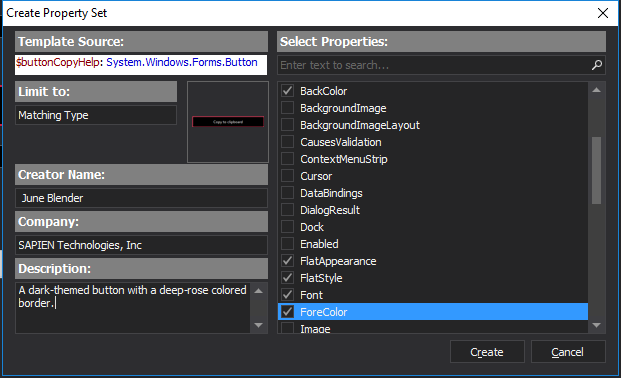
- Select the properties you want to save, enter a description, and then click Create.
>
For the property set to work, save it in the default template location, by default: $home\Documents\SAPIEN\Templates\Property Sets.
After you create a property set, you can apply it to buttons on this form or any other form.
To apply the property set to a button:
- Right-click a button or shift-click to select multiple buttons.
- Right-click any selected button and then click Apply Property Set.
-or-
Click Designer and, in the Templates group, click Apply Property Set.
Save Logos as Control Sets
Unlike a property set, which is a collection of properties and values, a control set consists of one or more controls, their properties, and optional script, including event handlers and functions. It's a very powerful construct.
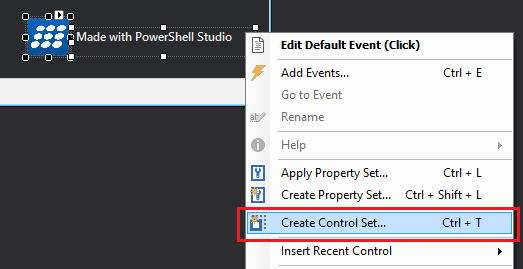
In our case, the use is pretty simple. The "Made in PowerShell Studio" logo combines a PictureBox control and a label. To save multiple controls (with their event handlers and functions) as a group, use a control set.
The SAPIEN logo is a PictureBox control. You can save the properties of the control, including the image, as a property set and then apply it. But, because you're typically adding the logo to the form, rather than re-styling an existing picture box, it's easier to add it as a control set. (Try both ways!)
To create a control set:
- Right-click or shift-click to select the controls. Then, right-click and select Create Control Set.
- Select the functions and events you want to save in the control set, and then save it.
To work, the control set must be located in C:\Users\JuneBlender\Documents\SAPIEN\Templates\Control Sets (but you can change that in Options/General/Directories).
To add a control set:
- In the Toolbox, click the Control Sets tab, and then double-click the control. Or, right-click and click Insert or drag and drop.
The process is a lot like adding a control, except that you get multiple controls, branded, and complete with the code to make them run.
Use the Branding
Now you have a nice branded GUI app and sharable tools to replicate the branding on new and existing GUI apps. Be sure to contribute to my Branded GUI Apps repo on GitHub: https://github.com/juneb/ThinkingInEvents/tree/master/BrandedGUIApp.
Just for fun, I applied the nice styling to the Get-Service GUI app that we create in Thinking in Events hands-on labs.
Have fun with it. And, be sure to post pics of your branded apps.
June Blender is a technology evangelist at SAPIEN Technologies, Inc. and a Windows PowerShell MVP. You can reach her at This email address is being protected from spambots. You need JavaScript enabled to view it. or follow her on Twitter at @juneb_get_help.
For licensed customers, use the forum associated with your product in our Product Support Forums for Registered Customers.
For users of trial versions, please post in our Former and Future Customers - Questions forum.