Refreshing Local Cache of PowerShell Cmdlets and Modules
- Details
- Written by Max Trinidad
- Last Updated: 16 August 2019
- Created: 07 December 2017
- Hits: 17755

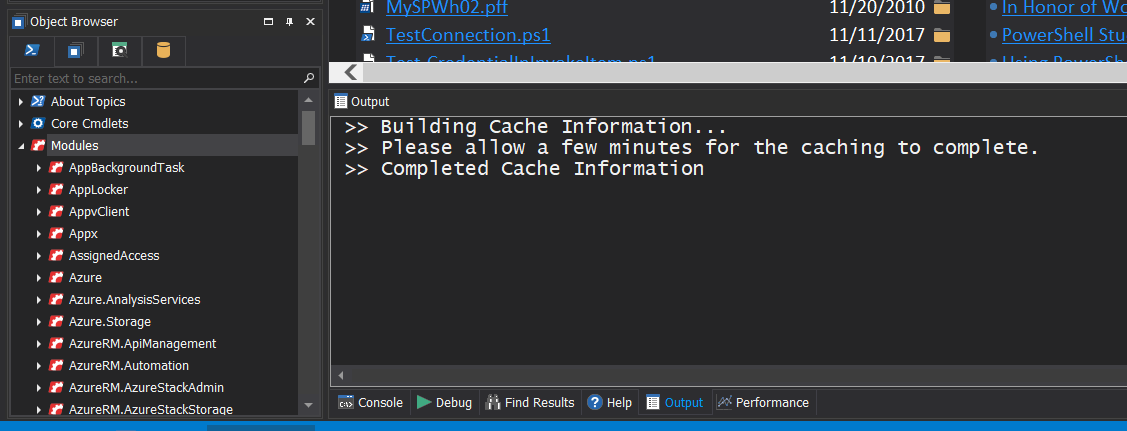
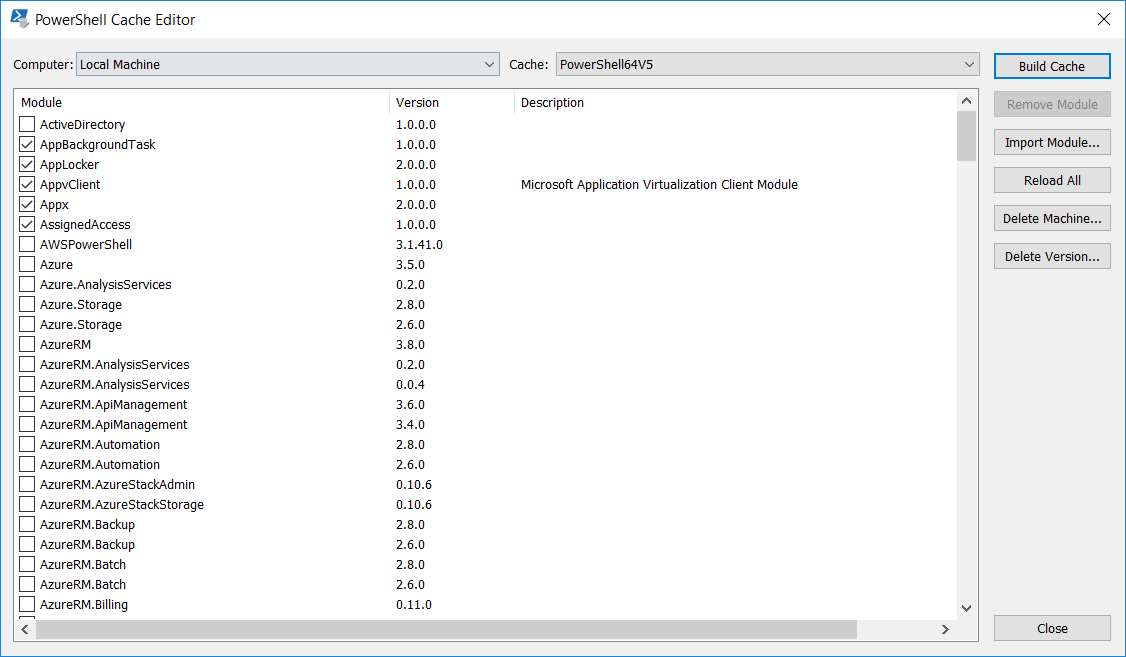
One feature of PowerShell Studio that you want to pay attention to is the PowerShell Cache Editor. When PowerShell Studio is opened for the first time, it creates a cache of all available cmdlets and modules that are on your local machine. The cached cmdlets and modules are used to provide PrimalSense, syntax coloring for your PowerShell scripts, and are displayed in the Object Browser.
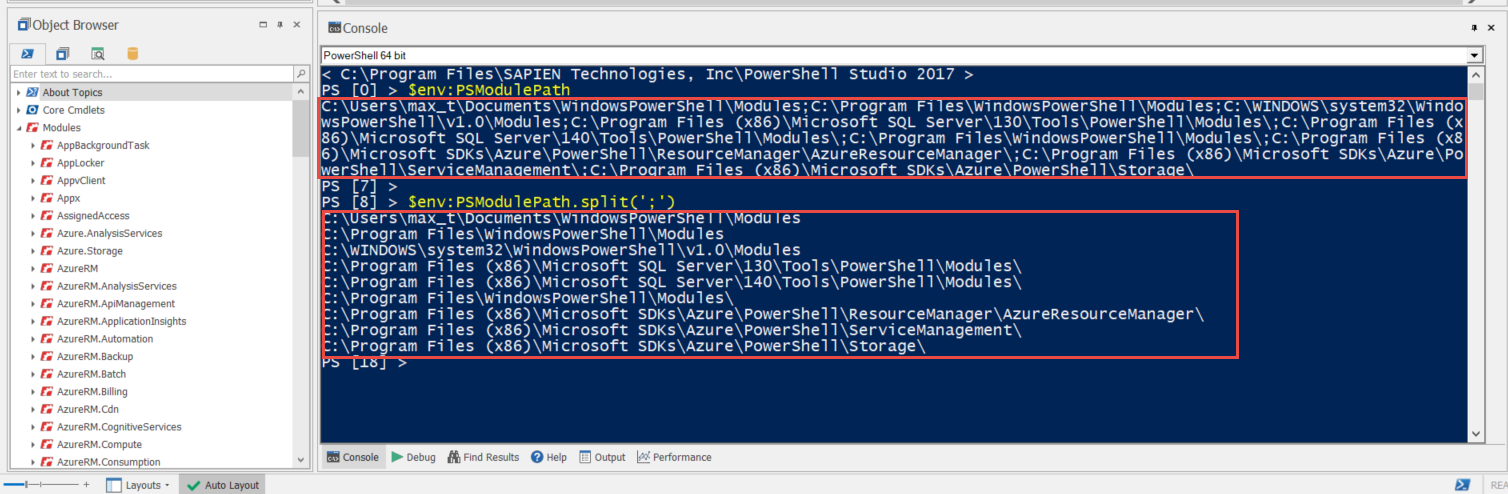
The module must be located in a PSModulePath directory in order to be discovered by the caching process. Use the following PowerShell one-liner(s) to display the content stored in the PSModulePath: “$env:PSModulePath“, or “$env:PSModulePath.Split(‘;’)“.
Because PowerShell Studio uses a cache of the modules, newly installed modules will not be displayed automatically in the Object Browser.
There are two ways you can update the cache:
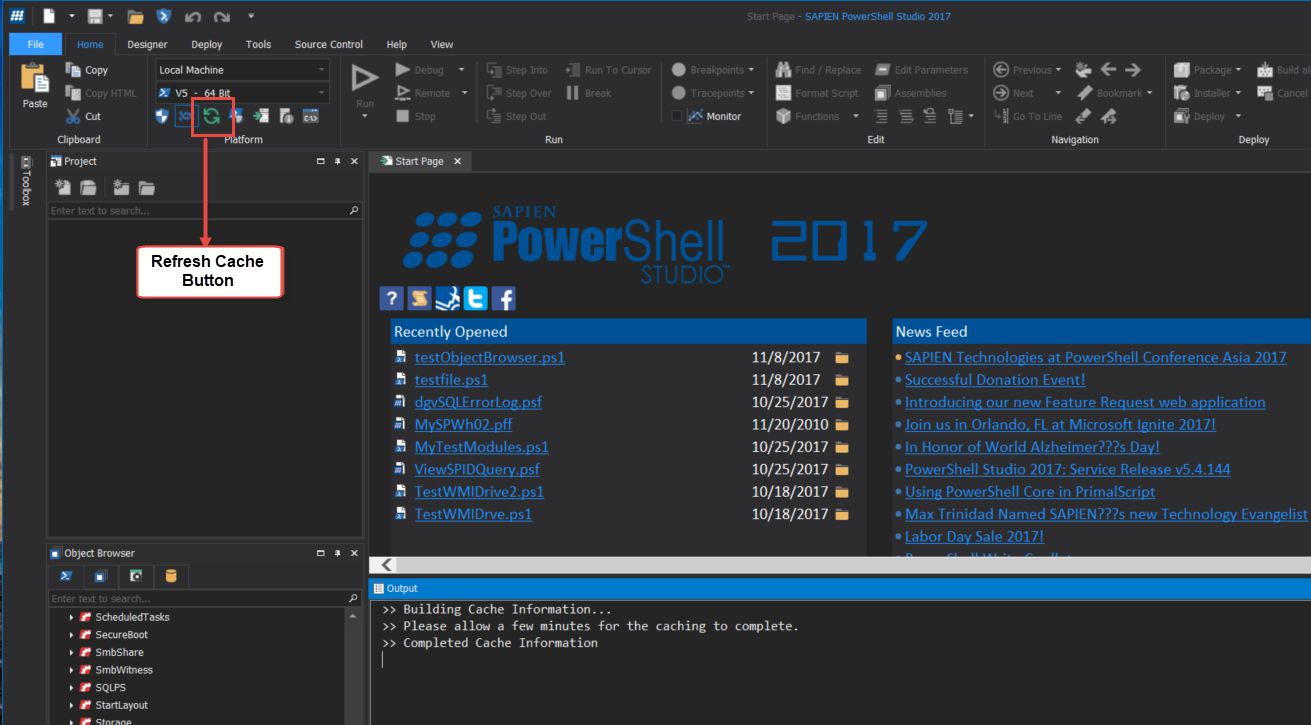
- Refresh Cache – Refresh the cache using the button via the Ribbon->Home->Platform->Refresh Cache.
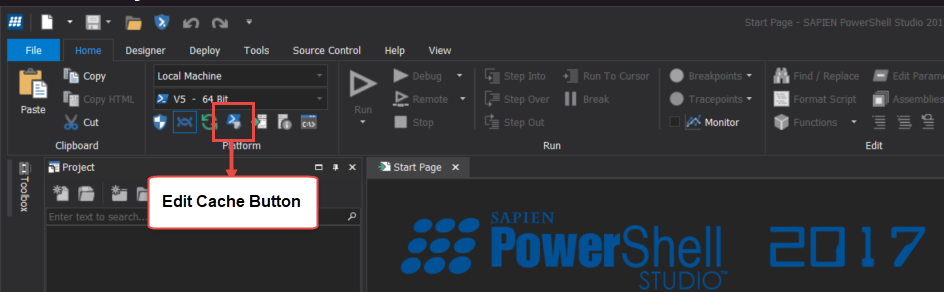
- Or use the PowerShell Cache Editor – to modify and update the existing cache, which can be found via the Ribbon->File->Home->Platform->Edit Cache icon.
This will open the “PowerShell Cache Editor“.
Using the Cache Editor to manually add or update a module
In order to load the new module(s) manually, follow these steps:
- Open the “PowerShell Cache Editor“.
- For example, look at the SQLPS module which has two versions installed:
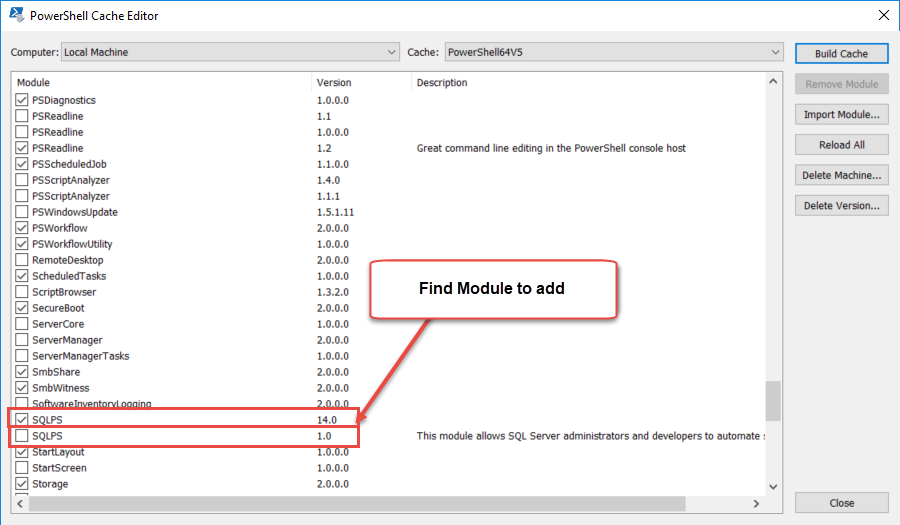
- Uncheck the older version – 1.0, then check the newer version (14.0).
- To update the Object Browser with the changes, click on the “Build Cache“, and “Close” the editor.
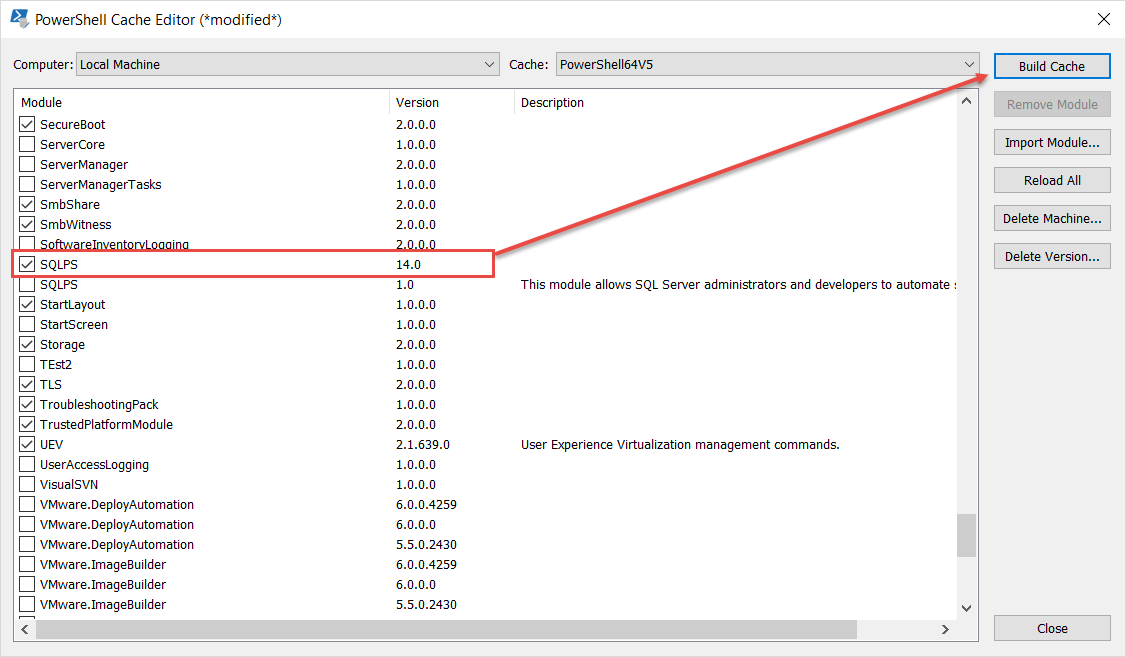
Now, the local cache has been updated with the module(s) you want to use in PowerShell Studio. Please notice that when you hover the mouse over the module name, the module version will be displayed.
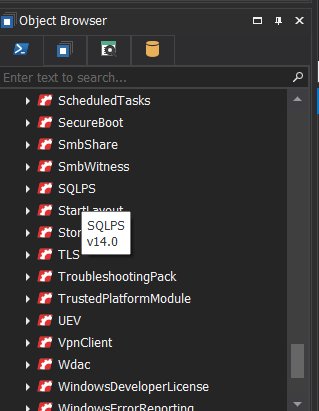
At this point, the selected module is available under the Object Browser section and can be easily added using the following steps:
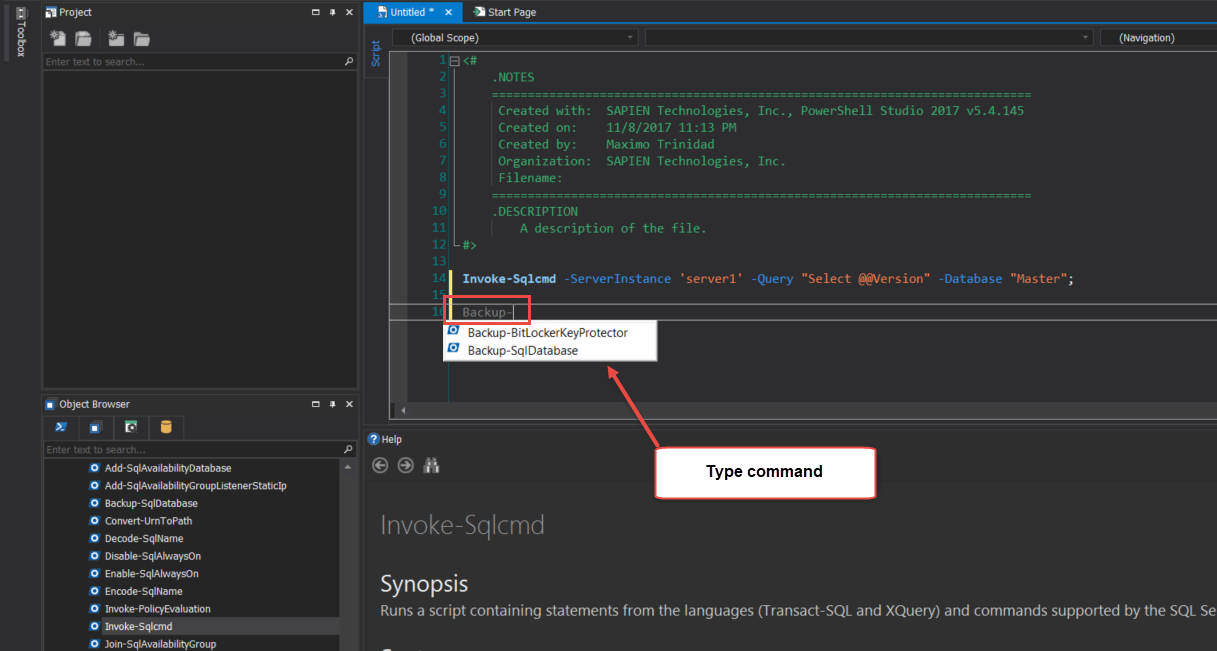
- By drag-drop from the Object Browser.
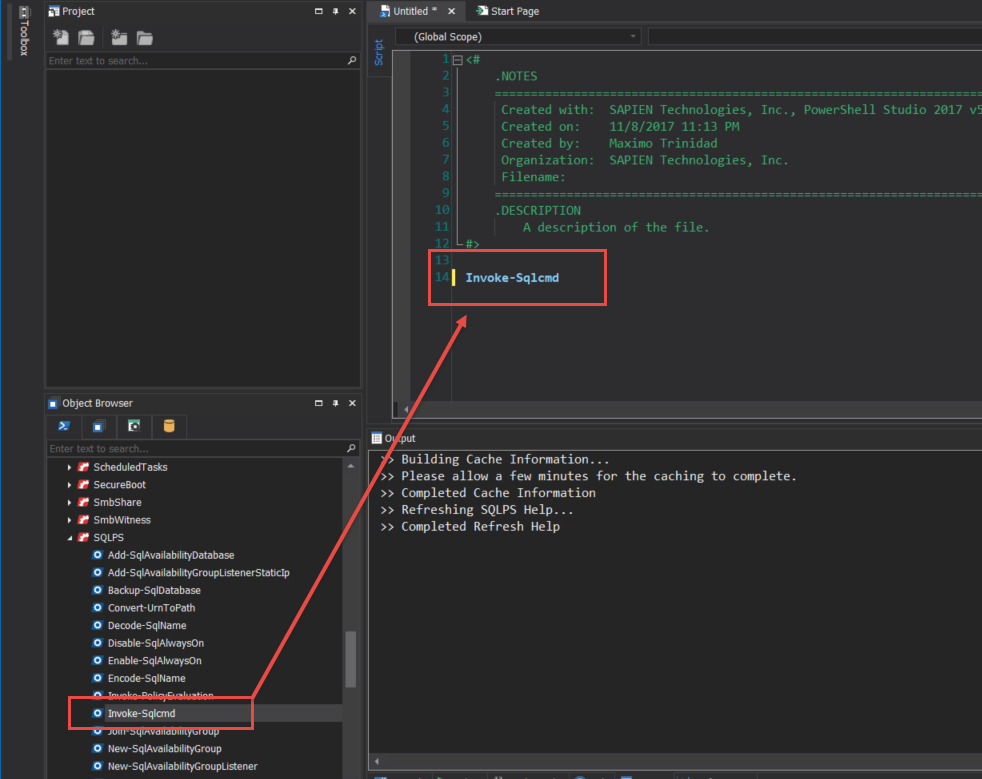
- Or, by just typing the command and the PrimalSense will response with a list of commands to choose.
Notice, while working with the “PowerShell Cache Editor”, there’s no need to use the “Refresh Local Cache“.
Just remember, when having multiple versions of the same module, make sure to use the latest one.
Companion Video: PowerShell Studio: Cache Editor Feature
For licensed customers, use the forum associated with your product in our Product Support Forums for Registered Customers.
For users of trial versions, please post in our Former and Future Customers - Questions forum.