Create a Single Function Help File
- Details
- Written by Max Trinidad
- Last Updated: 07 October 2019
- Created: 05 June 2018
- Hits: 7363

PowerShell HelpWriter™ is an essential application to have in your toolbox, especially when working with existing scripts, functions, or modules. Eventually, your scripts will be shared or given to someone else to maintain, and no one wants to inherit a script that is hard to follow or difficult to understand.
Including Help documentation with your scripts is a best practice that takes very little time to do, and demonstrates your quality of work to your IT peers. In this article we will show you how to create a PowerShell XML Help file and add it to a script.

Ease Of Use
PowerShell HelpWriter has the ability to build an XML Powershell Help file that can be included in a script file.
You can start using the tool as soon as you open the application—it’s as easy as filling in the blanks.
Use the application Menu, or both the Navigation panel and the Designer panel to build the Help file.
When the Help file is complete, the XML file can be validated before being implemented in the script file.

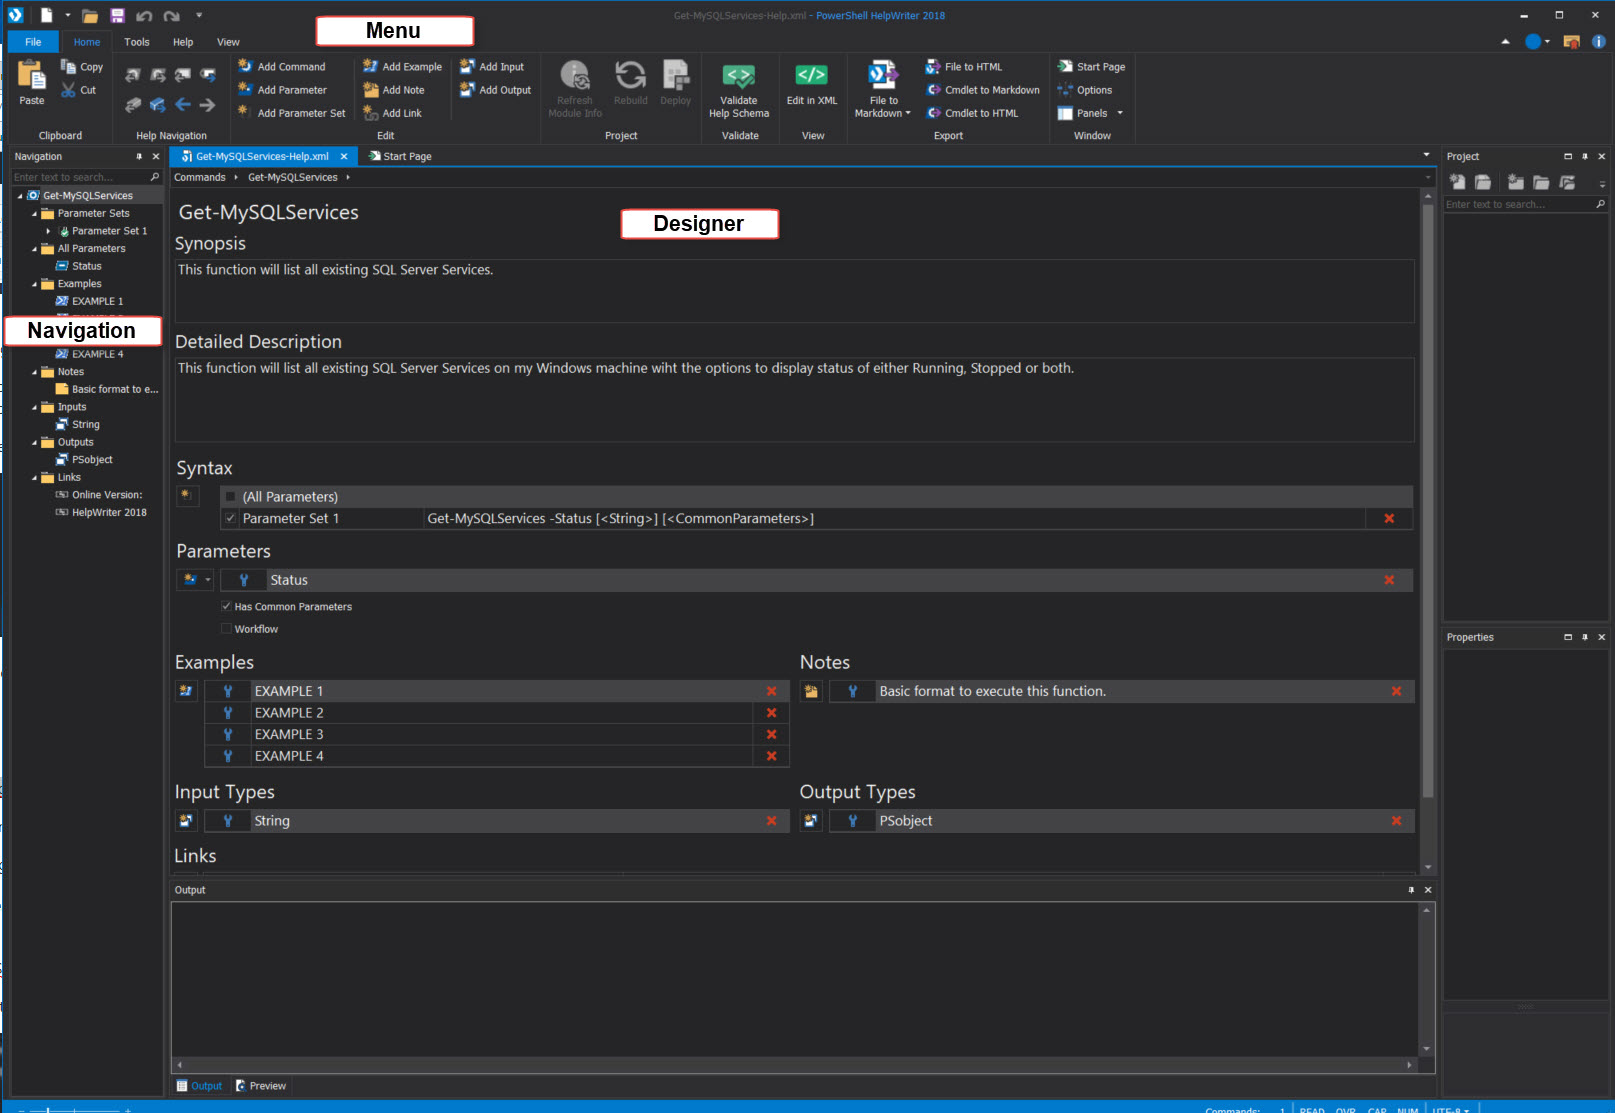
Create a Help File
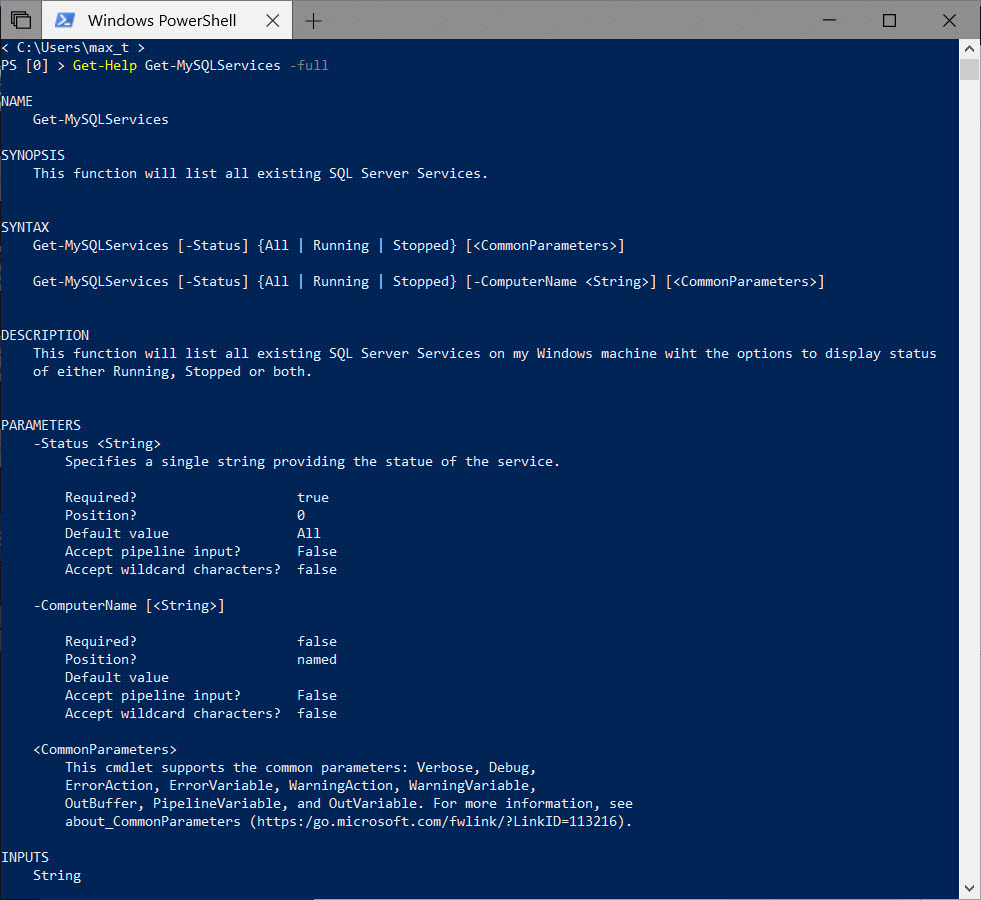
We are going to create a new Help file for an existing function called Get-MySQLServices.
On the File menu, click on New then select New Help File. This will open an empty New-Cmdlet Help file.
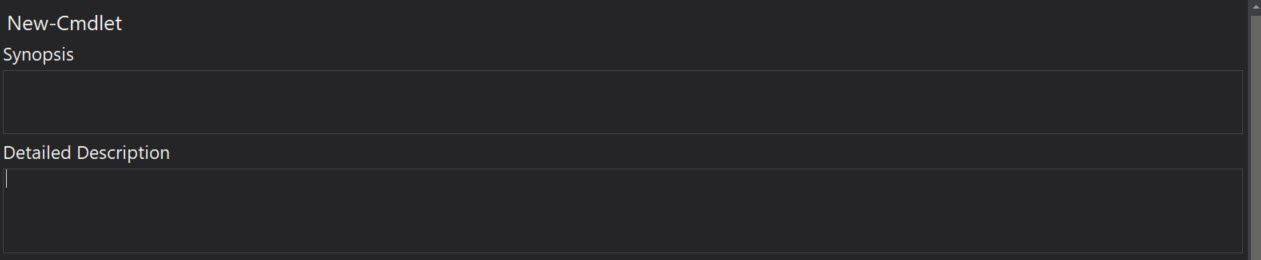
We will change the name from New-Cmdlet to Get-MySQLServices and start to fill in the information in the Synopsis and Detailed Description sections.
The Synopsis is a short description about the function and the Detailed Description explains more about the function.

Adding Syntax and Parameters
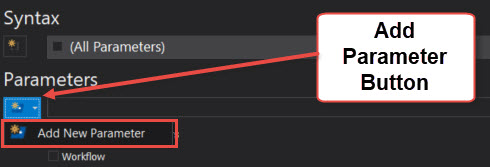
In the Syntax and Parameters sections we will configure how the function will work and what parameters are going to be used by the function.

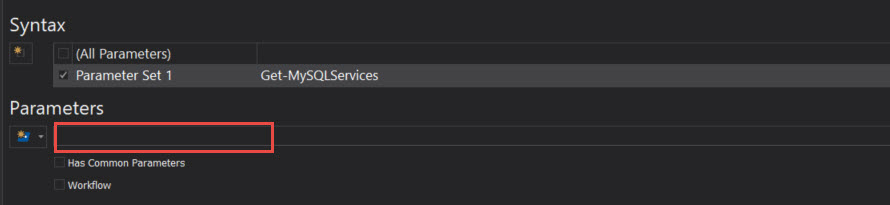
First, we need to add all of the parameters used by this function in the Parameters section. To start adding parameters click on the Add New Parameter button.
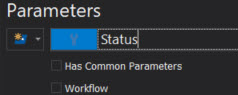
Parameter1 will be added first, then we will rename it to Status.
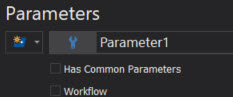
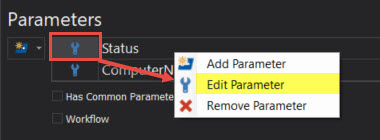
Next we will update the properties for each parameter by clicking on the "tool" icon next to the parameter name.
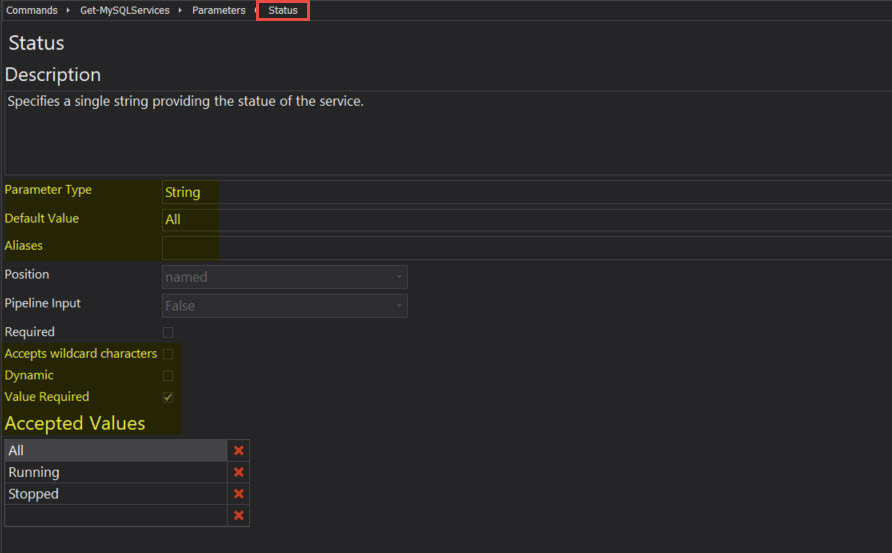
The following parameter properties can be modified in the Parameters tool editor:
- Description
- Default Value
- Aliases
- Accept Wildcard Characters
- Dynamic
- Value Required
- Accepted Values
In this case we are working with the Status parameter properties.
Keep in mind this is just for the Help file and will not effect the existing function script file.
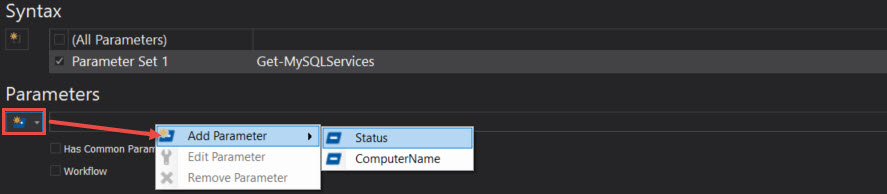
After adding all of the function parameters we need to go back to the Syntax section and add a parameter set to configure how the function will be used with the assigned parameters. We will add Parameter Set 1.
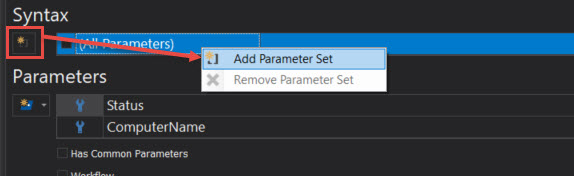

Creating Parameter Sets
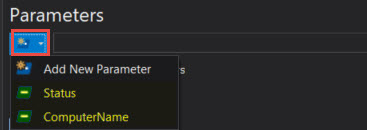
When clicking on the Parameter Set 1 checkbox you’ll notice that the Parameters field is empty. And, No! We haven’t lost any of the parameters we previously added.
Next we will add the parameters that we previously loaded in the Parameters section to the Parameter Set 1 field.
To add a loaded parameter: In the Parameters section under Parameter Set 1, click on Add Parameters or right-click on the parameter field. In the drop-down menu, select Status.
Remember, you can build a function script that can be executed in a number of ways. This is why we can add a Parameter Set for each way the function can be executed.
We will finish configuring the properties for the Status parameter to be use in Parameter Set 1 by going back into the Parameters tool editor pane. Now we can change some properties that were not enabled when we initially added the parameter:
- Position
- Input Pipeline
- Required
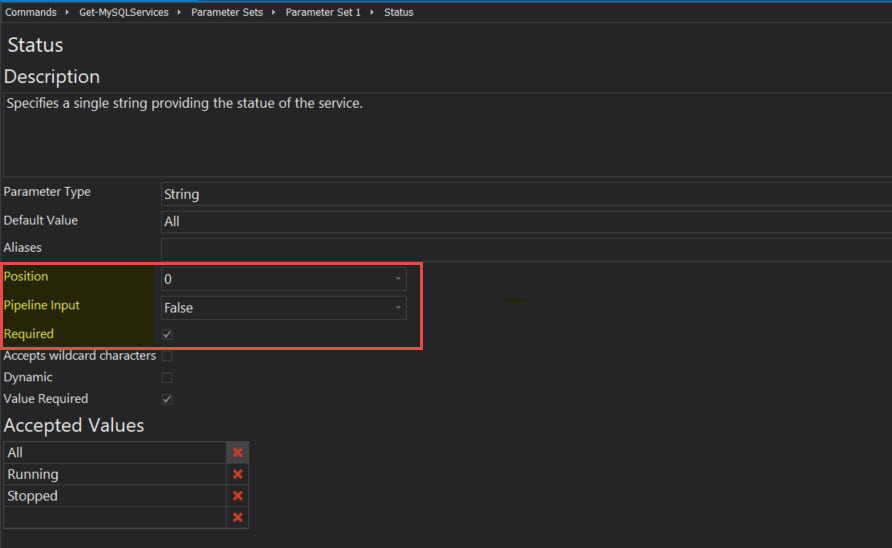
After the changes are done for the parameter set they are displayed in Syntax | (All Parameters)*

*Note: To Add/Update/Delete parameters simply click on the selected "Parameter Set x", then select either "X" to delete or select "Add New Parameter".
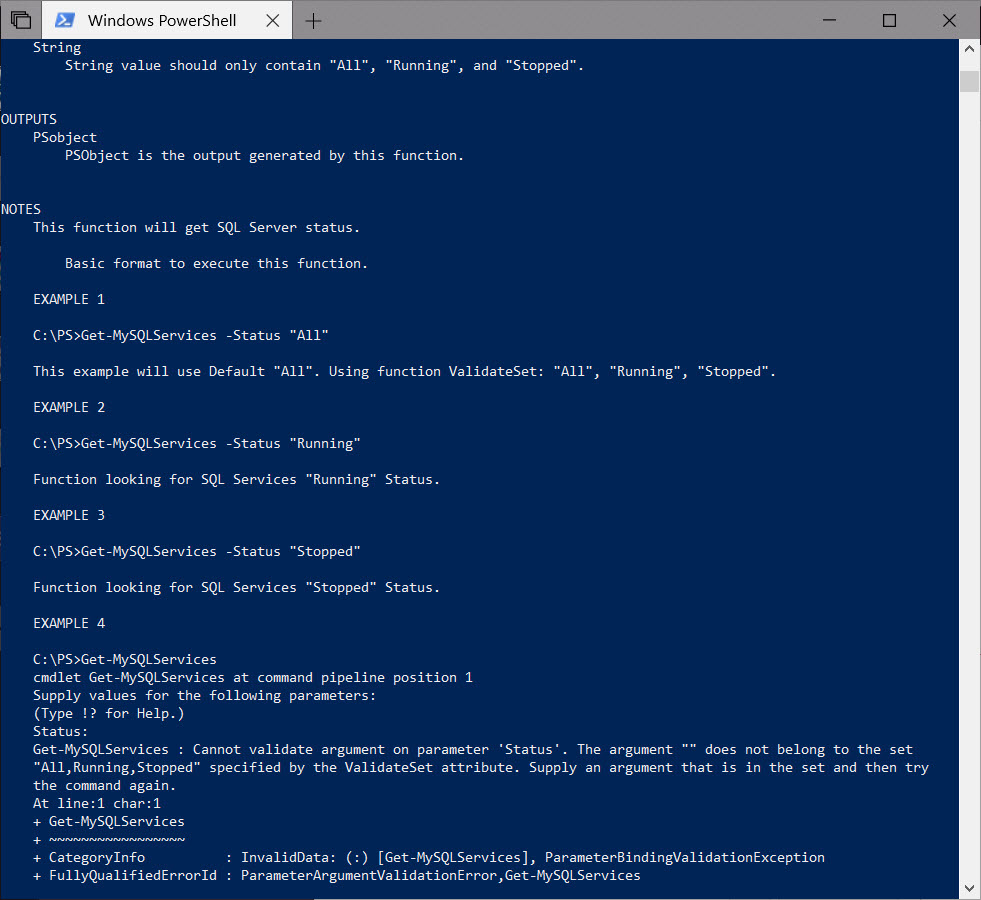
Adding Examples
In the Examples section we can add examples of how the function is going to be executed with the parameters.
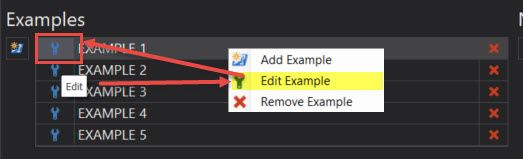
- Click on Add Example or right-click on the Example field.
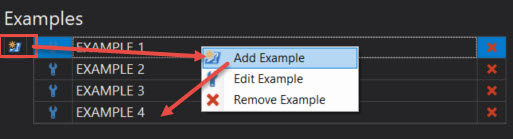
- To edit the new line (Example x), click on the "tool" icon to add the example code.
There are three fields used to add Help information about the function: Introduction, Command, and Remarks.
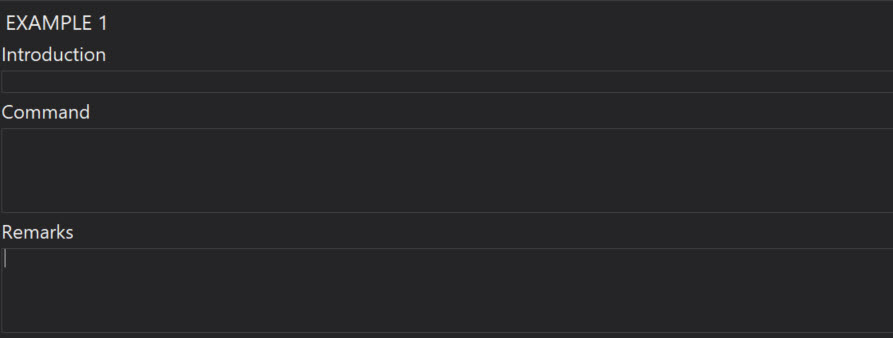
In the Introduction field, type either a DOS prompt "PS C:\>" or a Bash prompt "PS /home/user1>".

In the Command field, type the command one-liner example.

In the Remarks field, add any additional comments about the example.*

*Note: Make sure to press enter at the end of the Remark.
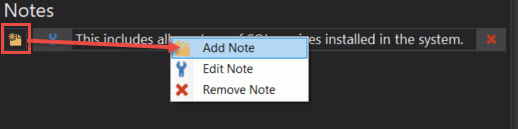
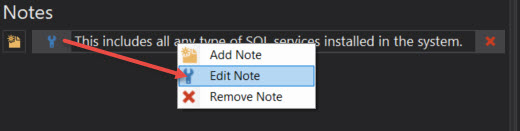
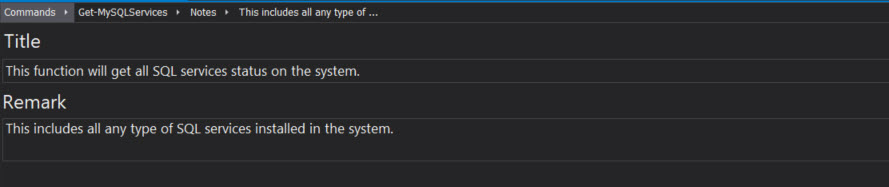
Adding Notes
You can add any additional notes about the function in the Notes section. You can add titles for every Remark you want to add or edit.
Identify Input and Output
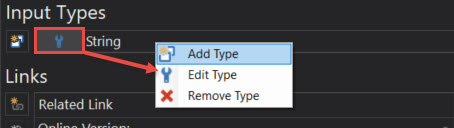
Input Types and Output Types is where you document what types of variable the function is accepting and what output is being returned when the function is completed.
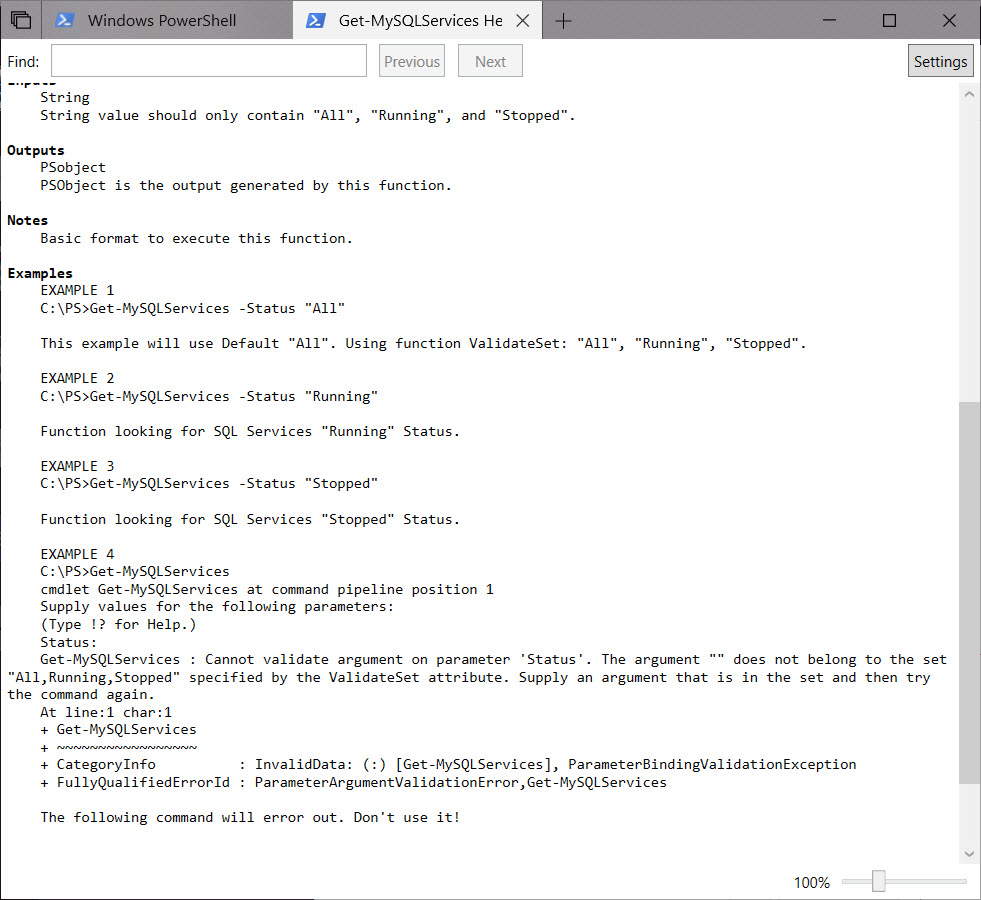
![]()
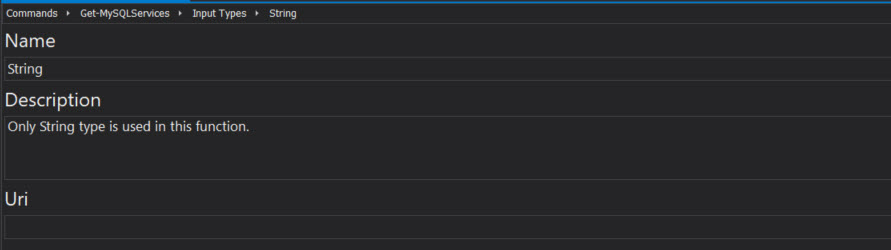
In Input Types we add a "String" type input variable. Click on the "tool" icon next to the name and select Add Type to add the object type "String" in the Name field. Include additional information about the Input object variable in the Description field.
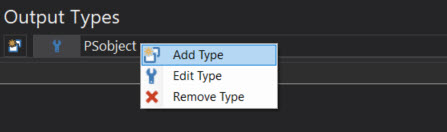
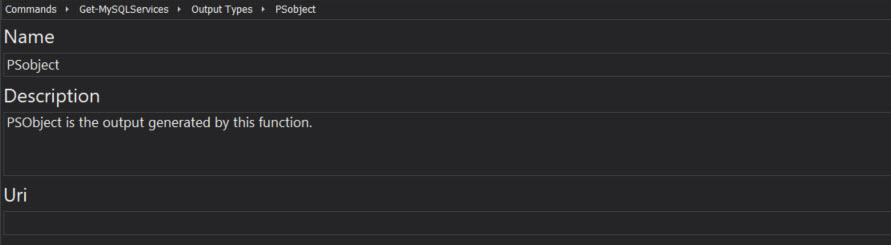
In Output Types we add a "PSobject" type output variable. Click on the "tool" icon next to the name and select Add Type to add the object type "PSobject" in the Name field. Include additional information about the Output object variable in the Description field.
Add Resource Link
Links is an optional section where you can provide a URL link to a Microsoft document, or perhaps a link to a blog post related to the custom function.

Validate and Preview
We will save the file as Get-MySQLServices-Help.xml.
After the Help file has been saved we will Validate Help Schema to check for errors and Preview the file.*
The validation result will display in the Output pane at the bottom of the designer. If there are no errors this message will display: Validation Status (Errors: 0, Warnings: 0): PASSED.
*Note: Make sure to save changes and validate the schema before previewing the Help file.
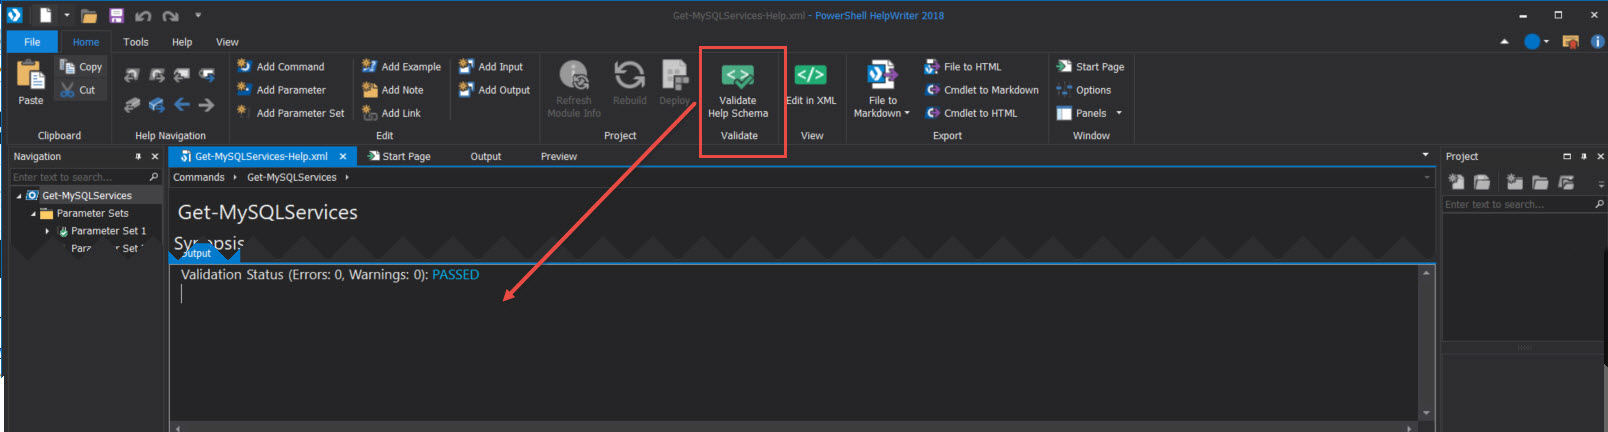
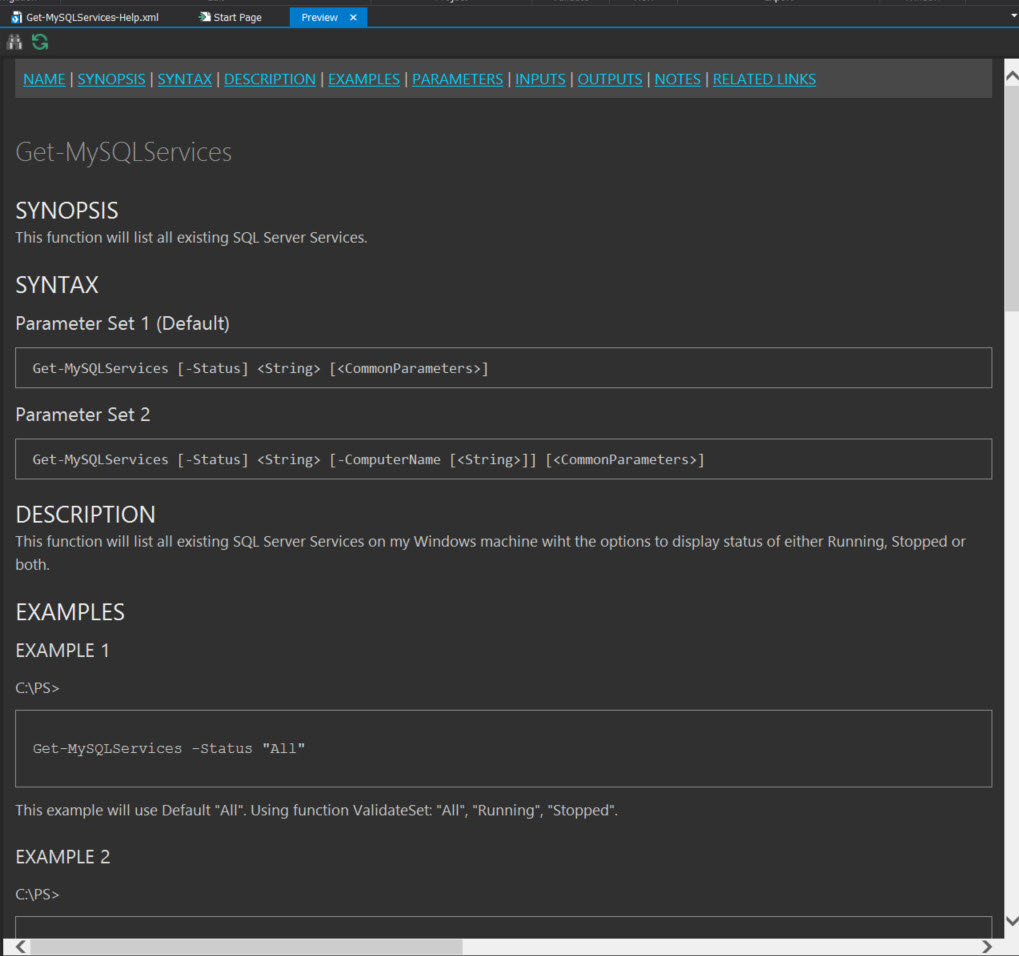
Although the Help file can be previewed at any time, it is a good idea to Save, Validate, and Preview the file while building the file.
Add Help File to the Script
Next we will open the script function Get-MySQLServices in PowerShell Studio to add the Help file Get-MySQLServices-Help.xml.
In order to add the Help XML file to the script, we need to add the " # .EXTERNALHELP <HelpXMLfileLocation> " line inside the function:
function Get-MyMSQLServices{
# .EXTERNALHELP C:\Users\user01\Documents\SAPIEN\Help Files\Get-MySQLServices-Help.xmlParam(..)
: code here…}

After this line has been added to the script function we load the function in PowerShell. Then we can view the function Help information by executing the following:
## – Display help detailed information:
Get-Help Get-MySQLServices -Detailed## – Or, Display Help in popup windows:
Get-Help Get-MySQLServices -ShowWindow
Help Your IT Peers
As you continue to build your PowerShell scripting skills, PowerShell HelpWriter 2018™ is a must have tool for properly documenting your scripts. In addition to helping your IT peers understand how your scripts, functions, and modules work, taking the time to include a Help file before deploying your script to production is clearly a Best Practice.
Comment Based Help is always an option but if you want to exponentially speed up the documentation process and make Help file updates on-the-fly—PowerShell HelpWriter is the answer.
Instructional Video
Check out the video demonstration here!
Related Articles
- PowerShell HelpWriter 2018: Released!
- PowerShell HelpWriter 2017: What’s New? (Part 1)
- PowerShell HelpWriter 2017: What’s New? (Part 2)
For licensed customers, use the forum associated with your product in our Product Support Forums for Registered Customers.
For users of trial versions, please post in our Former and Future Customers - Questions forum.