The MessageBox Control
- Details
- Written by June Blender
- Last Updated: 23 December 2016
- Created: 15 December 2016
- Hits: 69352
User Rating: 5 / 5

MessageBox Control [System.Windows.Forms.MessageBox]
Displays a modal window with a message for the user and at least one button. The MessageBox closes only when the user clicks a MessageBox button. A MessageBox can contain text, buttons, and symbols that show information to the user and require their response.
MSDN Page: System.Windows.Forms.MessageBox
A modal window is a child of the parent form that opens on top of it. When a modal window opens, the parent form is temporarily disabled, but still visible. When the user clicks a modal window button, the modal window closes and control passes back to the parent window, which is re-enabled.
Message boxes are typically used to display important information that the user must acknowledge, such as error messages. Using a MessageBox to display user messages, instead of a custom form, helps to standardize your application and assure that it conforms to best practice design standards.
There is a WinForms MessageBox class (System.Windows.Forms.MessageBox), but there is no MessageBox control in PowerShell Studio Toolbox pane.
In this article
Create a MessageBox
To create a MessageBox:
Use the Show static method of the MessageBox class.
[System.Windows.Forms.MessageBox]::Show('text', 'title')
For example:
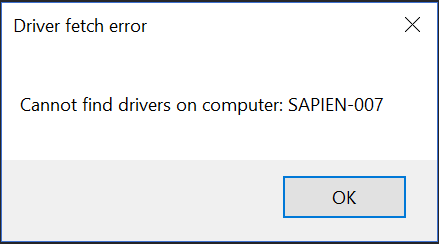
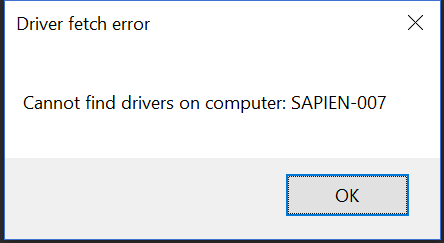
[System.Windows.Forms.MessageBox]::Show("Cannot find drivers on computer: $ComputerName", 'Driver fetch error')
Generates this message box when the value of $ComputerName is 'SAPIEN-007'.
To create a MessageBox in PowerShell Studio:
- Use the msgbox or msgboxyesno snippets
- Replace the 'Text' placeholder with the text that appears in the message box.
- Replace the 'Title' placeholder with the window title.

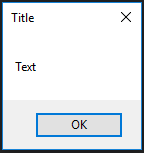
Here is the MessageBox that the msgbox snippet creates before the 'Text' and 'Title' placeholders are replaced.
Because the MessageBox class does not have constructors (special methods for creating an object of that class), you do not use the New-Object cmdlet or the New static method to create a MessageBox. Use the Show static method instead.
The Show method has 21 different overloads (like parameter sets) and you can use any overload to create your MessageBox.
Tips for using a MessageBox Control
- Unlike other controls in a PowerShell GUI application, you do not create a MessageBox in advance and write event handlers for it. Instead, you create it in the code where you use it.
- In PowerShell Studio, to add the code for a MessageBox, use the msgbox or msgboxyesno snippet. These snippets create a simple MessageBox with a window title, a message, an OK button and the system close button (X) in the upper right corner. For a more complex MessageBox, see MessageBox Variations.
- The first line of the msgbox and msgboxyesno snippets is an Add-Type command that adds the System.Windows.Forms assembly to the session. In PowerShell Studio, you need this command only when displaying a MessageBox in a .ps1 file. In a .psf file, you can comment-out this line or delete it.
#Add-Type -AssemblyName "System.Windows.Forms, Version=2.0.0.0, Culture=neutral, PublicKeyToken=b77a5c561934e089"
- The msgbox and msgboxyesno snippets come with single-quoted strings. If your message strings include variables, be sure to change to double-quoted strings. For more information, see about_Quoting_Rules.
[void][System.Windows.Forms.MessageBox]::Show('Text', 'Title') [void][System.Windows.Forms.MessageBox]::Show("Cannot find computer: $ComputerName", 'Computer name error') - The Show method parameter values must be strings (enclosed in quotations marks), integers that represent an enumeration value, or variables.
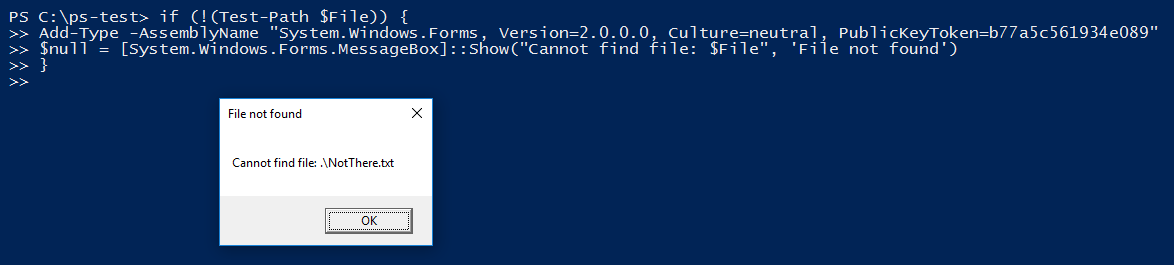
- When the user closes the MessageBox, the Show method returns a DialogResult value that represents the button that the user clicked to close the MessageBox, such as 'OK'. To suppress the output, pipe it to Out-Null, assign it to $null, or cast it as [void]. For example:
$null = [System.Windows.Forms.MessageBox]::Show("Cannot find drivers on computer: $ComputerName", 'Driver fetch error') - If you're using a more complex variation of the Show method, but can't remember the parameters or parameter order, PowerShell Studio will prompt you.
Type:
[System.Windows.Forms.MessageBox]::Show(
PowerShell Studio prompts with the parameters for different overloads of the Show method. To scroll through the options, use the up-arrow and down-arrow keys. To select an overload, press TAB. PowerShell Studio adds the parameters for you.

- You can display a MessageBox in your Form_Load event handler. For example, this code checks for a module and, if it's not installed, it displays a MessageBox and then closes the form. This is handy because #Requires -Module generates a console error and prevents the script from running, but it does not display anything to the GUI app user.
$formShow_Load = { if (!(Get-Module -Name CoolNewThing -ListAvailable)) { $msg = "This app requires the CoolNewThing module. Install the module and try again.`n`nClosing this app." [System.Windows.Forms.MessageBox]::Show($msg, 'Required module not found', 'OK', 'Error') $formShow.Close() } } - You can also add a MessageBox to a console command or a script (.ps1). Be sure to include the Add-Type command that adds the System.Windows.Forms assembly to the session. You can find the Add-Type command in the msgbox and msgboxyesno snippets.
MessageBox Variations
The Show method of the MessageBox class has many variations or overloads, which are like Windows PowerShell parameter sets. This section lists and explains some of the most frequently used overloads of the Show method of MessageBox class .
- Message only
- Message and Title
- Message, Title, and Buttons
- Add Icon
- Set the Default Button
- Add MessageBox Options
- Add a Help Button
Message only
MSDN: https://msdn.microsoft.com/en-us/library/519bytz3(v=vs.110).aspx
[System.Windows.Forms.MessageBox]::Show('text')
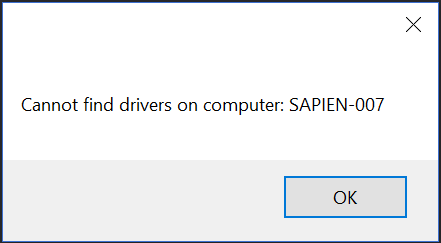
To create a MessageBox with text, but no title, enter a single string. To break a line or create paragraphs in the string, use the newline character, `n (backtick-n).
[System.Windows.Forms.MessageBox]::("Cannot find drivers on computer: $Computer")
Message and Title
MSDN: https://msdn.microsoft.com/en-us/library/20stz12s(v=vs.110).aspx
[System.Windows.Forms.MessageBox]::Show('text', 'title')
To create a Message box with text and title, call the Show method with two strings. The first string is the MessageBox text; the second string is the window title.
[System.Windows.Forms.MessageBox]::("Cannot find drivers on computer: $Computer", 'Driver fetch error')
Message, Title, and Buttons
MSDN: https://msdn.microsoft.com/en-us/library/0x49kd7z(v=vs.110).aspx
[MessageBox]::Show('text', 'title', MessageBoxButtons)
NOTE: When you specify MessageBoxButtons values other than 'Ok' that do not include a Cancel button, the system close button (X) in the upper right corner of the MessageBox is disabled.
[System.Windows.Forms.MessageBox]::Show('text', 'title', MessageBoxButtons)
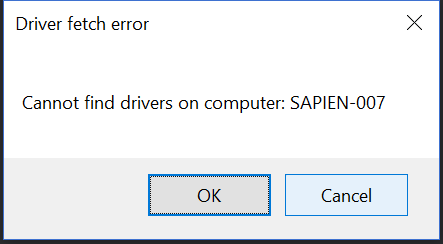
To create a Message box with text and title and specified buttons (up to 3 buttons), call the Show method with two strings, and a MessageBoxButtons option, such as OK, YesNo, or YesNoCancel. By default, a MessageBox has an OK button. You can replace the OK button, but you cannot remove all buttons. To add a Help button, use a HelpButton overload.
$result = [System.Windows.Forms.MessageBox]::("Cannot find drivers on computer: $Computer", 'Driver fetch error', 'OKCancel')
When using multiple buttons, use the DialogResult value that the Show method returns to respond to the user's button choice. For example:
$buttonStart={
    Try {Get-Service -ComputerName $textboxCn.Text.Trim() | Out-GridView}
    Catch {
        $result = [System.Windows.Forms.MessageBox]::Show('Failed. Get services on local computer?', 'Computer name error', 'YesNo')
        if ($result -eq 'Yes') { Get-Service | Out-GridView }
    }
}
Notice that when you specify MessageBoxButtons that do not include a Cancel button, the system close button (X) in the upper right corner of the MessageBox is disabled. The exception is 'OK', which is the default value.

Add Icon
MSDN: https://msdn.microsoft.com/en-us/library/365dky5y(v=vs.110).aspx
[MessageBox]::Show('text', 'title', MessageBoxButtons, MessageBoxIcon)
[System.Windows.Forms.MessageBox]::Show('text', 'title', MessageBoxButtons, MessageBoxIcon)
This Show method overload adds a MessageBoxIcon option, such as Exclamation, Warning, or Stop. The icon that appears varies with the version of Windows on the local system.
For example:
$result = [System.Windows.Forms.MessageBox]::("Cannot find drivers on computer: $Computer", 'Driver fetch error', 'OKCancel', 'Error')
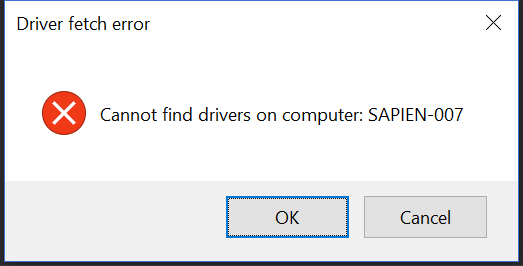
This Show method requires a MessageBoxButtons value. You cannot skip the parameter or insert an empty string. To omit the icon, use a value of 'None'.
Set the Default Button
MSDN: https://msdn.microsoft.com/en-us/library/ctd56yay(v=vs.110).aspx
[MessageBox]::Show('text', 'title', MessageBoxButtons, MessageBoxIcon, MessageBoxDefaultButton)
[System.Windows.Forms.MessageBox]::Show('text', 'title', MessageBoxButtons, MessageBoxIcon, MessageBoxDefaultButton)
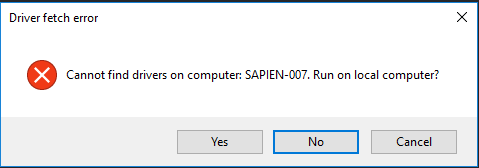
This Show method overload adds a MessageBoxDefaultButton option, Button1, Button2, or Button3. The ButtonX values refer to left-to-right order of the buttons. Button1 is the default. When a button is the default, that button is highlighted and is clicked when the user presses the Enter key.
For example:
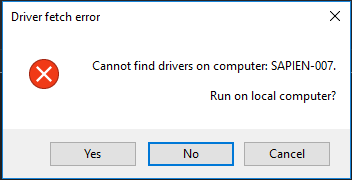
$result = [System.Windows.Forms.MessageBox]::("Cannot find drivers on computer: $Computer. Run on local computer?", 'Driver fetch error', 'YesNoCancel', 'Error', 'Button2')
Add MessageBox Options
[MessageBox]::Show('text', 'title', MessageBoxButtons, MessageBoxIcon, MessageBoxDefaultButton, MessageBoxOptions)
MSDN: https://msdn.microsoft.com/en-us/library/ba3x8zfh(v=vs.110).aspx
[System.Windows.Forms.MessageBox]::Show('text', 'title', MessageBoxButtons, MessageBoxIcon, MessageBoxDefaultButton, MessageBoxOptions)
This Show method overload adds a MessageBoxOptions value. The RightAlign and RtlReading attributes are designed for aligning text near buttons and for right-to-left languages. The DefaultDesktopOnly and ServiceNotification values keep the MessageBox on top of other windows, which might be useful for very high priority messages in multi-window applications. You can also enter a value of 0, which satisfies the MessageBoxOption value requirement without selecting any of the options.
For example:
$result = [System.Windows.Forms.MessageBox]::("Cannot find drivers on computer: $Computer. Run on local computer?", 'Driver fetch error', 'YesNoCancel', 'Error', 'Button2', RightAlign)
Also, the MessageBoxOptions enumeration has a FlagsAtttribute that lets you select multiple enum values, rather than choosing just one.
$MBOptions = [System.Windows.Forms.MessageBoxOptions]"RightAlign, DefaultDesktopOnly"
[System.Windows.Forms.MessageBox]::Show("Cannot find drivers on computer: SAPIEN-007.", 'Driver fetch error', 'OK', 'Error', 'Button2', $MBOptions
Add a Help Button to a MessageBox
There are several Show overloads that create a Help button in a MessageBox.
IMPORTANT:
- You cannot use a MessageBoxOptions value of DefaultDesktopOnly or ServiceNotification with a help button in a message box.
- When the user clicks the Help button in the MessageBox, the form receives the HelpRequested event. To respond to this event, add a HelpRequested event handler to the form.
Use this syntax to add a Help button that displays the text in a file or opens a web page. This Show overload does not work properly in the Form_Load event handler.
MSDN: https://msdn.microsoft.com/en-us/library/tewzaxwc(v=vs.110).aspx
[MessageBox]::Show('text', 'title', MessageBoxButtons, MessageBoxIcon, MessageBoxDefaultButton, MessageBoxOptions, HelpPathString)
[System.Windows.Forms.MessageBoxMessageBox]::Show('text', 'title', MessageBoxButtons, MessageBoxIcon, MessageBoxDefaultButton, MessageBoxOptions, HelpPathString)
Use this syntax to add a Help button with a custom response, such as launching a child form or starting a wizard.
MSDN: https://msdn.microsoft.com/en-us/library/szwxe9we(v=vs.110).aspx
[MessageBox]::Show('text', 'title', MessageBoxButtons, MessageBoxIcon, MessageBoxDefaultButton, MessageBoxOptions, Boolean)
[System.Windows.Forms.MessageBoxMessageBox]::Show('text', 'title', MessageBoxButtons, MessageBoxIcon, MessageBoxDefaultButton, MessageBoxOptions, Boolean)
Display Help from a File or Web Page
To add a MessageBox Help button that displays the text from a text file or opens a web page, add the text file path to the Show method arguments.
For example, this script displays a MessageBox with a Help button that opens a Windows PowerShell About help file on disk.
$msg = 'Cannot interpret symbols or special characters in input string.'
$HelpFilePath = "$PSHOME\en-US\about_Special_Characters.help.txt"
[System.Windows.Forms.MessageBox]::Show($msg, 'Invalid input', 'OK', 'Stop', 'Button3', 0, $HelpFilePath)
The obvious risk of this strategy is that the file isn't found. Before using this method use the Test-Path cmdlet to verify the file location and provide an alternative or use this method only with files installed with your application.
You can also use a URL in the HelpFilePath string value.
$msg = 'Cannot interpret symbols or special characters in input string.'
$HelpFilePath = 'http://go.microsoft.com/fwlink/?LinkID=113269'
[System.Windows.Forms.MessageBox]::Show($msg, 'Invalid input', 'OK', 'Stop', 'Button3', 0, $HelpFilePath)
Display Help in Other Ways
You can add a Help button to a MessageBox and then write an event handler to respond to clicking the Help button. This lets you respond to the Help button click in a variety of ways, such as by displaying a Help window child form or opening a web page.
This Show method overload adds a Boolean value. Enter $True to add a Help Button; $False to omit the Help button.
Remember to set the MessageBoxOptions to 0 or to a value other than DefaultDesktopOnly or ServiceNotification. To make the Help button the default, set the value of MessageBoxDefaultButton to the last button. In this case, with OK, Cancel, and Help buttons, Help is Button3.
[System.Windows.Forms.MessageBox]::("Cannot find drivers on computer: $Computer. Run on local computer?", 'Driver fetch error', 'OKCancel', 'Error', 'Button3', 0, $True)
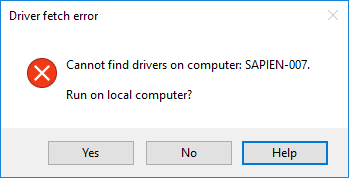
When the user clicks the Help button on the MessageBox, it raises the HelpRequested event on the parent form (not on the MessageBox). To respond to the Help button click event, add an event handler for the HelpRequested event to the parent form.
Add a HelpRequested event handler
When the user clicks the Help button on the MessageBox, it raises the HelpRequested event on the parent form (not on the MessageBox). To respond to the Help button click event, add an event handler for the HelpRequested event to the parent form.
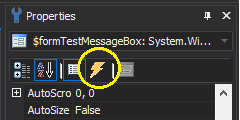
To add the HelpRequested event handler:
- Click the Designer tab and, in the Properties pane for the form, click the Event button (lightening icon).
- Double-click the HelpRequested event.
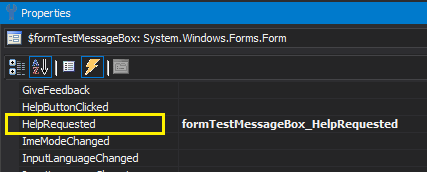
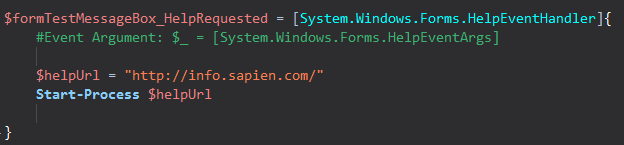
PowerShell Studio adds an event handler for the HelpRequested event (of the form) to your script.
This sample event handler opens a web page, but you can respond to the Help button click in many different ways.
For more information:
- VIDEO! MessageBox: Display user messages in a PowerShell GUI app
- Manage Errors in a GUI Application
- Displaying Output in a GUI Application
- Spotlight articles? In PowerShell Studio, in the Toolbox or in the Properties pane, right-click a control and then click View Spotlight Article.
For licensed customers, use the forum associated with your product in our Product Support Forums for Registered Customers.
For users of trial versions, please post in our Former and Future Customers - Questions forum.