Advanced Features and Customization
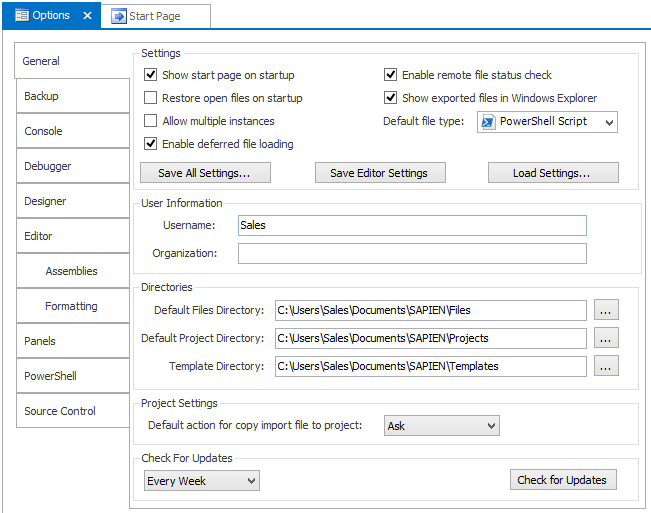
The Options dialog contains all of the main configuration settings for PowerShell Studio. The next few sections highlight some of
the settings that have not yet been mentioned.
General
-
Show start page on startup
Enables or disables the start page.
-
Restore open files on startup
Reopens the files that were open when PowerShell Studio was last shut down.
-
Allow multiple instances
Allows for more than one copy of PowerShell Studio running at once.
-
Enable deferred file loading
Loads files on demand. Deferred loading improves overall performance when loading large groups of files while reducing memory consumption and load times.
-
Enable remote file status check
PowerShell Studio will warn you if a file has been edited outside of its editor. Checking remote files can cause PowerShell Studio to slow down. This
option allows you disable remote file checking if needed.
-
Show exported files in Windows Explorer
After exporting files from PowerShell Studio, launch Windows Explorer focused on the export folder.
-
Default file type
Choose what gets created when you click on the new button (
 ) in the ribbon bar.
-
Username
and Organization
Enter your details here. This information will be used in your templates.
-
Default Files Directory
Specifies the folders you would like PowerShell Studio to use to store scripts.
-
Default Project Directory
Specifies the folders you would like PowerShell Studio to use to store projects.
-
Template Directory
Specifies the folders you would like PowerShell Studio to use to store templates.
-
Default action for copy import file to project
When importing an existing file into a project, PowerShell Studio can make a copy of the file and add it to the project folder or create a link to the
original file.
-
Check for Updates (combo box)
Specifies how often PowerShell Studio should contact the SAPIEN web site to check for updates.
-
Check for Updates
Press this to check for updates immediately. You can also do this from the help tab of the ribbon.
Saving Settings
There are three buttons at the bottom of the Settings section that control the saving and loading of settings for PowerShell Studio:

These settings can not only be used to back-up your settings for your own use, but they can also be passed around to everyone on your team for
standardization purposes.
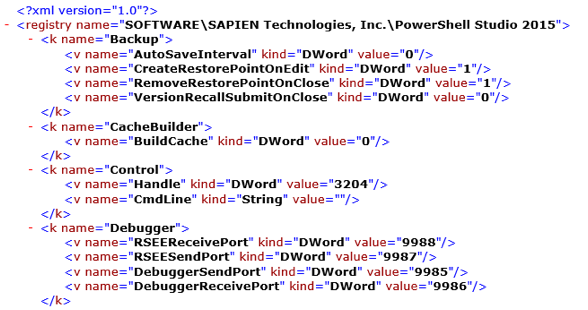
Save All Settings
This button saves all application settings. Whenever you spend a lot of time getting your coding environment just the way you like it, you hate to have to
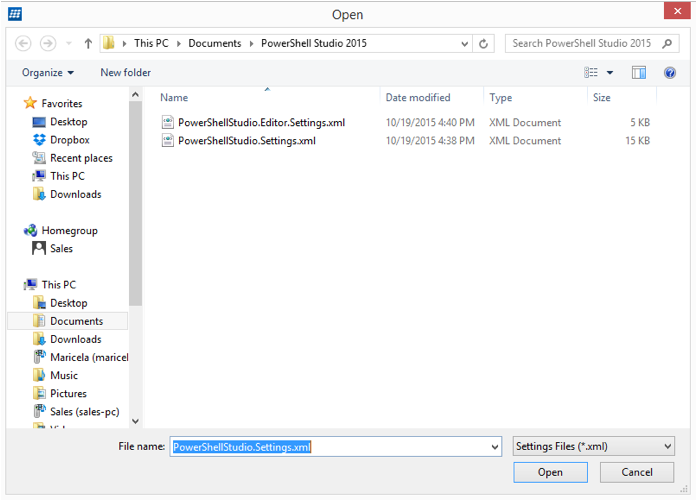
set everything up again. Therefore, it's a good idea to export the settings from time to time. By default, the settings are saved to:
%HOMEPATH%\Documents\SAPIEN\PowerShell Studio 2015\Files\PowerShellStudio.Settings.xml
Here is a piece of the xml created:
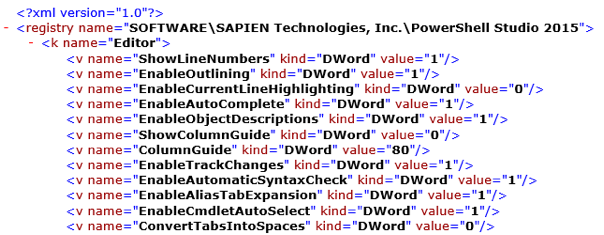
Save Editor Settings
This button works the same way as the Save All Settings button, only it only saves editor settings.
By default, the settings are saved to:
%HOMEPATH%\Documents\SAPIEN\PowerShell Studio 2015\Files\PowerShellStudio.Editor.Settings.xml
Here is a piece of the xml created:
Load Settings
This button loads settings that were previously saved.
You will be required to restart the application for the changes to take effect.
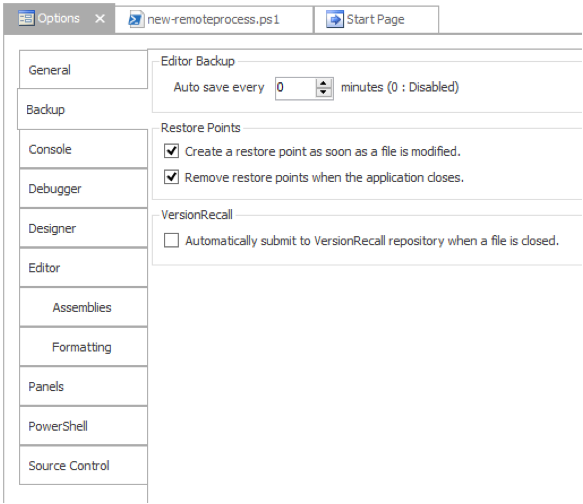
Backup
-
Auto save every [ ] minutes
The frequency in minutes that files will be auto-saved.
-
Create a restore point as soon as a file is modified
Create a restore point when you modify a file to allow you to easily undo all changes. The automatic restore point is only created once, at the time of
first edit (start of a session). When you create a permanent restore point, it only stores one. This is meant as a quick recovery tool and not as a
versioning tool. So if you work on your script for a long time and you need to restore it to a point using this method, then it will restore back to
the beginning of your session. You will lose everything you've done since.
NOTE: If you're about to do something in the script that you may want to rollback, click the Create button on the Restore Points
menu on the Tools ribbon.
-
Remove restore points when the application closes
When you close PowerShell Studio, restore points will be removed.
-
Automatically submit to VersionRecall repository when a file is closed
VersionRecall is SAPIEN's version control system. This option allows you to save your script to VersionRecall when it closes. For more info on
VersionRecall visit the product page on sapien.com.
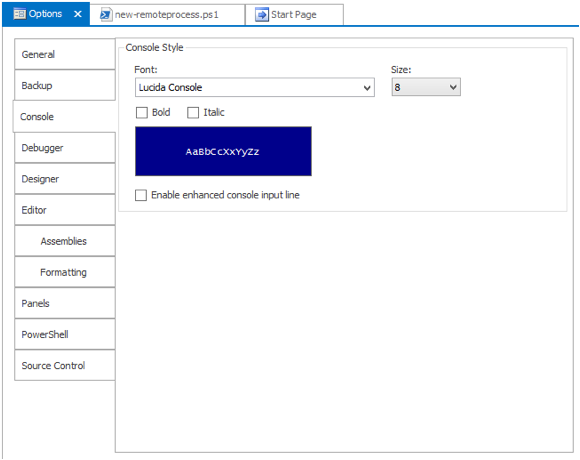
Console
-
Font
Sets your preferred font for the PowerShell console.
-
Test Color, Size, Bold, Italic
Configures the display properties of the PowerShell console.
-
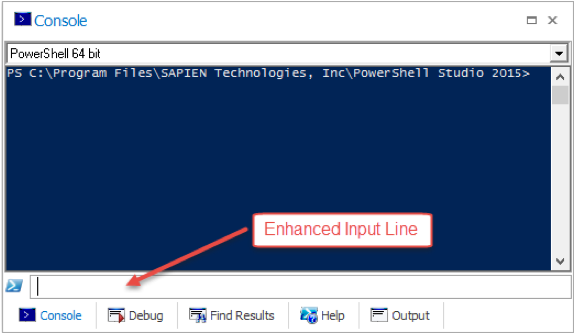
Enable enhanced console input line
Creates a separate input box to type, instead of typing directly into the console.
Debugger
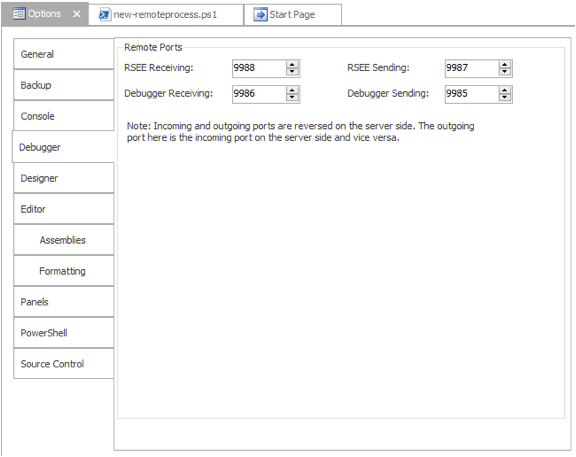
These settings configure the network ports that PowerShell Studio uses to connect to a remote installation of the Remote Scripting Execution Engine. You
must use the same port numbers on any computer that you want to support the remote execution. When deciding on which ports to use, it is important to
consult your network and security teams, as they will be able to advise you which ports are safe to use and, if required, reconfigure any firewalls. Port
numbers are specified in the registry on a machine that is running the RSEE service.
The key is HKEY_LOCAL_MACHINE\Software\Policies\SAPIEN. The Value name is InPort (for the incoming port) and OutPort (for the outgoing port). Note that these values are most easily configured by means of a Group Policy Object (GPO), and
we provide a template (ADM file) that can be imported into a GPO to configure RSEE.
Designer
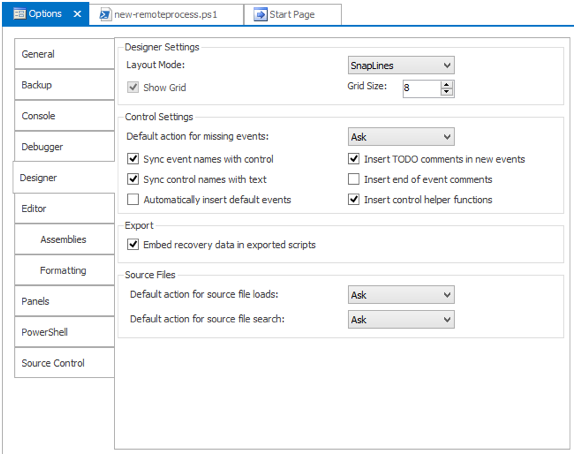
-
Layout Mode
Governs how controls are aligned when added to a form.
-
SnapLines
Allows you to precisely align controls. As you move a control around on a form, snap lines will appear that show how the control aligns with its
neighbors.
-
Snap to Grid
Aligns controls to a grid overlaid on the form. You can increase or decrease the grid size to suit your needs using the Grid Size.
-
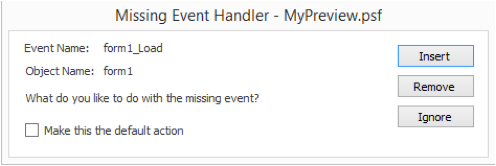
Default action for missing events
This controls what happens when PowerShell Studio cannot find the expected event handler code in your scripts. It protects you from accidental code
deletion. There are three options: Ask, Insert or Remove.
-
Ask
Displays the missing event dialog. You can choose to Insert, Remove, or Ignore the missing event from this screen.
-
Insert
Will automatically recreate the event handler code.
-
Remove
Will delete the event binding from the control properties.
-
Insert TODO comments in events
When enabled, PowerShell Studio will add a comment to each event handler reminding you to provide your code body.
-
Insert end of event comments
Adds a comment at the end of each event handler.
-
Insert control helper functions
Uncheck this option to prevent PowerShell Studio from inserting control helper functions into the script
-
Sync event names with control
Event handler names are generated using the pattern $<control name>_<event name>. This option ensures that when you rename a control its
event handlers are also renamed.
-
Sync control
names with text
Event handler names are generated using the pattern $<control name>_<event name>. This option ensures that when you rename a control its
event handlers are also renamed.
-
Automatically Insert Default Event
Many controls have a default event (click for a button, selected index changed for a ComboBox). This option will ensure that the default event is
always connected to an event handler when you add a control to a form.
-
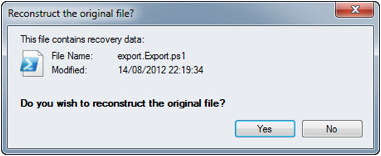
Embed Recovery Data in Exported Scripts
Enabling this option allows PowerShell Studio to add extra metadata to an exported script that allows it to recreate the original project that was used
to create the export. The recovery data is stored in multi-line comment blocks in the exported script.
-
Default Action for Source File Loads
This setting controls how PowerShell Studio loads exported scripts. It has three options: Load, Ignore, and Ask.
-
Load
Reloads the original files that were used to create the exported script.
-
Ignore
Loads the exported script as is.
-
Ask
Displays a dialog asking the user how they wish to proceed.
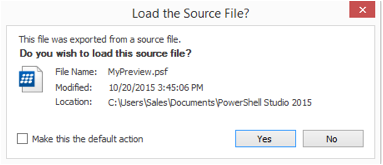
NOTE: If the file contains recovery data you will also get a second prompt asking if you wish to use the recovery data to reconstruct the original files.
-
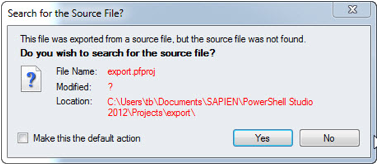
Default Action for Source File Search
This option controls how PowerShell Studio responds when it cannot find the original files for an exported script. It has the following three options:
Search, Never, and Ask.
- Search
Tries to locate the missing files.
- Never
Does not attempt to locate the missing files.
- Ask
Displays a dialog asking the user how to proceed.
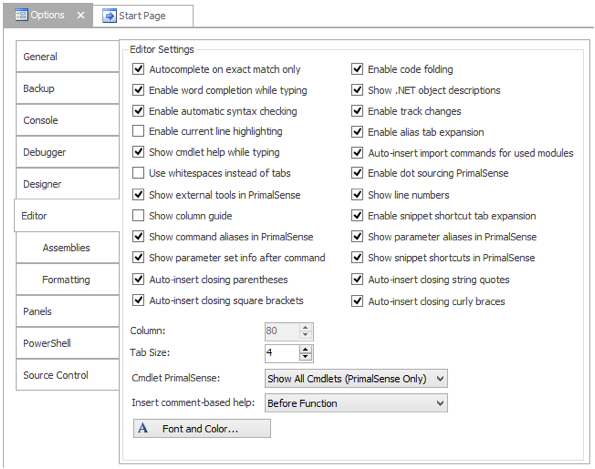
Editor
These options customize PrimalSense and the appearance of the code editor panel.
-
Autocomplete on exact match only
Only matches search expressions when it matches a standalone instance of the expression. For example, if this is checked and you search on "express",
it would match only "express" by itself and not "expression". If this is unchecked, a search on "express" would match both "express" by itself, and
"expression".
-
Enable word completion when typing
Fills in the missing characters on partially typed words. There could be only one, on multiple possible completions available in a drop down list.
-
Enable automatic syntax checking
Provides real-time syntax analysis as you type.
-
Enable Current Line Highlighting
Places a colored bar under the current line to provide a visual contrast.
-
Show cmdlet help while typing
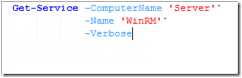
If you type a cmdlet it will appear in the Object Browser.
-
Use whitespaces instead of tabs
Inserts spaces rather than tabs into code when indenting.
-
Show external tools in PrimalSense
If you have any external tools installed, they will appear in PrimalSense selection lists.
-
Show column guide
Displays a vertical line at a particular column.
-
Show command aliases in PrimalSense
When typing a command, PrimalSense will suggest aliases.
-
Show parameter set info after command
When typing a space after a command, a popup window is displayed to allow you to cycle through the command's parameter sets.
-
Auto-insert closing parenthesis
Auto-completes parenthesis while you type
-
Auto-insert closing square brackets
Auto-completes square brackets while you type
-
Enable Code Folding
Allows function bodies to be collapsed to a single line in the code editor.
-
Enable .NET object descriptions
Causes PrimalSense to display help text when you hover over an object.
-
Enable Track Changes
Annotates the source code with yellow and green bars to indicate changes made in the current editing session.
-
Enable Alias Tab Expansion
Pressing tab at the end of an alias will expand it into the full name.
-
Auto-insert import commands for used modules
When you type a cmdlet that is part of a module that isn't imported in the script, Powershell Studio will automatically insert the Import-Module
statement.
-
Enable dot sourcing PrimalSense
When you dot source a file in PowerShell Studio, it will automatically load and parse the file to provide PrimalSense and coloring for functions
contained in said file.
-
Show line numbers
Displays line numbers in the left margin of the code editor.
-
Enable snippet shortcut tab expansion
Pressing tab at the end of a snippet will expand it into the full name.
-
Show parameter aliases in PrimalSense
When you type or specify the parameter in a command, PrimalSense will suggest aliases.
-
Show snippet shortcuts in PrimalSense
PrimalSense will list snippet shortcuts, along with the command names, while typing when enabled.
-
Auto-insert closing string quotes
Auto-completes string quotes while you type
-
Auto-insert closing curly braces
Auto-completes curly braces while you type
-
Column
Specifies the column where the column guide should be displayed.
-
Tab size
Specifies the tab size
-
Cmdlet PrimalSense
Has three options:
-
Show Cmdlets (Active Modules Only)
This option limits PrimalSense to only showing Cmdlets that are part of the current project.
-
Show All Cmdlets (PrimalSense Only)
When typing in the code editor, PrimalSense will offer suggestions from all of the PowerShell modules on your system.
-
Show and Color All Cmdlets
Enables PrimalSense to show all Cmdlets whether they are loaded or not.
-
Insert comment based help
Has 2 options:
-
Before Function
-
Inside Function
Command Parameter Completion
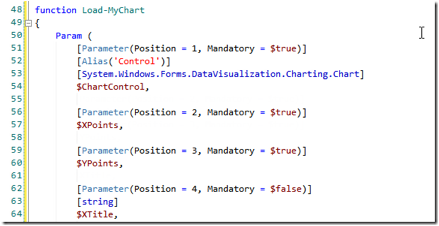
You will notice a new popup window show up when typing a space after a command:

This popup window will display and allow you to cycle through the command's parameter sets. You can auto-insert the parameters by pressing [TAB] while the
parameter set popup is visible.

Font and Color
Using this dialog, you can customize the font and coloring of PowerShell Studio's editor.
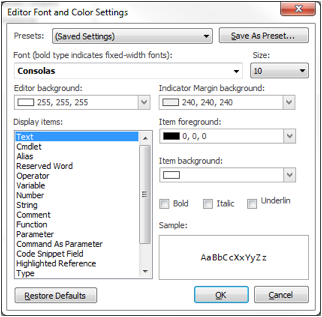
Presets
This allows you to quickly change the coloring scheme of PowerShell Studio's editor. At the top of the dialog, you will find a dropdown list that contains
a list of all the coloring presets:

|
Default Presets
|
Description
|
|
(Current Settings)
|
Restores the settings to the last saved state.
|
|
PowerShell ISE
|
Changes the color scheme and font to match the default settings of the Microsoft PowerShell ISE.
|
|
PowerShell Studio
|
Changes the color scheme to the default PowerShell Studio coloring and font.
|
|
PrimalScript
|
Changes the color scheme to the default PrimalScript coloring and font.
|
When you select a preset, the font and coloring settings are updated to the predefined preset. Simply click the Apply button and PowerShell Studio
will use the new coloring scheme. You can also create your own presets and share them with your colleagues if you wish. Simply configure the coloring
setting and then press the Save As Preset… button. You will be presented with a Save As dialog.
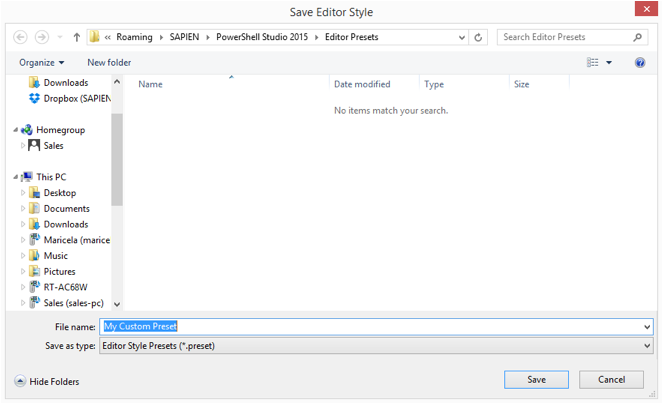
Give the preset a name and press the Save button. Now the preset will be displayed in the drop down list:

Importing Presets:
To import a preset, copy the preset file (*.preset) to the following user specific folder:
C:\Users\<username>\AppData\Roaming\SAPIEN\PowerShell Studio 2015\Presets\
Next time you edit the font and colors, the preset will appear in the drop down list.
Edit Font and Coloring:
You can change the font of the editor and its size. All bolded fonts are fixed point fonts.
You can also change the background color of the indicator margin where the breakpoints, tracepoints and bookmarks are located:
 If you want to set the background transparent for specific items, you can right-click on the background color picker to bring up the context menu and
select the Set to Automatic menu item.
If you want to set the background transparent for specific items, you can right-click on the background color picker to bring up the context menu and
select the Set to Automatic menu item.

Wrap Commands
We added the following commands which let you quickly wrap the selected text in quotes or braces:
|
Keyboard Shortcut
|
Wrap Selection In
|
|
Ctrl + Shift + 9
|
( )
|
|
Ctrl + [
|
[ ]
|
|
Ctrl + Shift + [
|
{ }
|
|
Ctrl + '
|
' '
|
|
Ctrl + Shift + '
|
" "
|
Assemblies
These are the assemblies that are loaded when you open a new or existing file.
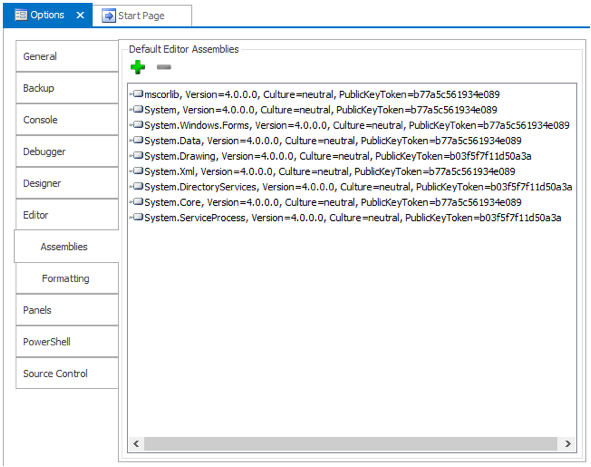
These assemblies are used to provide PrimalSense support for Types and .NET objects. You can add assemblies to the Default Assemblies to ensure that they
are loaded every time PowerShell Studio is started.
Formatting
PowerShell Studio 2015's code formatting is customizable to fit your needs:
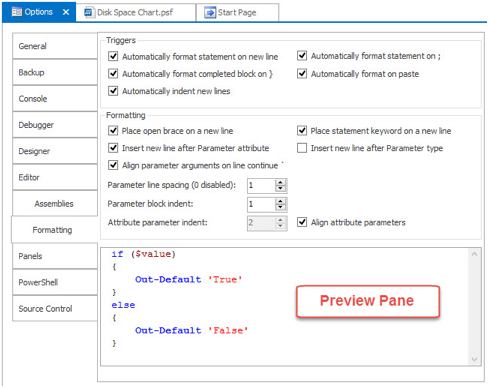
Formatting Triggers
The first few options serve as triggers for auto formatting. These options tell PowerShell Studio when to format your script.
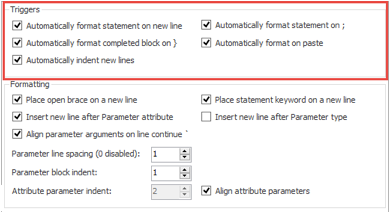
The following triggers can be enabled:
-
Automatically format statement on new line
Formats the line when you press <enter>. You might not notice anything if the text is already formatted.
-
Automatically format completed block on }
Formats a code block when the close curly bracket is typed.
-
Automatically indent new lines
Automatically indents the appropriate tab depth when inserting a new line by pressing <enter>.
-
Automatically format statement on ;
Formats the statement when the semi-colon is typed.
-
Automatically format on paste
Formats code when it is pasted into the script.
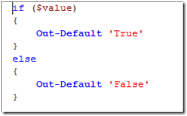
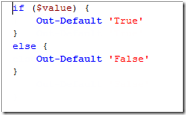
Formatting Rules
The second set of options allows you to customize the formatting rules of PowerShell Studio 2015.
NOTE: Most items above will be altered in the preview pane when changed, so that you can see what effect they have on your script.
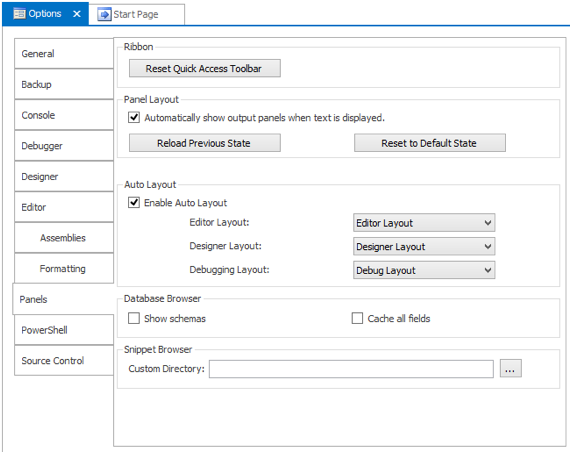
Panels
-
Reset Quick Access Toolbar
Resets the Quick Access Toolbar to its default state.
-
Reload Previous State
Resets PowerShell Studio to the same state as the last time you opened it.
-
Restore to Default State
Configures PowerShell Studio to its default panel layouts.
-
Enable Auto Layout
Allows PowerShell Studio to display panels based on what you are doing. For example, when debugging make all of the debug related panels visible and
hide others.
-
Editor Layout
Chooses your preferred layout for editing code. Choosing (current) will keep the layout you are currently using.
-
Designer Layout
Chooses your preferred layout for designing forms. Choosing (current) will keep the layout you are currently using.
-
Debugging Layout
Chooses your preferred layout for debugging. Choosing (current) will keep the layout you are currently using.
-
Show Schemas
This setting configures how the object browser displays schema information from SQL server. If it is cleared, then the object browser will ignore
schema information and display database tables, stored procedures etc. in a simple flat list. Enabling Show Schema will cause the object browser to
display database objects in their respective schemas.
-
Cache all fields
This setting will cache everything within the database browser, for quick loading of recently used information. Checking this option will take more time to
load because it is caching everything upon start-up.
-
Custom Directory
Adds an extra folder to the snippet browser panel. You can provide a network path here to create a shared snippet repository.
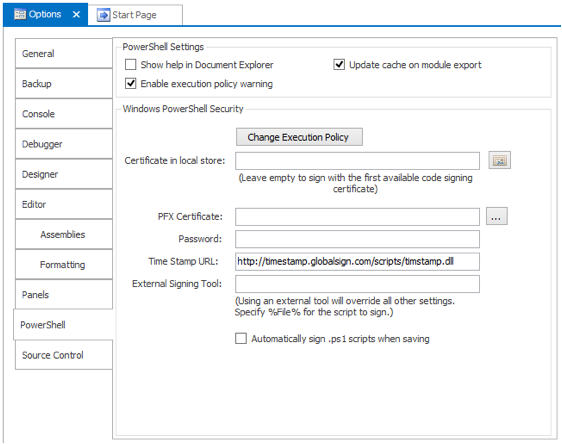
PowerShell
-
Show help in Document Explorer
Displays help in Document Explorer instead of in the Help pane. Turning on this option disables context-sensitive help in the Help pane.
-
Enable Execution Policy Warning
PowerShell Studio will warn you if the current PowerShell execution policy is set to Restricted and help you to change it if
required.
-
Update cache on module export
Updates the stored cache when exporting modules when enabled.
-
Change Execution Policy
Allows you to reconfigure the execution policy for both 32-bit and 64-bit shells from a simple GUI interface.
-
Certificate in local store
The name of the certificate the PowerShell Studio will use for code signing.
-
PFX Certificate
Specifies a certificate stored in PFX format.
-
Password
The password required to access the certificate stored in PFX format
-
Time Stamp URL
Used to add a timestamp to the signature block in a script. This provides an extra level of security as PowerShell can determine if the certificates
used to sign a script were valid when the script was signed.
-
External Signing Tool
Provides the name of an alternative code signing tool.
-
Automatically sign .ps1 script when saving
Enable this to ensure that all scripts are signed.
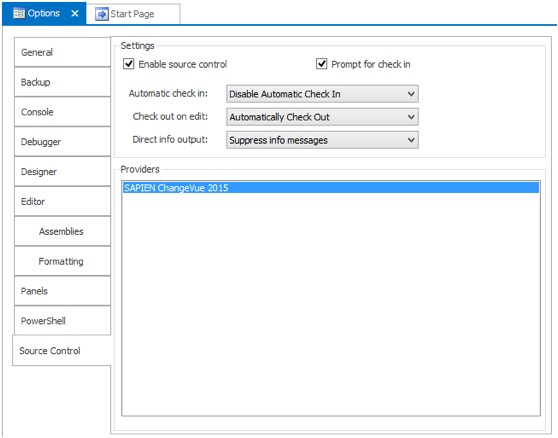
Source Control
-
Enable Source Control
Allows PowerShell Studio to use source control if it is available.
-
Prompt for Check In
This option works in conjunction with Automatic check in:
|
Prompt for Check In
|
Automatic Check In
|
Behavior
|
|
Checked
|
Check in when file closed
|
User is prompted to check in files
|
|
Unchecked
|
Check in when file closed
|
PowerShell Studio automatically checks in files
|
|
Any value
|
Disable Automatic Check In
|
User must manually check files in
|
-
Automatic Check In
This controls check in behavior and has following two options:
-
Disable automatic check in
Leaves you to decide when files should be checked in.
-
Check in when a file is closed
Automates the check in process.
-
Check Out On Edit
This controls check out behavior and has the following two options:
-
Automatically check out
PowerShell Studio will check a file out as soon as you edit the file.
-
Prompt for check out
PowerShell Studio will display a file chooser dialog in which you can choose the files you wish to check out. The file you are currently attempting
to edit will automatically be selected.
-
Providers
Displays the list of available source control providers and allows the user to switch between them.