
PowerShell Studio fully supports the creation of GUI scripts based on Windows Forms technology.
It includes a number of predefined forms to get you started or you can start with a blank form and build everything up from scratch.
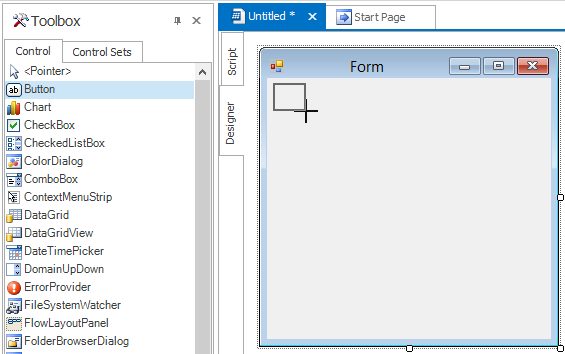
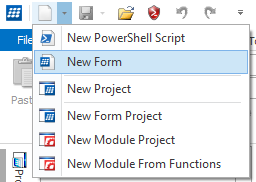
The main editor screen for GUI scripts is the Forms Designer. Open PowerShell Studio 2015 and click on New, New Form, to open the main editor screen:
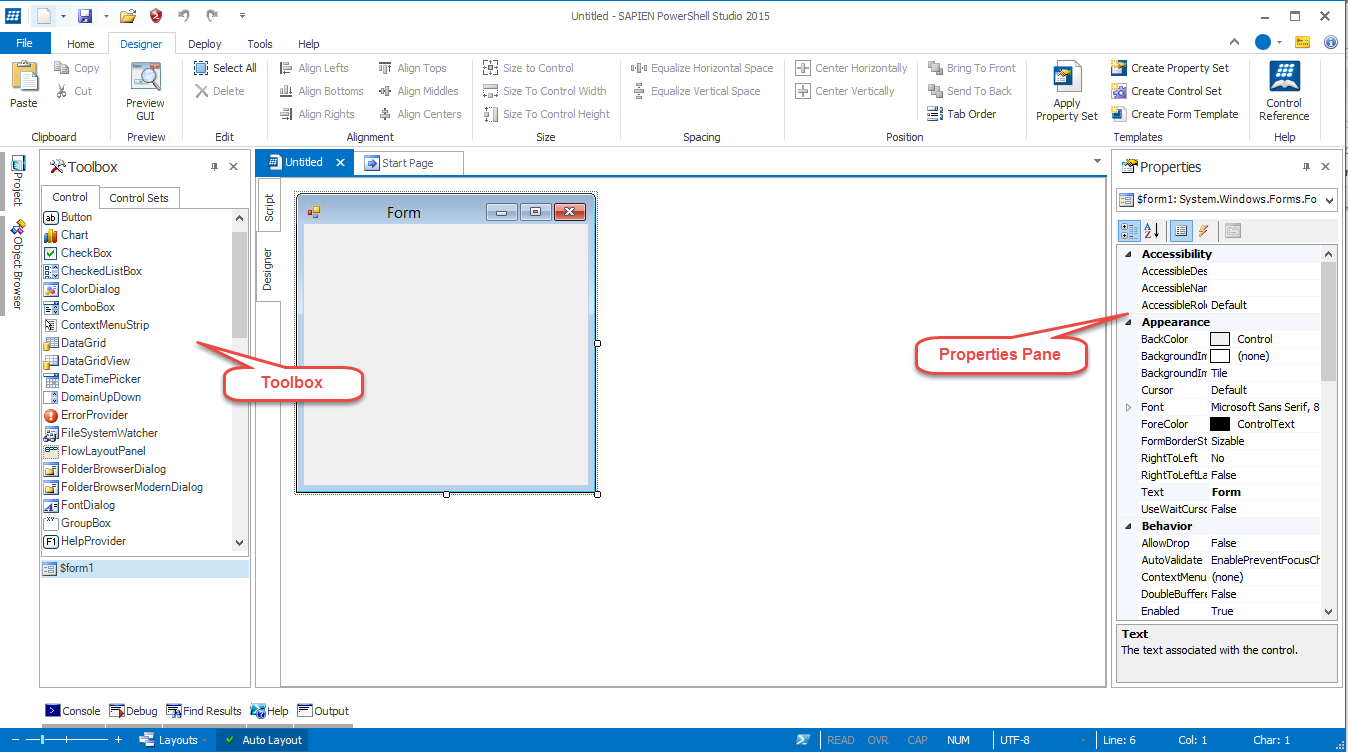
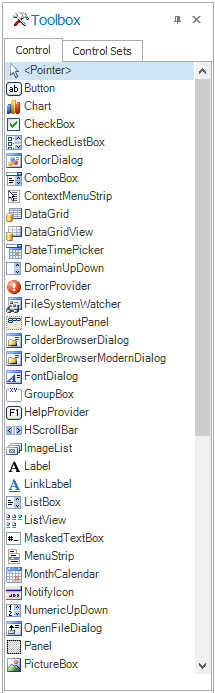
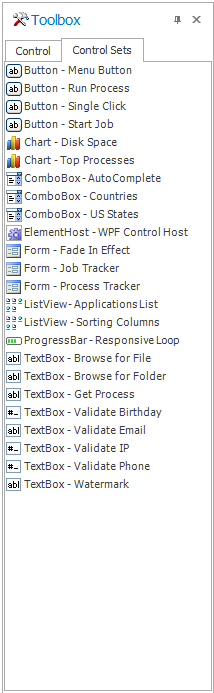
The Toolbox pane contains two tabs:
The Property Pane allows you to edit the properties of the currently selected control. Each property has an associated editor to help guide you in choosing the correct value. The Properties Pane also displays the events that a control can respond to, and allows you to connect an event to code.

To add a control to a form, simply open the toolbox and double click it in the Controls or Control Sets pane OR drag and drop it onto the form.
This screenshot shows a button control about to be dropped on to an empty form:
The edit section of the ribbon bar contains a number of useful commands for working with controls.

These include:
Equalize Vertical Space - Makes the vertical distances between the selected controls equal.
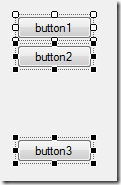
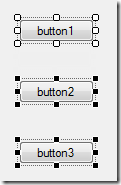
Equalize Horizontal Space - Makes the horizontal distances between the selected controls equal.


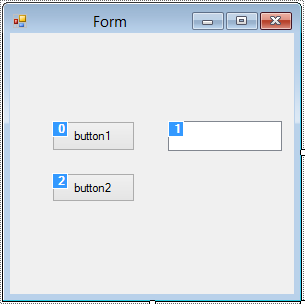
The Tab Order button is a toggle. That means that one click turns it on and another turns it off. In order to display the tab order of the form items, simply click the Tab Order button and each element on the form will show its tab order on the left.
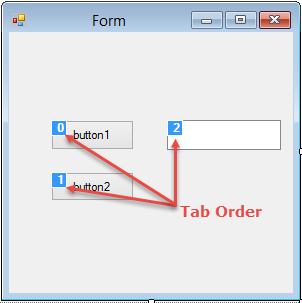
Notice the tab order itself is a zero-based array. So zero is the first tab, one is the second tab, and so on and so forth. To change the tab order simply click on one of the elements until the number you want appears. You don't have to click on the tab order number itself, just clicking anywhere on the element will suffice. Clicking on the element simply cycles through the available tab orders. As you click on the element, the number will increase. And once you reach the end of the available tab orders it will start back at zero.
In the above screenshot the tab order is button1, button2, dropdown.
In the below screenshot, however, the tab order has been changed to button1, dropdown, button2.
The Preview GUI button allows you to preview the way a form will appear at run time, without executing any of your code. When a form is in preview mode none of your controls will work, however, you can use the minimize and maximize buttons and resize the form to make sure it behaves as expected. When you are finished, close the form to go back to the designer.
Follow these steps to use Preview GUI:

The simplest way to connect a control event to your code, is to use the Add Events dialog. Right click on the control and choose Add Events, or press Ctrl+E.
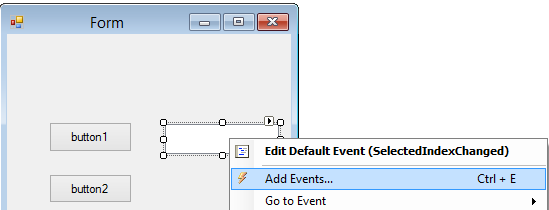
This will prompt the following pop-up:
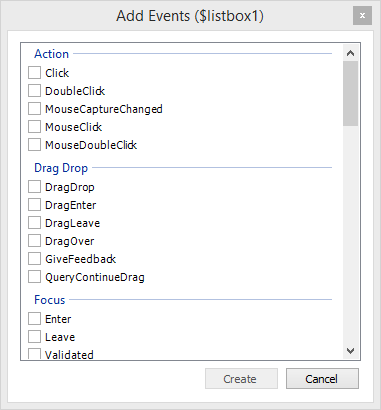
Now you can select the events you want to use in your script. PowerShell Studio will write the required code and indicate where you need to add your own code.
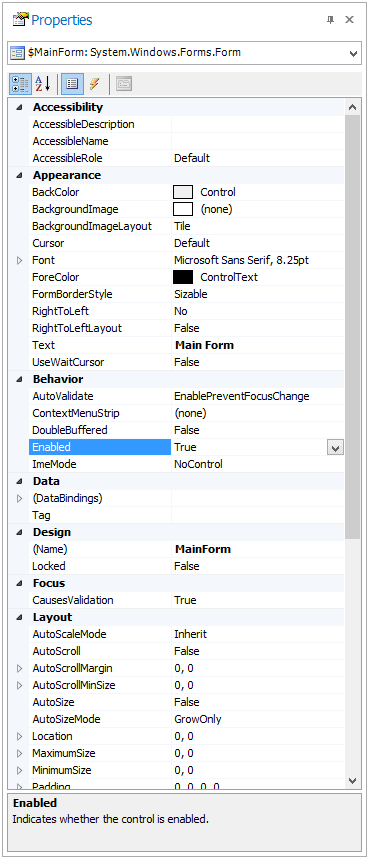
Event handlers can also be created using the properties panel. To do this, first select the control in the designer and access the properties panel. Then click on the lightning bolt button to display the events that belong to the control. The screenshot below shows the events for a form. The load event has been connected to a handler called form1_Load.
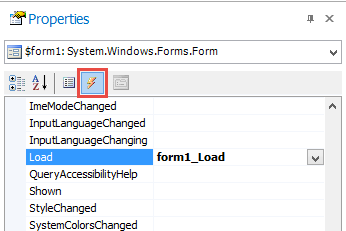
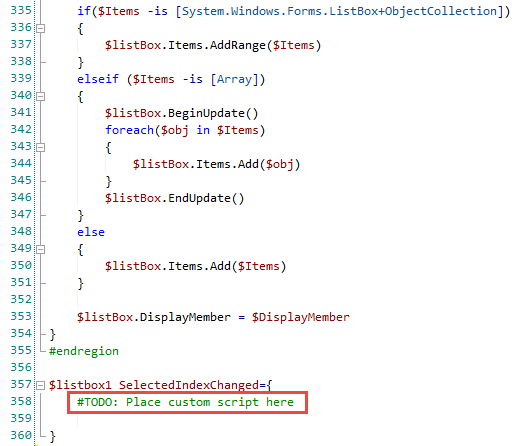
To handle another event, simply double click in the blank cell next to the event. PowerShell Studio will create an event handler named $<object name>_<event name>.
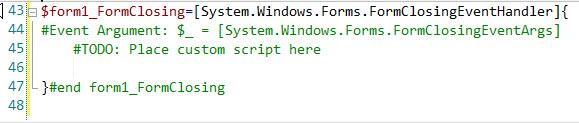
For example, double clicking in the blank cell next to FormClosing results in the following code being generated:
If you want to specify the name of the event handler you can type its name rather than double clicking in the blank cell. PowerShell Studio will use the name you type to generate the event handler.
A form template is a pre-created form containing controls and script code. Templates help you create GUI scripts quickly by doing much of the layout and code writing for you.
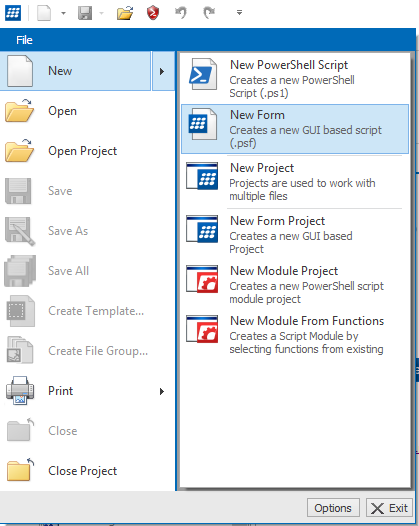
To create a GUI based script, choose New Form from the New button on the Quick Access menu.
You may also choose New Form from the File menu.
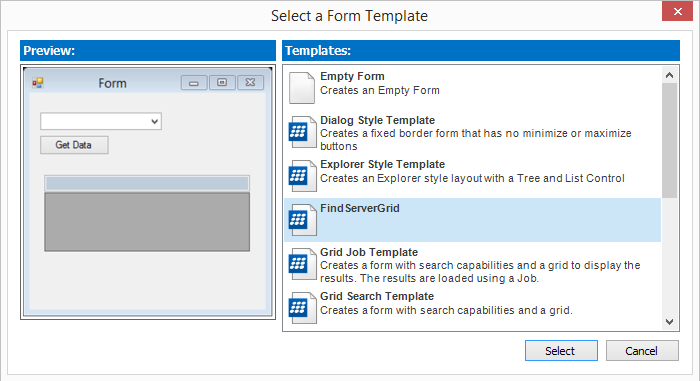
Either method will display the template selector:
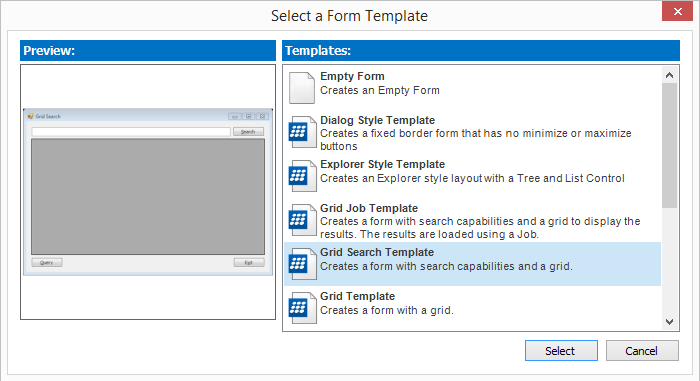
As you click on a template a small preview is displayed on the left. You will notice the preview image changes with the Grid Search Template above. Press Select to create the form and associated scripts.
If the predefined templates do not meet your needs, you can create your own. There are two distinct types of templates:
To get started, create a new form and configure it as required; including event handlers and any other code.
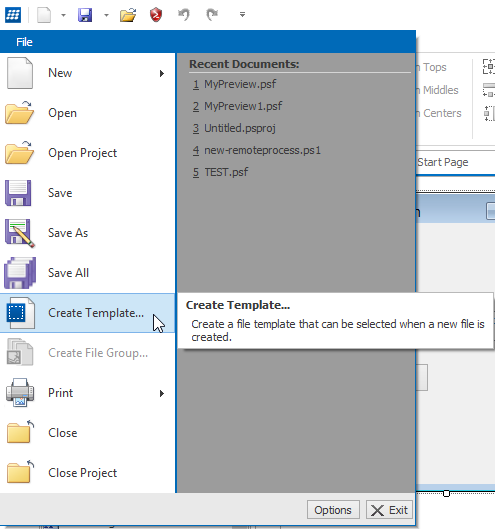
Save your work and then go to the File menu and choose Create Template. NOTE: This functionality used to be on the Export tab of the ribbon.
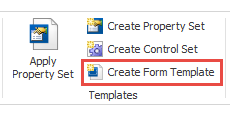
You can also click on the Create Form Template button on the Templates menu of the Designer ribbon.
Next you are presented with the Create Form Template dialog:

Now fill in the form properties:
Fill in the form and press Save. Your new template will now be shown whenever you create a new form, just like the standard templates.
If you right click on a database table or WMI object in the Object Browser, the following menu appears:
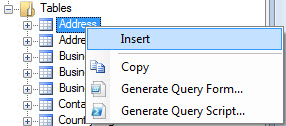
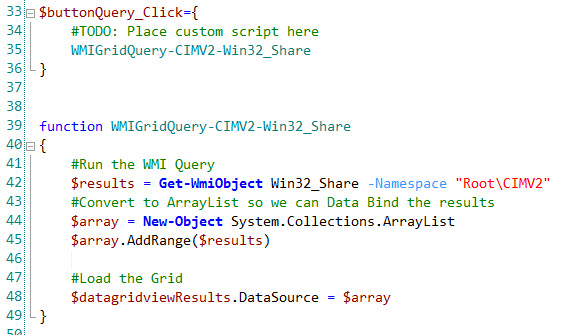
The Generate Query Form… option will display a list of grid templates, that include code, to retrieve objects and display them in a grid. In order to allow the code generator to reuse a template for different kinds of objects, placeholders are included in the template. These placeholders get replaced with object specific code when the template is used.
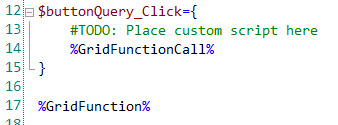
There are four placeholders:
If you open the form file 'Grid Template.psf' from the built in grid template stored in %ProgramData%\SAPIEN\PowerShell Studio 2014\Templates\Grids\Grid Template and examine the code, you will find the placeholders.
Once the template has been used against a WMI object, the generated code looks like this:
These placeholders allow you to control exactly how a user can interact with data, while leaving PowerShell Studio to write the data retrieval code.
When you create a grid template from an existing form, PowerShell Studio will clearly indicate that you have not included the placeholders in your code.

You can elect not to include them if you would rather provide a fixed data retrieval implementation.
You can export a script or package directly from the Export tab of the ribbon:
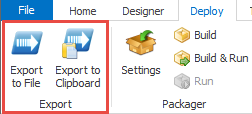
Exporting creates a single stand-alone script that encapsulates all of the content of a script or package. The exported code can be placed on the clipboard or stored in a file. In both cases, PowerShell Studio adds assembly load statements to the front of the exported code to make sure that it runs in the same environment.
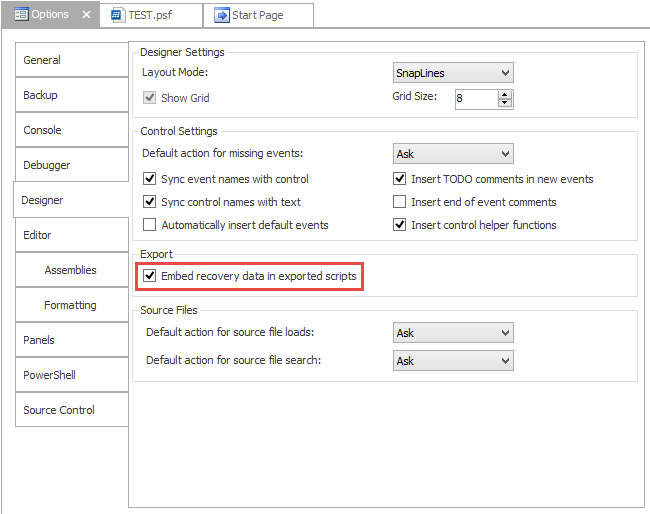
PowerShell Studio can also add metadata, called recovery data, to the script created by the export process. This metadata allows PowerShell Studio to recreate the original project that was used during the export. Recovery data embedding is enabled on the Designer tab of the Options dialog on the Home ribbon as displayed below.
Chapter 9 will cover the recovery options in detail.
When an exported script is opened in PowerShell Studio and recovery data is present, PowerShell Studio will offer you the option of using the recovery data to recreate the project that was used to create the script. Alternatively, you can simply open the script in the code editor.
If you are working with a GUI script within PowerShell Studio and find that you need to edit the exported script to modify the control's initialization, then you are doing something wrong. Don't get us wrong, modifying and initialization of control properties is not the issue; in fact that is part of writing a GUI. What we're more referring to is the part where you are editing the exported scripts.
If you are editing the exported script:
So the main question here is: If I'm not supposed to edit the exported script, then how do I initialize my controls?
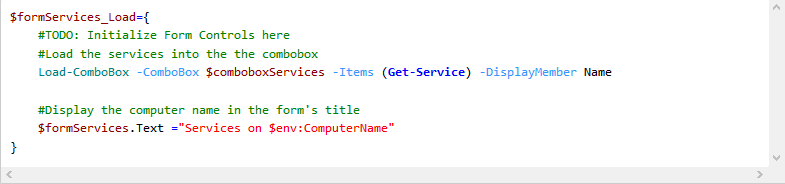
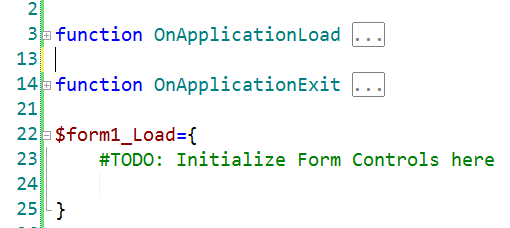
Thankfully WinForms provides a convenient place to initialize your GUI controls, the Form control's Load event. The Form control's Load event is called right before the form is displayed, which makes it a perfect place to initialize your controls.
WARNING: Do not try to initialize a control outside an event block within the script.
It is possible to use other events to trigger initialization. For example, some control sets such as the Chart - Disk Space use the VisibleChanged event to trigger initialization. This event is triggered when the control is displayed (such as when the form is loaded) or hidden using the Visible property.

In the sample above, the control set initializes when the control becomes visible by checking its Visible property.
If your initialization script is running slow, it can prevent the GUI from displaying in a timely manner or cause it to hang. In instances such as this, you might want to delay your initialization or simply run the query in a separate job, then initialize and enable the controls after the job has completed the query.
WARNING: You cannot access GUI controls directly from a Job. You must return the results first and then initialize the controls on the main thread / script.
Some controls are relatively complicated to work with directly from PowerShell, and may require custom .Net code to be able to access all of their features. For those controls, PowerShell Studio automatically creates helper functions that add useful .Net based methods into the form.
For example, when you add a ListView control to a form, PowerShell Studio adds two helper functions:
To demonstrate this, create a new empty form in PowerShell Studio and look at the script that has been created.
Now add a ListView control to the form and examine the code again. In the screenshot below, the helper functions have been folded to reduce the size of the image.
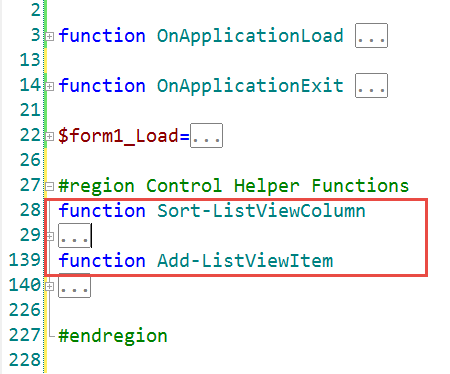
A region called 'Control Helper Functions' has been added to the form and two functions have been defined.
As you build larger and more complex scripts, you will find it useful to build up a collection of helper functions. Control helper functions are stored in the following folder:
%ProgramData%\SAPIEN\PowerShell Studio 2015\Templates\Control Functions
Each control that has helper functions will have a folder named after the control. This is the default set delivered with PowerShell Studio 2015:

Each of these directories contains one or more PowerShell scripts that will be merged into existing code when the control is added to a form.
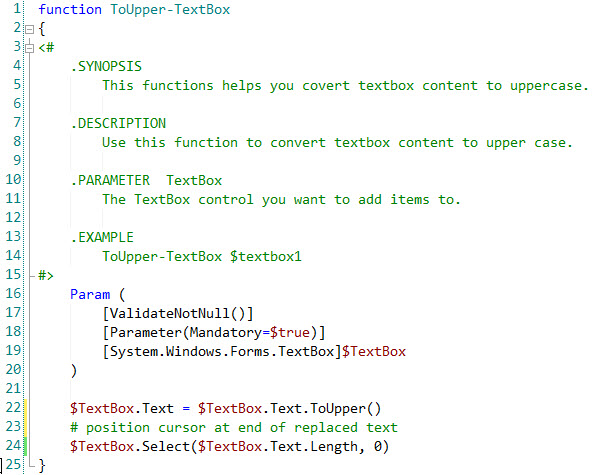
If we wanted to add a helper function to textbox controls, the first step would be to create a folder called System.Windows.Forms.TextBox in this folder. Note: The folder must match the control type's full name.
Next we would create one or more scripts, one for each helper function. It is important that the name of the function is the same as the name of the script file, and that only one file is included per script. In this case, we will add the script shown below. This sample function coverts the text in a textbox to upper case.
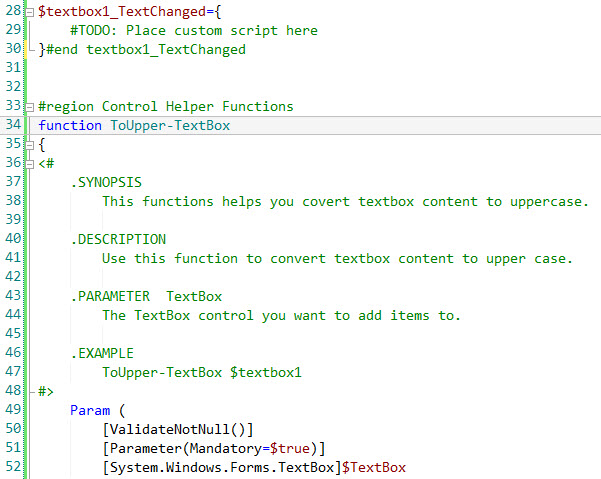
Now when we add a textbox to a form in PowerShell Studio, our helper function will be included along with the standard code as shown below:
Failure to follow these rules can result in the insertion of multiple copies of the same function.
A property set is a collection of property settings that can be applied together to one or more controls.Property Sets allow you to create a consistent look and feel for your GUIs; they are similar to the web concept of CSS files. A property set can be generic or specific to a particular type of control.
Property sets are applied by selecting one or more controls on a form, pressing the Apply Property Set button on the Designer ribbon, pressing Ctrl+L, or by right-clicking on the control and choosing Apply Property Set from the menu.
This will display the Property Set Template picker.
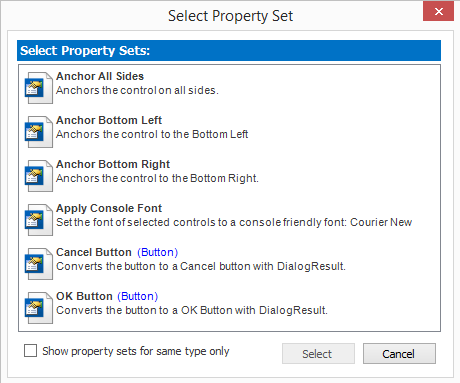
In this case, we are applying a property set to a button control. PowerShell Studio is showing four general styles and two that are specific to Buttons.
If you check the 'Show property sets for same type only' check box, the style list will be filtered to leave only styles that apply directly to the selected control type, as shown below.
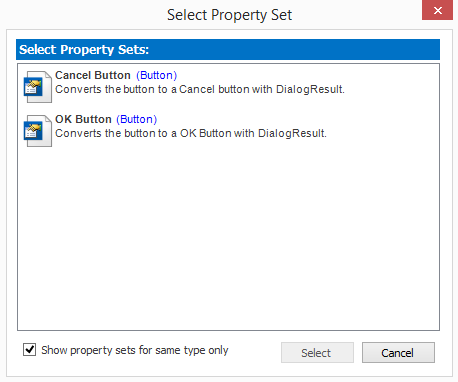
Now click on the style you wish to apply and press Select to apply it.
NOTE: If you modify a property set after you have applied it to controls, you must reapply it to those controls. Your changes will not be automatically applied.
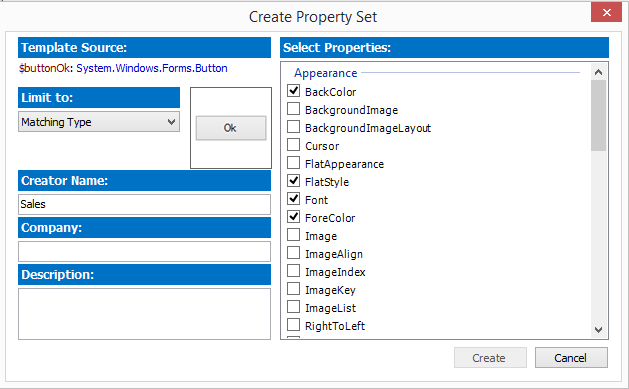
You can create your own property sets that encapsulate local branding requirements or other useful settings. To do this, first set all of the control properties that you want to capture. Then select a control and press the Create Property Set button on the Designer ribbon or press Ctrl+Shift+L.
When the Create Property Set Template dialog appears, select the properties that should be captured by the property set. Use the Limit to: selector to specify whether your new property set can be used with any control, or only controls that are the same type as the source control. You must also add a description before you can save the new property set.
The next time you apply a property set, your new property set will appear in the list of possible choices.
There is currently no way to alter a property set. They must be re-created and re-applied to the control.
In the same way that property sets allow you to group together property settings for reuse, control sets allow you to combine multiple controls and script code into new custom controls that can be added to forms just like standard controls.
PowerShell Studio provides a useful set of Control Sets. They are shown on the Control Sets tab of the Toolbox.

These control sets address a number of common scenarios in PowerShell scripting. To use them, simply drag one onto a form and, if necessary, add code to integrate it into your script. In some cases, a control set will need to add code to certain event handlers before it can work. PowerShell Studio will display the following dialog if this is required.
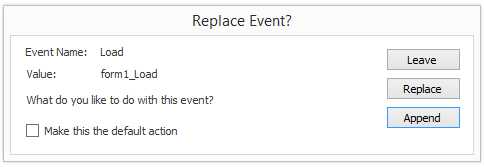
You can select from the following options:
When you select the new Append option, the form's event is assigned below the new event script block:
Now you can use multiple controls sets that share the same events without them interfering with one another.
In the code shown below, the form load event handler ($form1_Load) has been customized to write information to the debug pipeline.
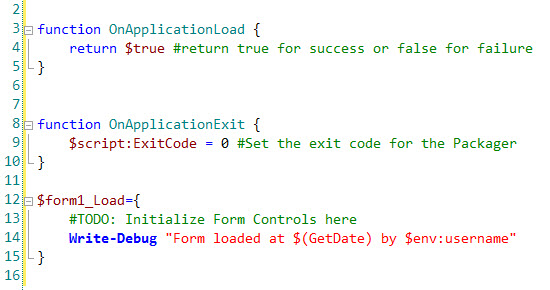
We can see from the form properties that this handler has been connected to the form's Load event:

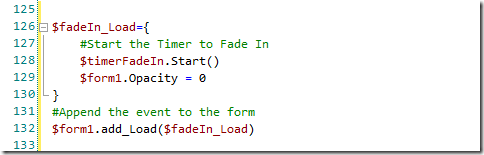
If we now add the 'Fade in Effect' control set and choose replace, the following changes occur:
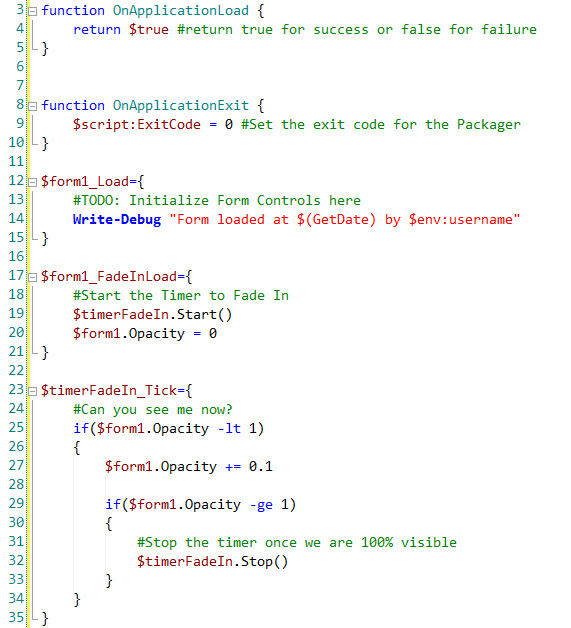
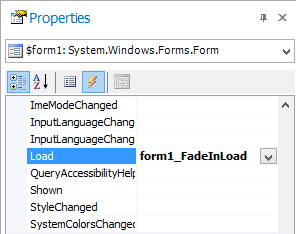
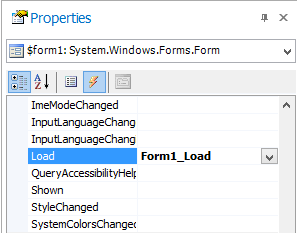
This provides a nice fade in effect but our Write-Debug statement is no longer executed. To fix this, reconnect the form's Load event to the original event handler, form1_Load, and modify the event handler to call the new control set code.
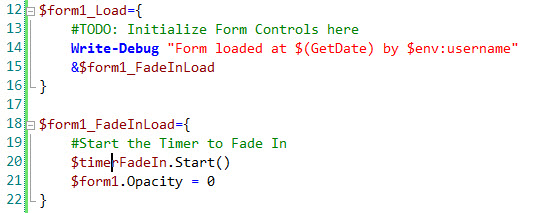
The following line will execute the code stored in the variable $form1_FadeInLoad:
&$form1_FadeInLoad
Choosing Leave would have added the control set code without connecting the form's load event to the new event handler, thus leaving it to us to connect things as we see fit.
Creating your own control sets is another great way to build reusable components for your scripting tasks.
Start by adding controls to a form, configuring their properties, and writing all of the code required to make your new control set function correctly. Once done, select all of the controls that are to be included in the control set and press Ctrl+T or right click on the code editor pane and choose Create Control Set.
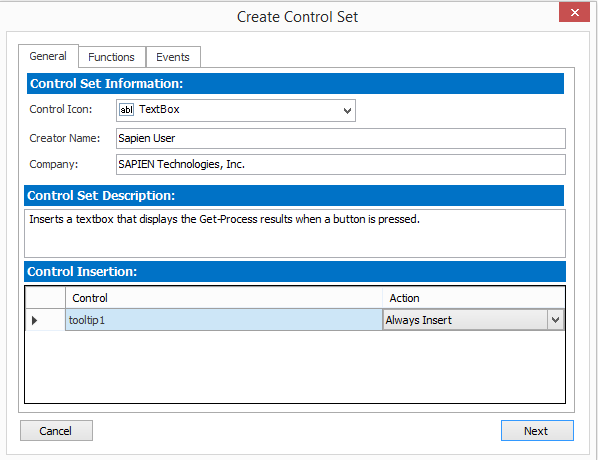
The Create Control Set dialog allows you to set the properties of your new custom control. On the General tab:
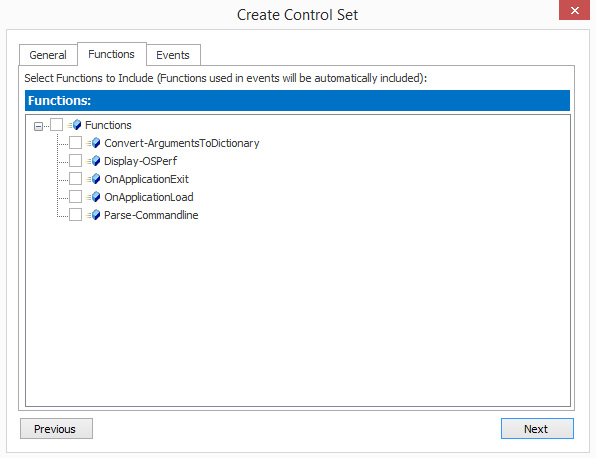
When you press Next you will be taken to the Functions tab where you can choose to include any functions from your code in the template.
PowerShell Studio will automatically include functions that are bound to events in the control.
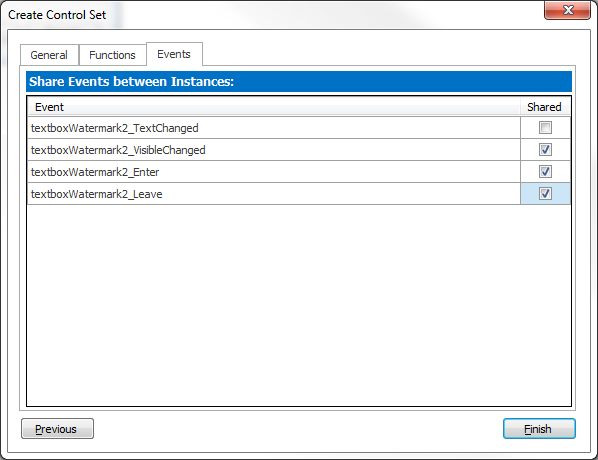
Next is the Events tab, where you can mark an event as shared. When you check the "Shared" checkbox next to an event, it will tell PowerShell Studio to share the event over multiple instances of the control set. It does this by first checking if the event already exists. If the event does not exist, then it will insert the event. If it does exist, it will simply use the existing script block whenever a control triggers the event.
The TextBox-Watermark control set in PowerShell Studio 2015 serves as a perfect example as to where you would use a shared event. The script blocks to display the watermark, is identical for all instances of the control set, and thus doesn't make sense to create a new instance of the same event block every time the control set is inserted.
Click on Finish and give your Control Set a name. It will now be added to the Toolbox.
If you include an entire form in a control set, PowerShell Studio will add an extra tab to the Create Control Set dialog.
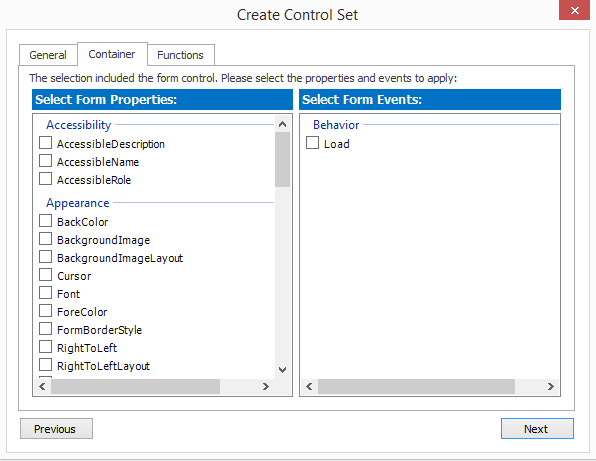
The container tab helps you to specify which form property values and event handlers should be included in the control set. The next time you need to use your new control set, simply drag it from the toolbox onto a form.