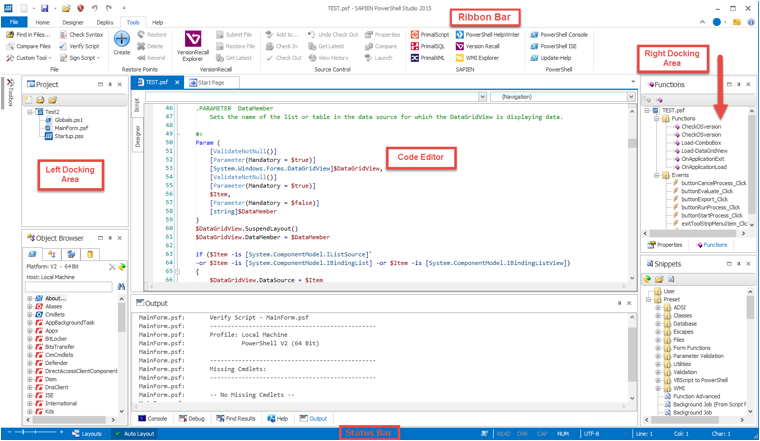
PowerShell Studio displays a ribbon bar at the top of the application window:
The tabs on the ribbon bar are:


There are also four buttons on the right hand side of the ribbon bar. From left to right:
![]()
The image below shows the major features of the PowerShell Studio window:
The Panels button on the Home ribbon tab contains a complete list of all of the panels that can be displayed in PowerShell Studio 2015.
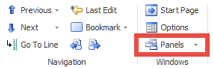
The list of panels that can be displayed includes the following below (These panels are covered in detail in Chapter 7):
Once a panel is displayed it can be locked into position or closed by using the buttons at the top right of the panel:
![]()
You can also click on the title bar of a panel and drag it to another location. As soon as you begin to drag the panel docking hints will appear.

You can drop the panel onto a docking hint to have it snap it to the desired location or leave the panel floating in the IDE window.
The status bar, at the bottom of the PowerShell Studio window, displays useful information about the current configuration of PowerShell Studio.
The left hand side of the status bar contains the Font Size slider, the Layouts menu, and the Auto Layout toggle button.
The slider is used to increase or decrease the font size used in the PowerShell Studio editor window.
The Layouts menu is used to define and choose different layouts for the scripting environment. You can read more about the Layouts menu in the Layouts section below:
![]()
The right hand side of the status bar includes the following status indicators:
![]()
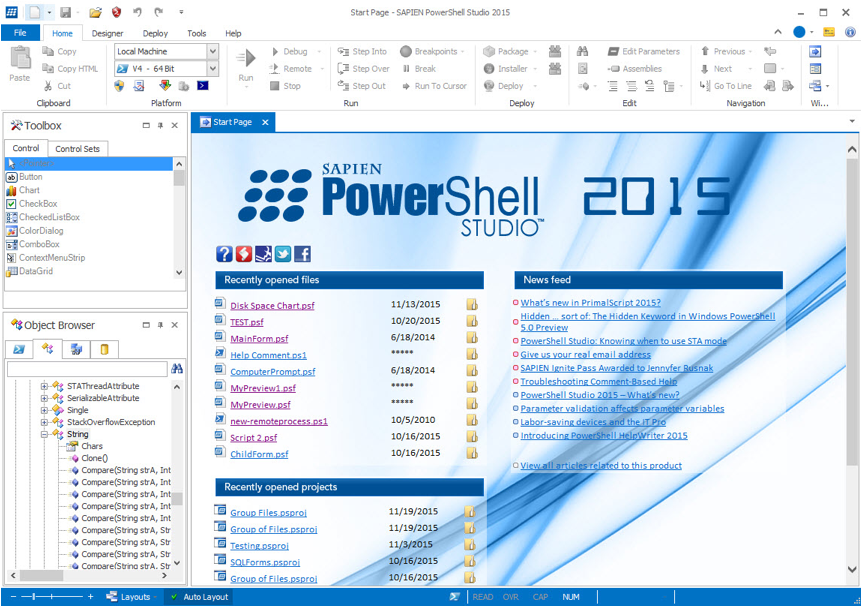
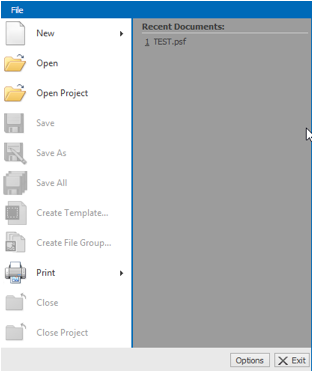
The start page displays Links to:
The startup page can be disabled by going to the Home tab, selecting Options, and then clearing the Show Start Page on Startup checkbox. It can also be disabled by the link at the bottom left corner of the Start Page.
A layout defines the position and visibility of the various PowerShell Studio panels. There are a number of preset layouts that configure PowerShell studio for specific activities:
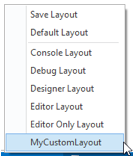
PowerShell Studio will automatically choose a layout based on what you are doing. If you want to switch to one of the other standard layouts you can use the layout selector; located next to the font size tool on the status bar.
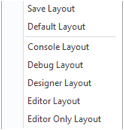
Simply click on the button and choose a layout from the list:
The auto layout button, next to the layout chooser, is used to enable or disable context sensitive layout changes.
![]()
Simply click on this button to toggle auto layout on or off.
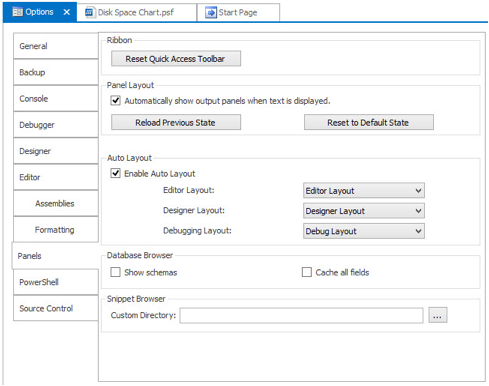
You can also configure layout options by accessing the Panel tab of the options screen (Home ribbon/Options), as shown below:
Layout files are saved in the following location:
AppData\Roaming\SAPIEN\PowerShell Studio 2015\Layouts
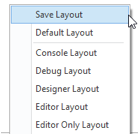
Each layout pertains to a .layout file, which contains the state information of the panels in PowerShell Studio. You can use the layout selector to save your own customized layout for future reuse. To do this, first configure PowerShell Studio to your preferred layout and then click on the Save Layout option in the layout picker:
PowerShell Studio will display a Save As dialog where you can set the name for your new layout:
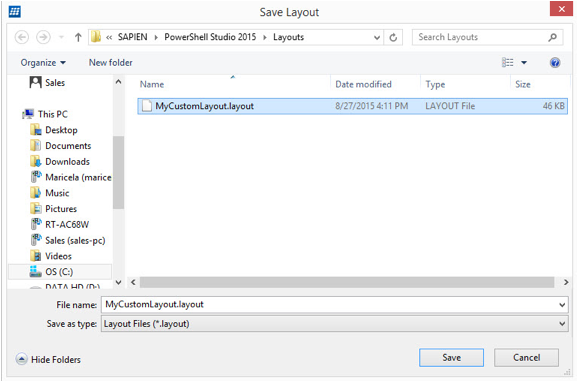
Once you press Save the new layout will appear in the list of available layouts.
NOTE: You can disable the Auto Layout feature in order to maintain the current layout.
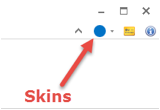
The main color scheme used by PowerShell Studio can be changed from the Skins button on the top right hand corner of the window. There are several color schemes to choose from.