How to execute a script from a Windows Form and capture the output in a text box
- Details
- Written by Max Trinidad
- Last Updated: 11 June 2020
- Created: 25 November 2019
- Hits: 26622
User Rating: 4 / 5


We often get asked how to execute an external script from a Windows Form and capture the output in a text box. This example shows how to accomplish this in just a few steps with PowerShell Studio.
A. Build the GUI for the application
Follow the steps below in PowerShell Studio:
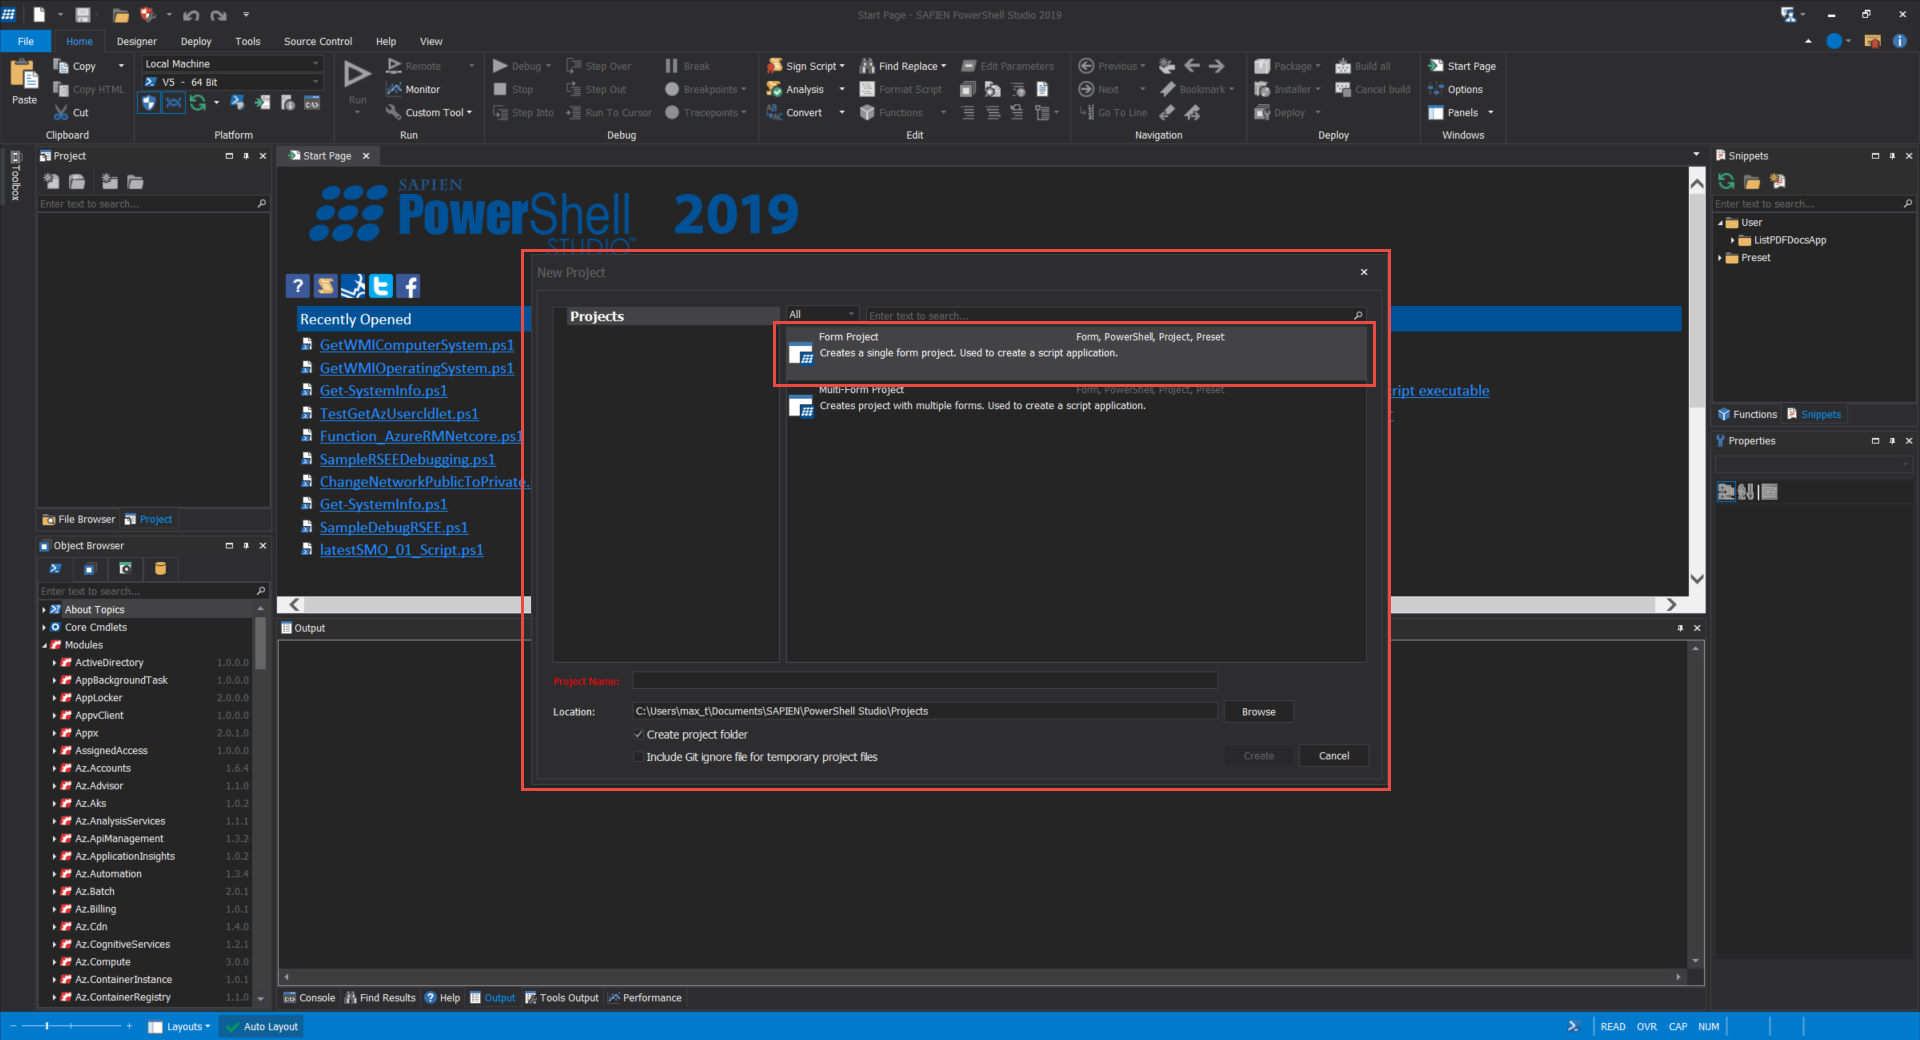
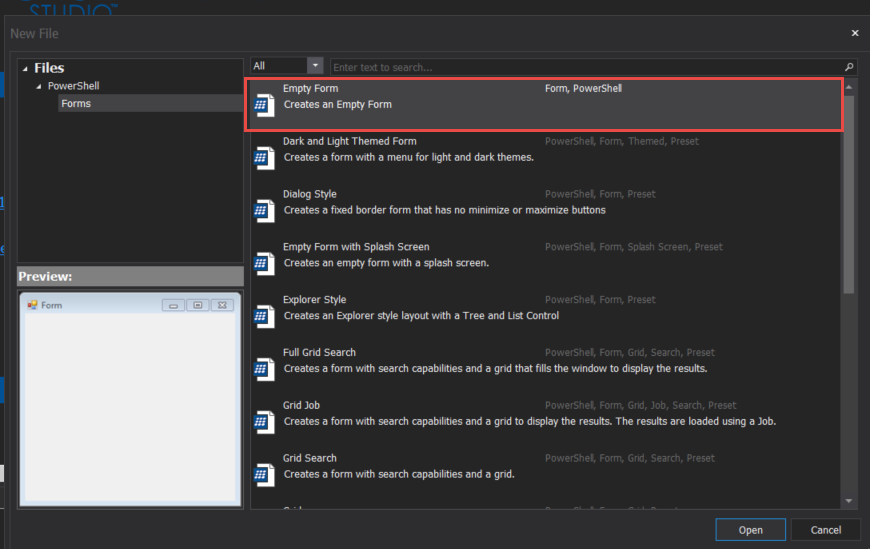
1. Open a New Form Project: Select "Form Project" and give the new form a name, then click the "Create" button and select the "Empty Form" template. Next, click the "Open" button to start working with the form.
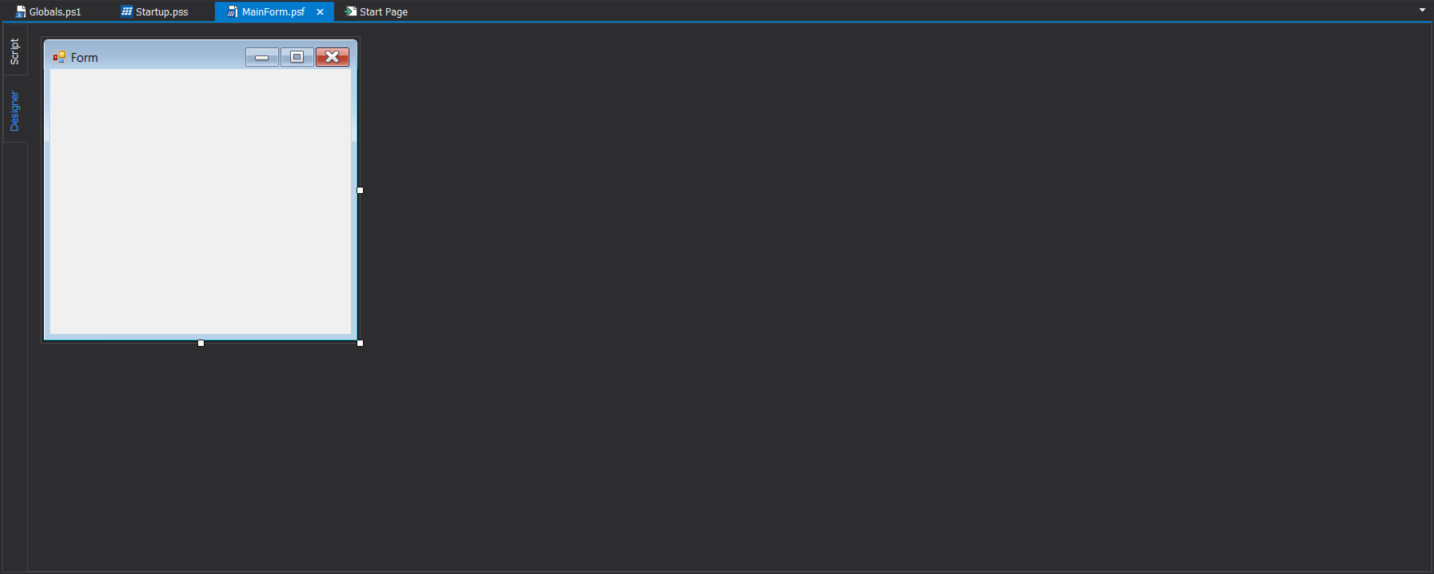
2. In the editor panel, go to the "MainForm.psf" tab and adjust the form's size.
3. From the Toolbox "Control Set" section, add the "TextBox - Browse for File" control. Resize the textbox to accommodate long file names.
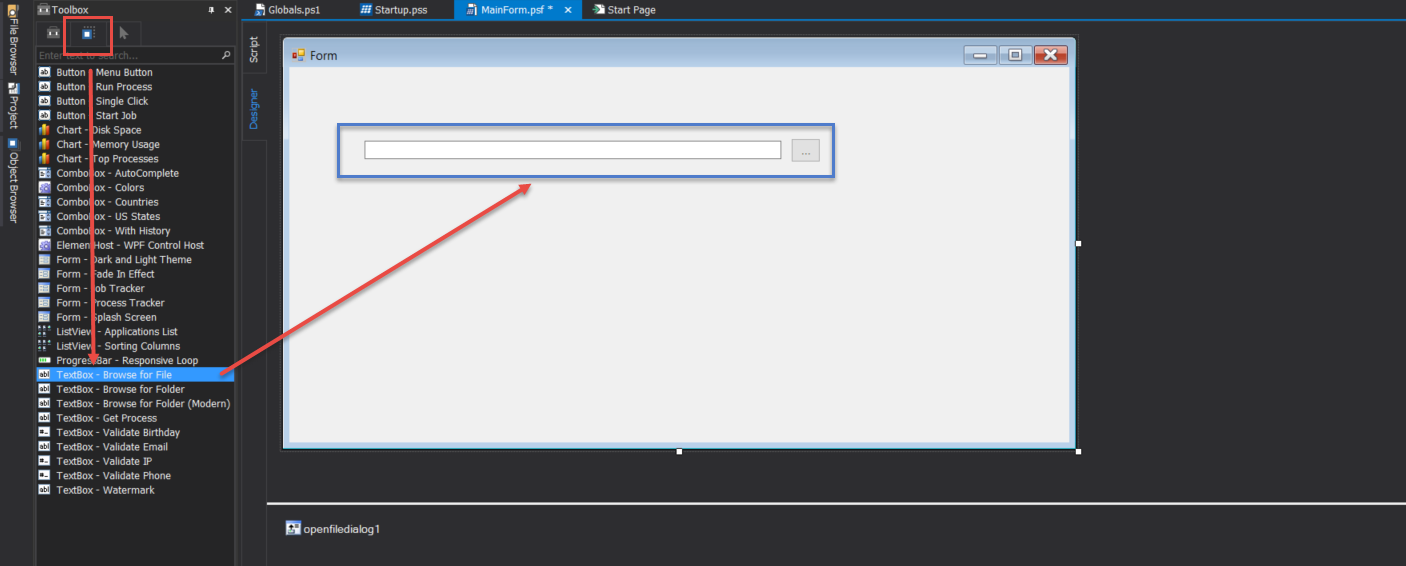
4. From the Toolbox "Controls" section, add a button and a TextBox control.
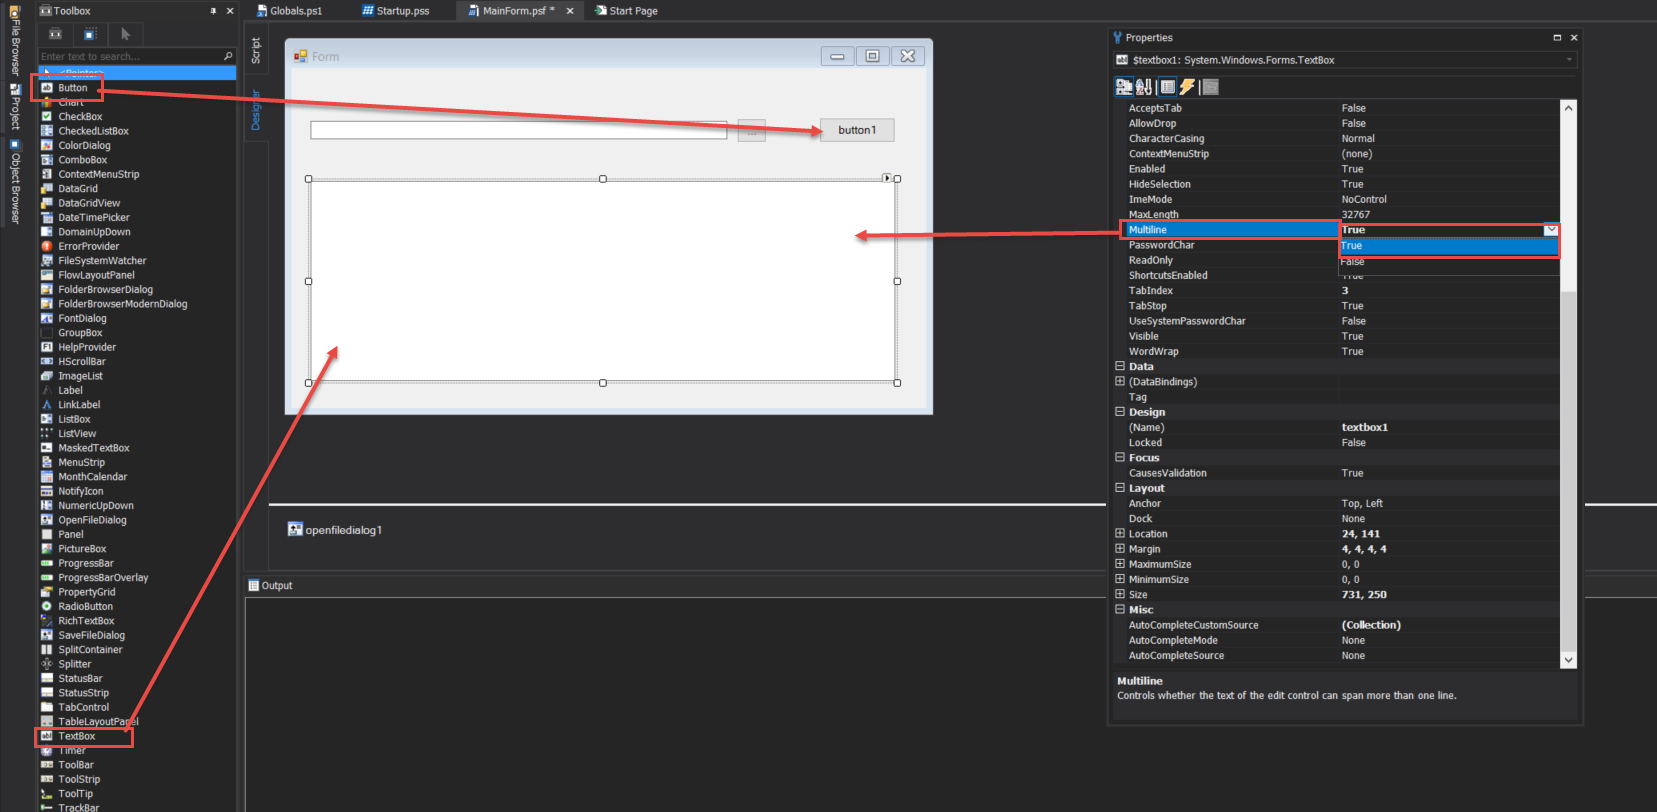
5. For the TextBox control, change the "Multiline" property to "True" and then resize the control to the desired dimensions.
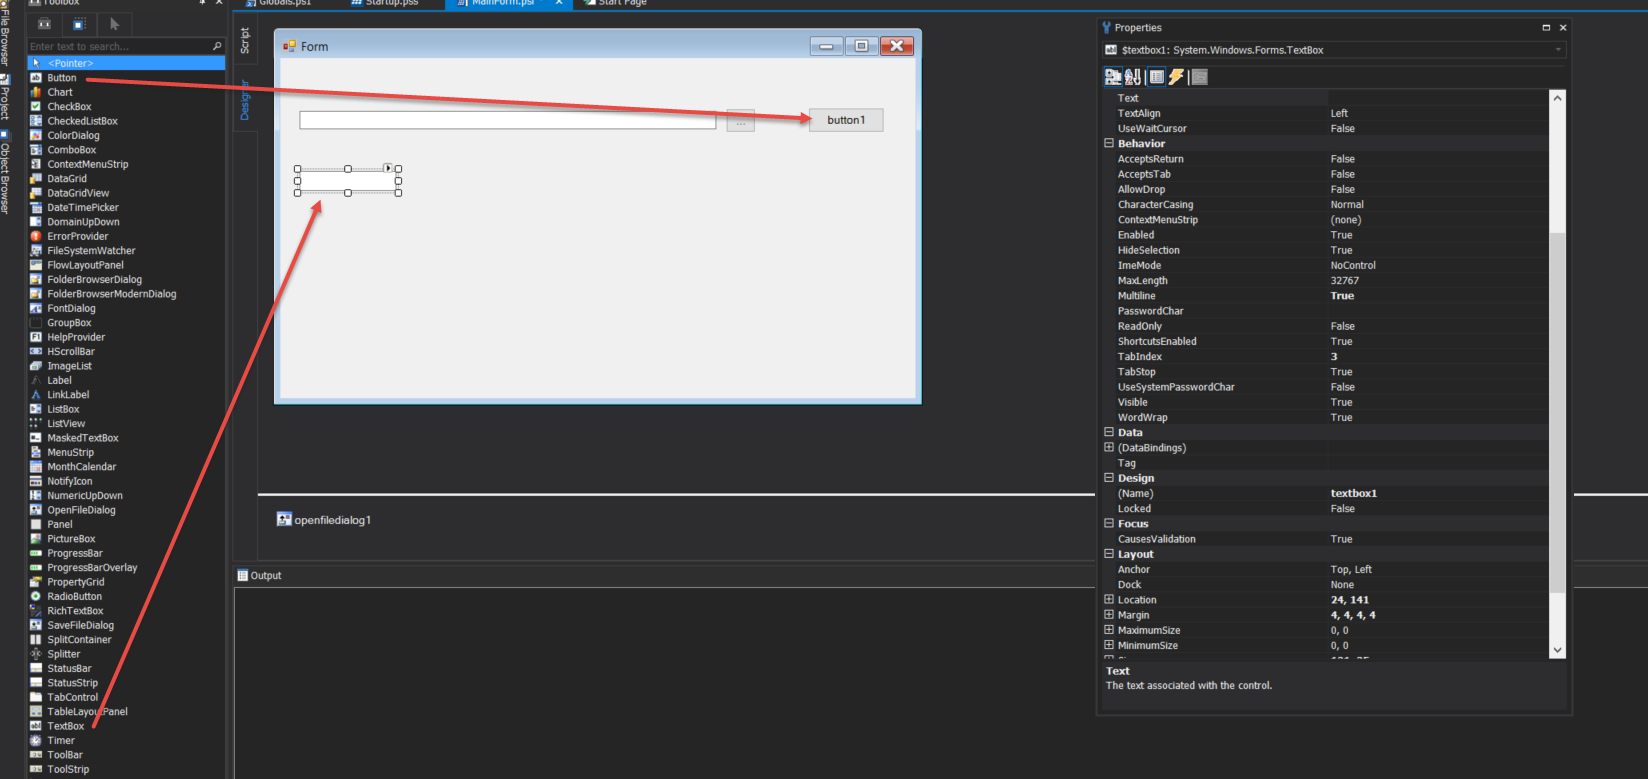
Finally, change the text for the button to "Run". This will execute our external script.
B. The Code
Since you added the "TextBox - Browse for File" control set, the form will automatically include the code for the browse button.
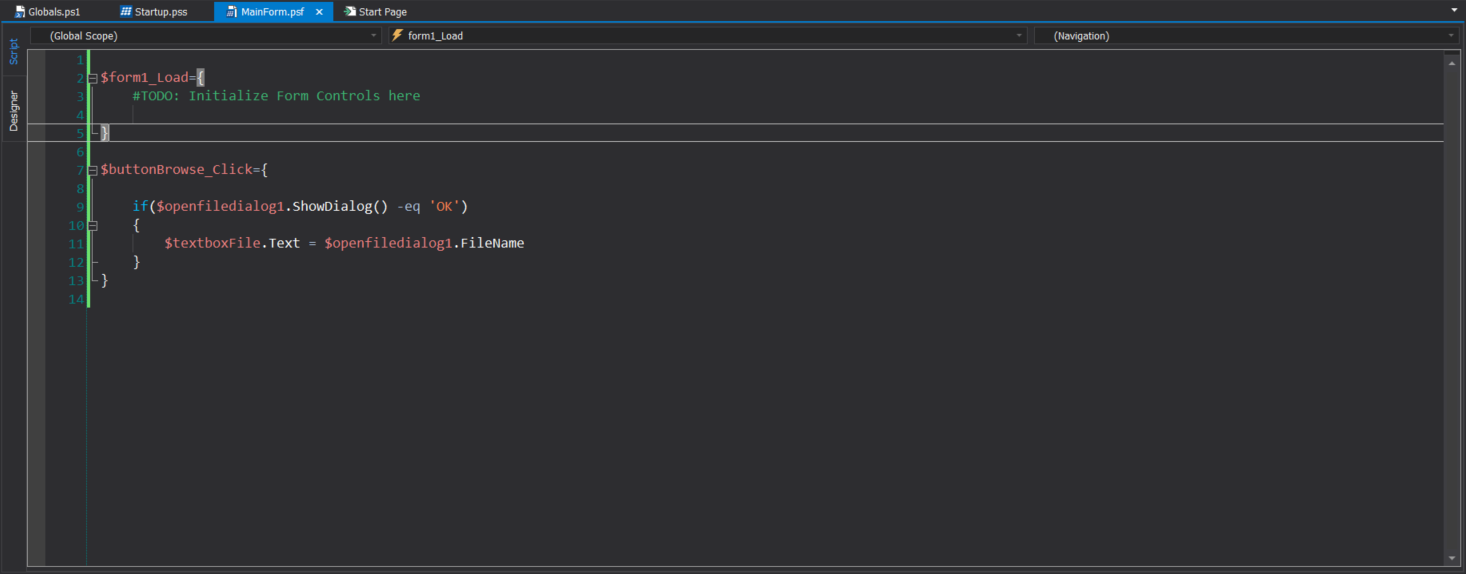
The Button control added above did not add any code in the form. So, in the Form Designer panel double-click on the "Run" button to create the "Run" event handler.

Now, with all that in place, we can add the code which will execute the selected script and capture the output in the form's multiline textbox.
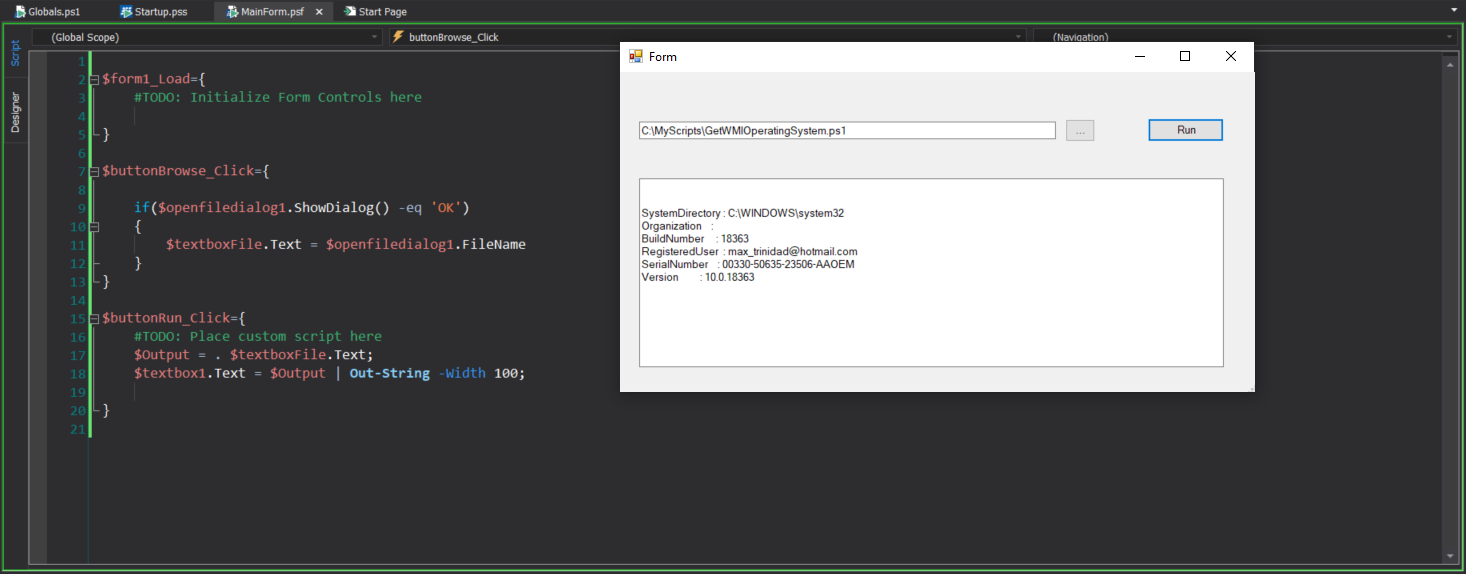
Add these two lines of code into the "buttonRun_Click" event script block:
$Output = . $textboxFile.Text;
$textbox1.Text = $Output | Out-String -Width 100

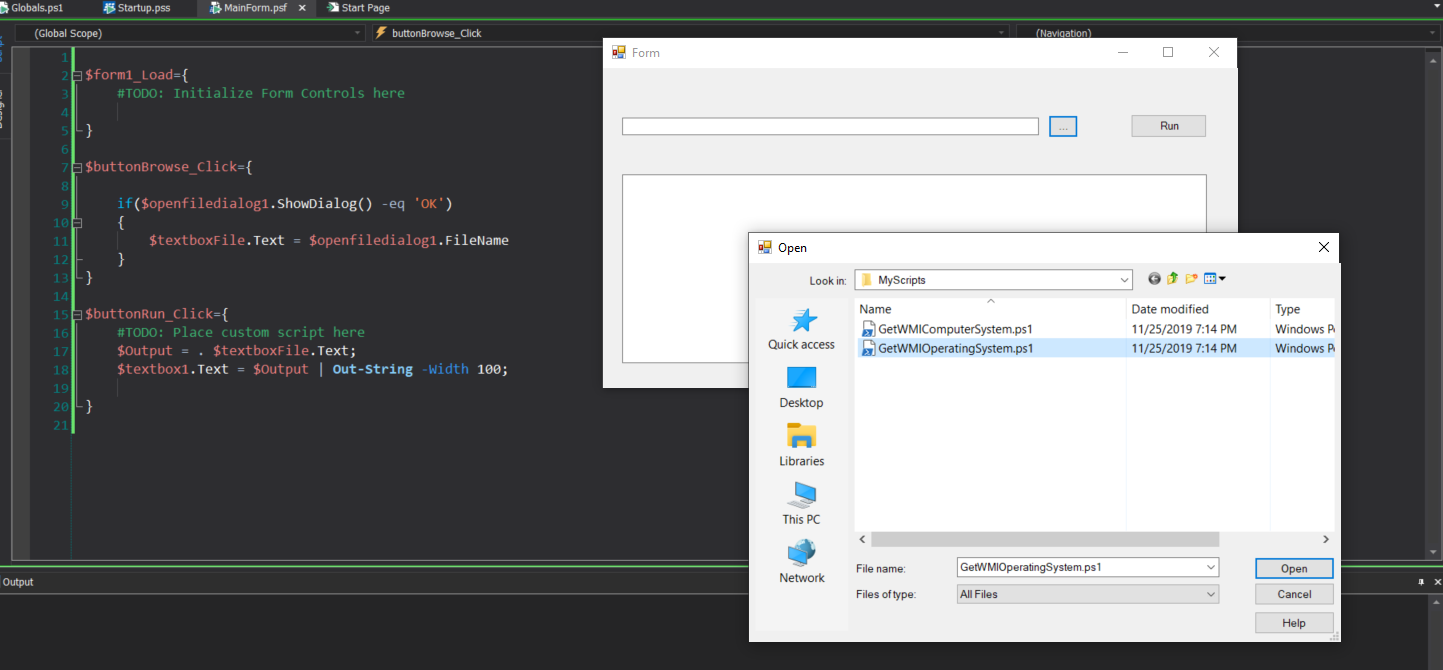
C. Run the application
Launch the application, select and execute a script file and see the results displayed in the multiline text box. For this to work as expected, you must select a script that actually produces output.
As demonstrated in this example, using PowerShell Studio's form templates and control sets can drastically reduce GUI development time. This sample took just a few minutes to build—go ahead and try it for yourself!
For licensed customers, use the forum associated with your product in our Product Support Forums for Registered Customers.
For users of trial versions, please post in our Former and Future Customers - Questions forum.