PowerShell Studio projects help group related files and settings together. For example, a PowerShell utility might consist of several different Forms and Scripts. A project can keep these files together, whereas the PowerShell Studio packager can create an executable file that includes everything in the package.
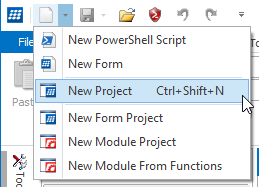
To create a project, click on the small triangle in the top left corner, next to the new menu on the ribbon bar:
Clicking on the new menu will create a new PowerShell script instead of a project.
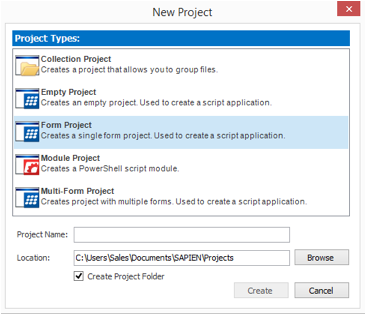
There are a total of four project templates to choose from. Once you have chosen a template, specify the project name and choose a distinct folder to store the project files in.
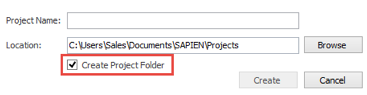
Checking the 'Create Project Folder' option will ensure that your project files are stored in their own sub directory in the Projects folder, rather than mixing them together with files from other projects.
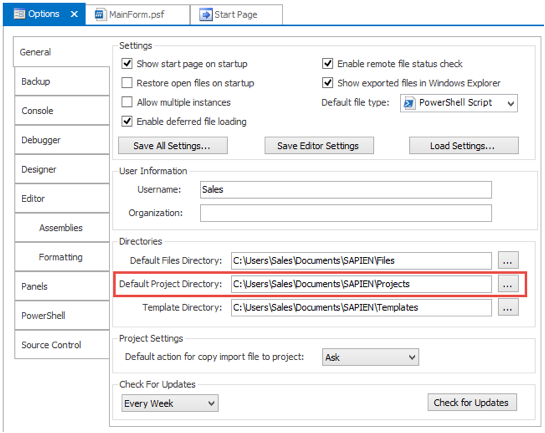
The default location for project files is:
%homepath%\Documents\SAPIEN\PowerShell Studio 2015\Projects
This path can be changed to reflect your environment in the General pane of the Options menu, under "Directories", as shown below.
New projects are based on a template; PowerShell Studio provides four templates to choose from. All four options are described below.
Once you have chosen your template, you will need to provide the following information:
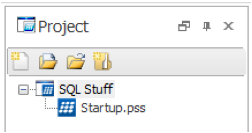
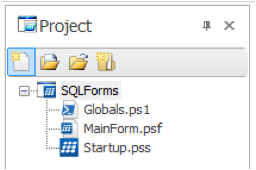
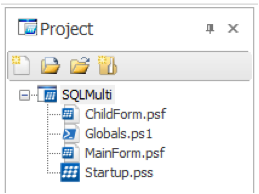
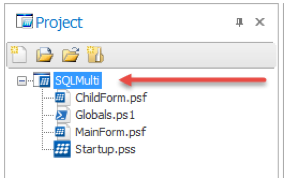
PowerShell will create all of the files specified in the template and display them in the Project pane.
You may find at times you reuse various functions and constantly copy them into new scripts or find different variations of the same function are located in different scripts. You may come to the conclusion that those functions would better serve you in the form of a module where all your scripts can reference the functions in a centralized location. This is where the New Module From Functions feature comes in handy.
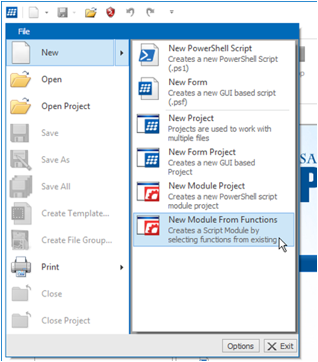
The New Module From Functions allows you to import functions from various ps1 scripts and merge them into a new script module. When you select this project from the menu, it will ask you to select a file (if one is not already open) and present you with the following dialog:
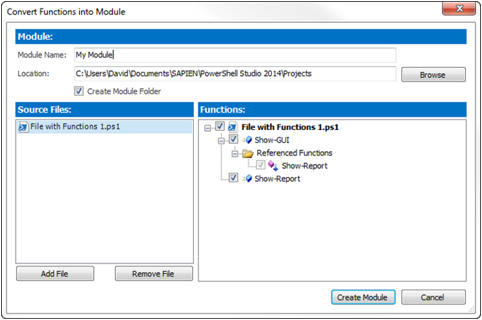
Let's cover each field individually:

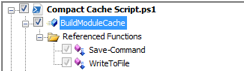
![]() When you check a function in the list that has references, it will automatically check all the referenced functions as well.
When you check a function in the list that has references, it will automatically check all the referenced functions as well.
![]() You can check and un-check all the functions in the file by checking/un-checking the file's node.
You can check and un-check all the functions in the file by checking/un-checking the file's node.
Once you have selected the functions and specified a module name, you can press the Create Module button to generate the new module.
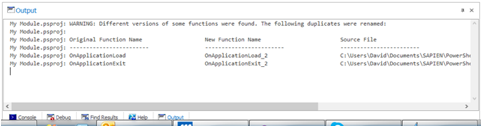
Note on duplicate functions: In some instances you may have a duplicate function that is defined in multiple files, PowerShell Studio will compare these
functions and if they are identical, it will only insert the function once. If the functions are different, PowerShell Studio will automatically rename the
duplicate. A warning will be displayed in the Output window when this occurs:
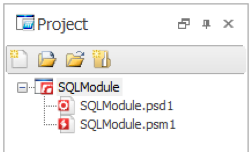
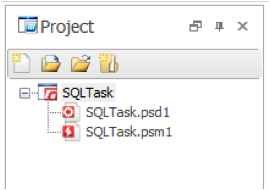
The new module project will contain three files:
One of the most valuable uses for projects is managing development workflow. When using projects, you can develop entirely on your local machine, ensuring that your work-in-progress doesn't affect production users. When you're ready, the project can be deployed - by PowerShell Studio, as a single unit - to a production server where the project goes "live".
This contrasts with the common technique of editing files directly in production, such as on a web server. With this technique, changes are seen immediately by users, but so are mistakes. Editing "live" files directly is a very poor development practice. PowerShell Studio projects means that you don't ever need to edit live. Instead, it allows you to work on your local machine which serves as a development "sandbox" or test bed. You then deploy the completed, tested, and debugged files, into production.
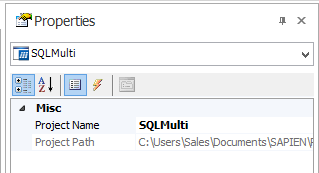
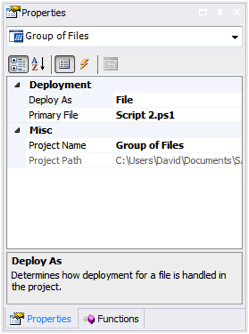
Project properties are shown in the Property pane. You must first click on the project name, in the Project pane, for the results to show.
 ----->
There are two project level properties:
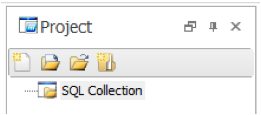
If you have various ps1 scripts that dot source each other, you can now create a Collection Project to enjoy the following benefits:
When you first create a Collection Project, you will notice that there is no Startup.pss file. There is no entry point in the project since these are
individual files. All files within the project are considered 'Content'.
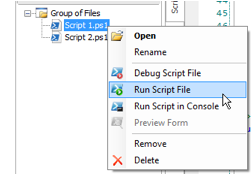
You can run each file individually using the Project's context menu or using the usual Run Ribbon buttons (v4. 1.64 and up).
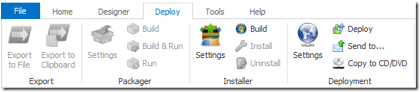
Deployment is handled on a project basis. You can deploy all the project files to a single destination or create an install that includes all the project files.
The project's packaging is restricted because there are all individual files.
These options accommodate your deployment needs by controlling the behavior of the Packager, MSI, and Deployment as a whole or as individual files.
|
File |
Tells the project to handle each file individually when it comes to deployment. Each project file will maintain its own independent
settings.
|
|
Project |
Tells the project to handle the deployment of all of the files as a whole. You must define a primary file for the purposes of the Packager
and MSI builder.
|
Previously the deployment options were unavailable in the Collection Project unless you opened the files independent of the project.
These new deployment settings now allow the Collection Project to fit your deployment needs.
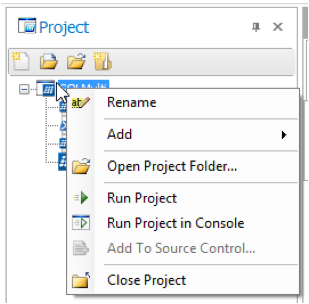
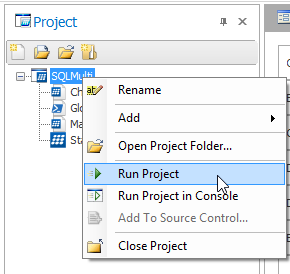
Project files are managed via the Project pane. Right clicking on the project name will display the project menu. Here you can run, rename, close, add existing/new files, add new folders, and navigate to the project folder in Windows Explorer.
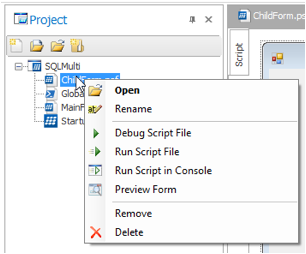
Right clicking on a project file displays the file menu where you can open, rename, remove, delete, preview, debug, or run a file.
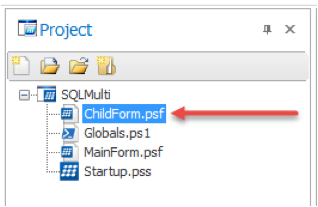
File properties are shown in the Property pane. You must first click on the file name, in the Project pane, for the results to show.
 ----->
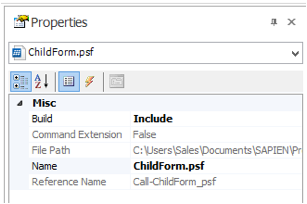
There are five project file properties:
The reference name property described above is used to create a Call Function that allows simple invocation of a project file. If you add a script file called Utilities.ps1 to a project and you examine its properties, you will see that PowerShell Studio has generated a Reference Name called Call-Utilities_ps1. You can use this name elsewhere in your project scripts to run the code in Utilities.ps1.
PowerShell Studio uses this method to load the first form in a project from the project startup script (Startup.pss).
Projects can be managed as a unit through PowerShell Studio's source control integration. Source control integration must be configured first.
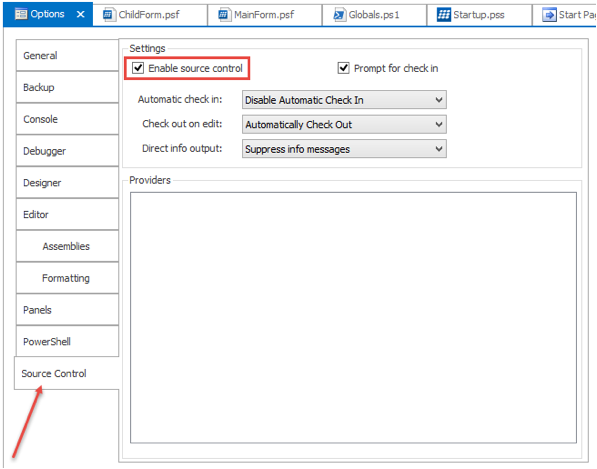
To work with source control, right-click the project name in the Project Pane.
Individual files within the project can be checked in or out independently as well, although checking files in together - as a project - helps to simplify file and source control management.
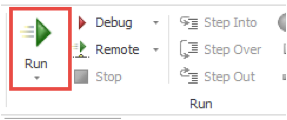
There are two ways to run a project.
Exporting a project converts the project into a single script file that contains all of your code, plus the auto-generated code produced by PowerShell Studio.
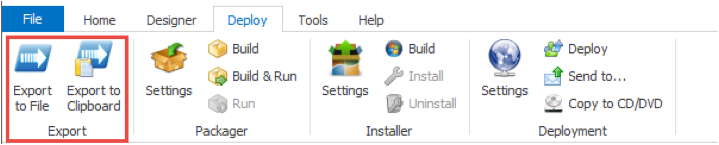
To export a project, navigate to Deploy on the ribbon bar and then to the Export menu, to choose where you would like to export your project - either to a file or to the clipboard.
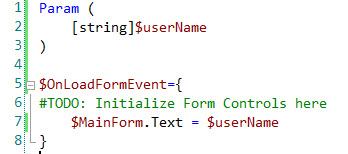
Adding a Param block to the Startup.pss file allows you to provide startup parameters to your project when it runs. The runtime behavior depends on how the project is started. If you start your project from the console, then you provide parameter values on the command line, separated by spaces. If you are starting a Forms project, then PowerShell Studio will prompt you for the parameter values. If you package a project into an EXE file, then you must always provide startup parameters on the command line. You can also add Param blocks to forms and scripts in your project, as long as their Command Extension property is not set to true. Simply add a Param block to the beginning of the file and provide parameter values when you invoke the file.
For example, if we wanted to pass the current user's name to each form in our script, we could add a Param block to each form:
Then supply an appropriate value when we call the form:

In the past, extra functionality for PowerShell was created by developers using Visual Studio, and delivered in the form of PowerShell Snap-ins. With the release of PowerShell v2.0, Microsoft introduced the capability to extend PowerShell via the use of Modules, which can now be created from PowerShell script code rather than C# or Visual Basic .Net.
A script module is a library of PowerShell functions delivered together for some common purpose. Microsoft Windows ships with a number of modules to address common requirements, for example: BitsTransfer, TroubleshootingPack, WebAdministration, etc. Script modules are a great way to create packaged, reusable utilities for your company, that can be installed anywhere they are required.
The Module Project template includes everything that you need to get started:
The psm1 file is where you define the functions that implement your module. A psm1 file is just a regular PowerShell script with a different extension. You add functions to the file in the same way that you would create a regular ps1 script file.
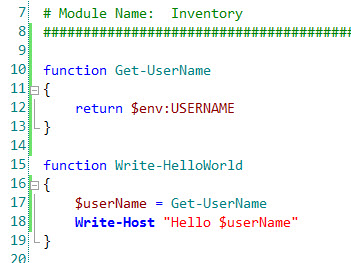
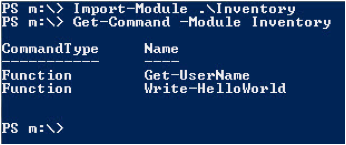
This module file contains two functions. When the module is loaded into PowerShell, both of these become available in the shell.
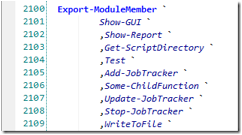
Sometimes you will add functions to a module solely to help other functions do their work. These 'helper' functions do not need to be visible to module users, and PowerShell provides a mechanism to accomplish this. In the example above, we do not need to share the function Get-UserName with our users. By calling Export-ModuleMember in our module, we can tell PowerShell what to reveal.
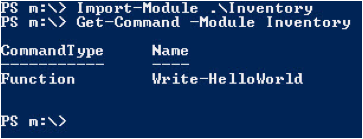
Here we have added the Export-ModuleMember call and specified that only Write-HelloWorld should be visible. Now when the module is imported, users only see one function:
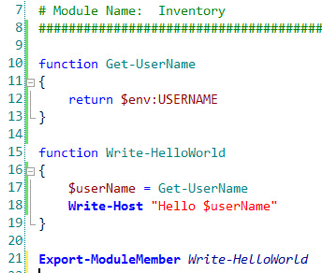
Export-ModuleMember can also be used to make aliases, cmdlets and variables visible to module users.
The psd1 file is a module manifest file. It is used to provide extra metadata about a module including such things as:
Using a module manifest file allows you to cleanly separate your code from instructions and metadata about your code. It is the preferred way of working.
In order to simplify working with forms in a project, PowerShell Studio will create special variables that allow you to refer directly to a property of controls on a child form. These variables become available when you add a form call function into your code.
To demonstrate this, start by creating a new form project and add a button to the main form so that it looks like the screenshot below:

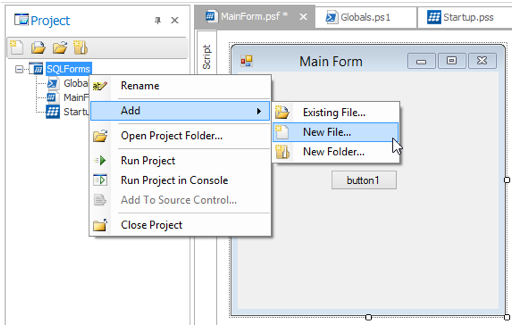
Now right click on the project node, and add a new file.
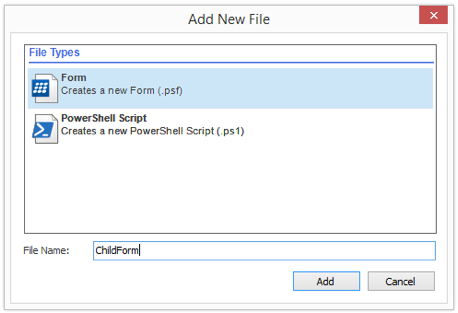
Choose Form and give it a name. Click Add.
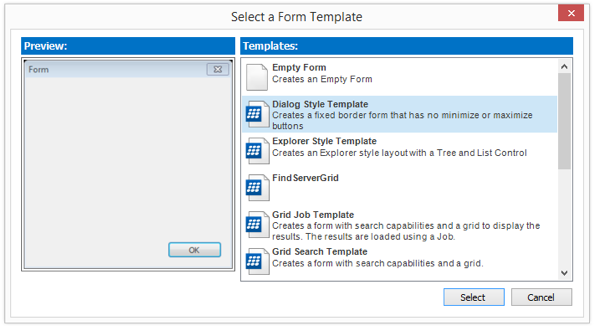
Next, choose Dialog Style Template.
Add a textbox, called textbox1, to the new form so that it looks like the screenshot below:

Now return to the code for the main form and add the call helper function into the button click handler, so that it looks like the screenshot below:
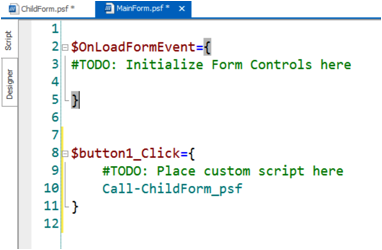
At this point, PowerShell Studio will make the text property of the textbox in the child form, directly accessible in the main form, through a variable called $child_form_textbox1. You can use it in the code in the main form. An example of this is shown on the screenshot below:
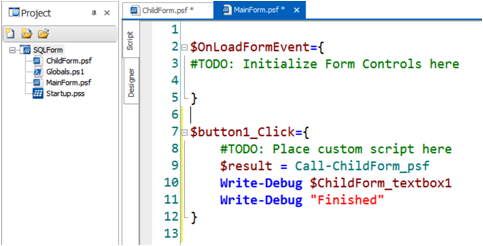
These form return variables make it simple to gather the results from a data entry forms.
The controls that support this mechanism are summarized below, along with the type of data that they return.
|
Control |
Return Type Property and data type |
|---|---|
|
Textbox |
Text (string) |
|
Checkbox |
Checked (Boolean) |
|
CheckedListBox |
Selected item (string) |
|
ComboBox |
Selected item (string) |
|
DateTimePicker |
Selected date (DateTime) |
|
ListBox |
Collection of selected items(string) |
|
ListView |
Collection of selected items(string) |
|
MonthCalendar |
Selected date (DateTime) |
|
RadioButton |
Checked (Boolean) |
|
NumericUpDown |
Selected value (Decimal) |
|
RichTextBox |
Text (string) |
|
Treeview |
Text (string) |